

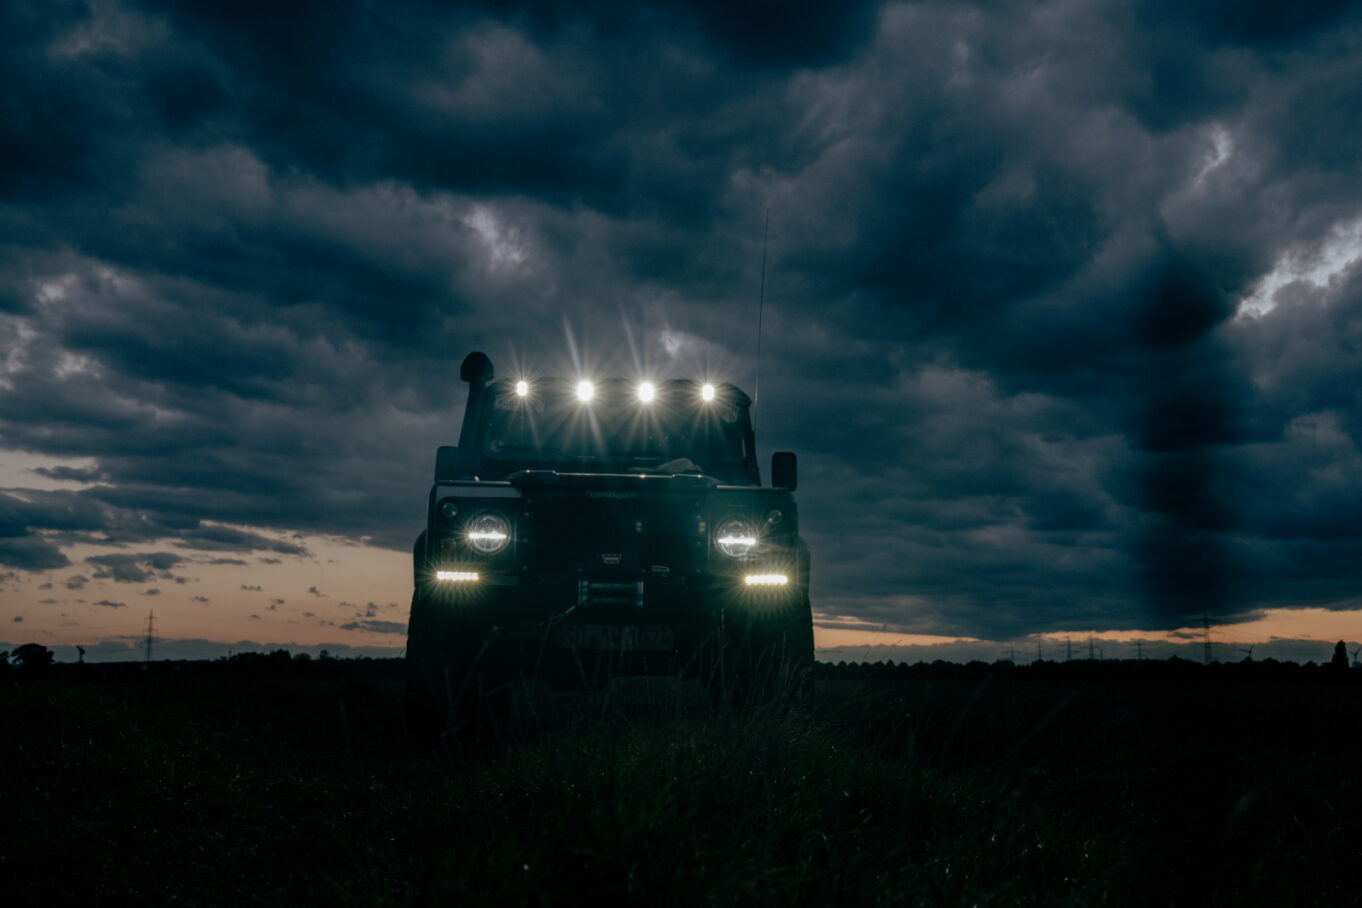

Advertising – At Scheinwerfer LUXX we get a lot of questions about high beam. In those conversations we also notice plenty of assumptions and gaps in knowledge. So in this article we want to tell you everything you need to know about high beam on your vehicle.
Extra light on the vehicle is needed for various reasons. Maybe you have to tackle poor tracks or difficult terrain, or you’re busy working and moving things around the vehicle. For every purpose there’s a matching product on the market. Very often the focus then falls on extra high-beam or work lights, and the two frequently get mixed up. We help you sort out the correct and legal categories and give tips on which light suits which job.
The legal framework
High beam is one of the lighting functions that have to be present on the vehicle. The law requires a minimum of two headlights and sets the beam direction to the front. The high-beam headlights have to be fitted and switched in pairs. Up to three pairs are allowed. That number, though, calls for a special wiring setup. In that case two pairs have to be covered and the third pair may only work as a flash-to-pass. Put another way, only two pairs may ever be lit at the same time.
It’s simpler, then, to retrofit just one pair. Auxiliary spotlights may be switched on one pair after another, but they all have to go off at the same time. So the most sensible thing is to wire the extra lights together with the vehicle’s normal high beam. More on that later.
Another limit, regardless of the number of lamps, is the reference number. All spotlights have it printed on the glass, for example “12.5”, “17.5” or “50”. Added together, all high-beam lights on the vehicle must not exceed the value “100”. This corresponds to 430,000 cd (candela) and is the maximum permitted luminous intensity.
There are no further rules on mounting height and the like. Only from a height of 1.4 metres does the spotlight have to be set according to the table in Annex 3 of the inspection directive. All of this applies to cars as well as trucks.
Where high beam is best mounted
High beam is meant to make safe driving in deep darkness possible. To do that, the road ahead should be lit up far and free of glare. Most of the light should therefore land there, with some of it needed to light the surroundings.
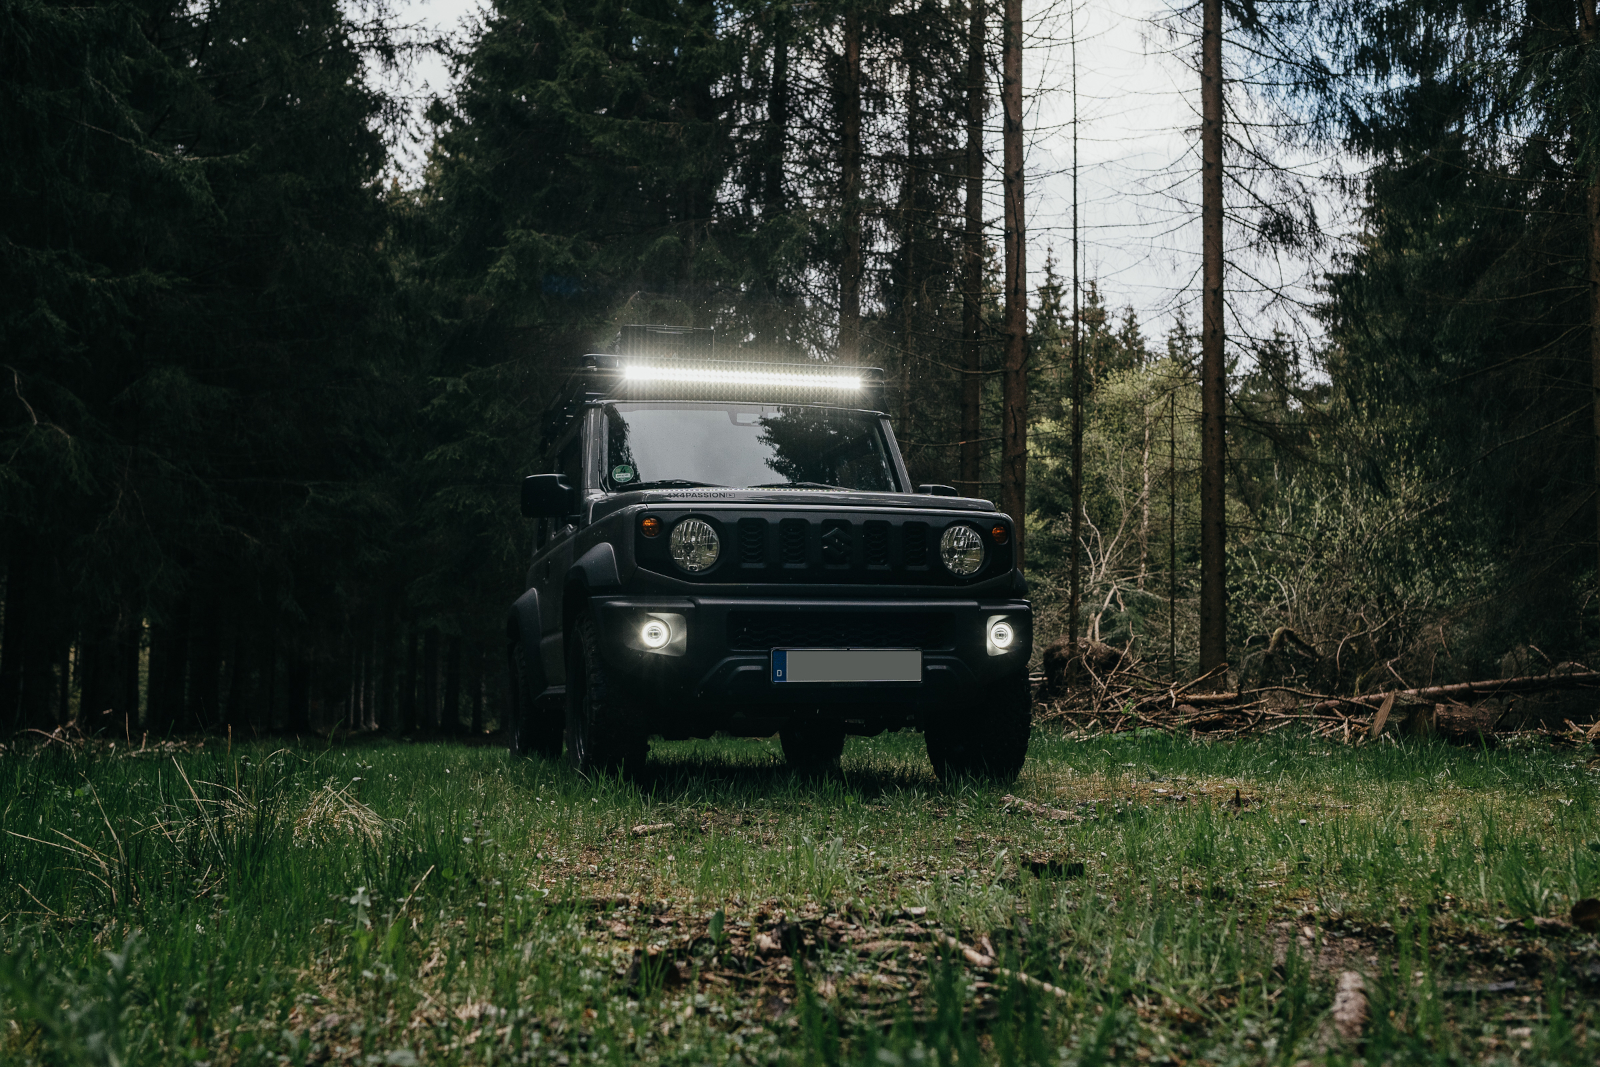
Sure, going purely by looks, the position above the windscreen is one of the most popular. Depending on the vehicle and the mounting options, it really is the only possible position too. Even so, it’s worth a second thought if you want to squeeze out the maximum gain in light.
The problem: reflections
So what can be a drawback about the position above the windscreen frame, and where are its advantages? If you’ve mounted lights above the windscreen, and it doesn’t matter whether they’re spot or work lights, reflections can appear on the glass. The more the windscreen is angled, the sooner it happens. Every bit of dirt, be it dust, insects, grime or any kind of smeary film, turns into glowing dots and streaks. Your night and distance vision then drops considerably. The eye focuses on the bright dots on the glass instead of on the track some distance ahead of the vehicle. So you can’t make full use of the extra spotlights, and this state of affairs is very tiring.
If your vehicle has a bonnet, as all car-based off-roaders and some trucks do, further glare effects come on top, because the lights also brightly illuminate the bonnet. It makes no difference whether it’s painted white or black, glossy or matt.
The ideal sits below your line of sight
For the purpose of lighting the distance while driving, the best position is below the windscreen, or better put, below your own line of sight. On the bumper, for example, or below the edge of the bonnet. If you spend most of your time in travel mode, especially on poor roads and tracks, you benefit from a far-lit route ahead of you while you sit in the dark and aren’t dazzled.
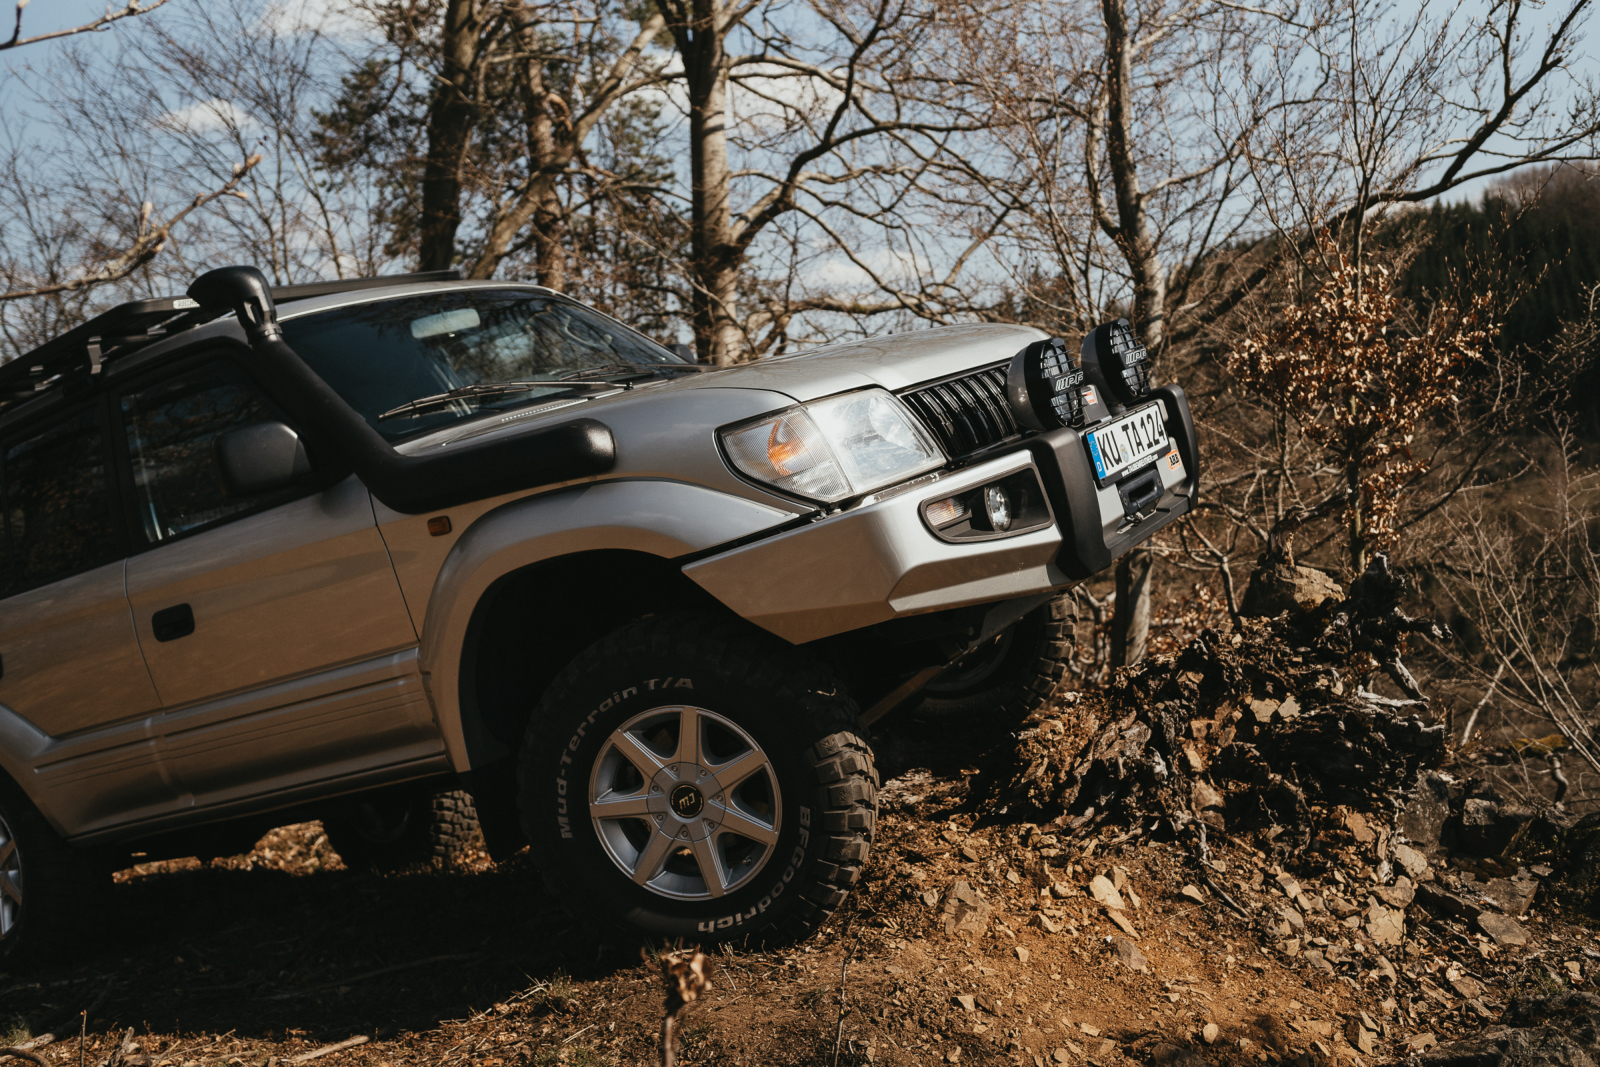
Mounting at roughly the height of the main headlights also has the advantage that dips or holes show up as shadows, since your high beam shines over them. That makes them easier to spot, and you can adjust your speed in good time. The other way round, larger bumps or small rises are recognised better, because everything behind them falls into darkness, so your high beam suddenly appears to shorten.
If the extra high beam is still to find its place above the windscreen frame, then at least try to set the lights back a little from the top edge towards the B-pillar, to shade the windscreen and bonnet.

How are headlights compared most objectively?
Everyone knows the practical tests where lights are mounted on a vehicle and shone out into the landscape. Hella even offers customers a surprisingly realistic comparison display on their website: Eliver. But that can only be one source of information about lights, since these tests involve a lot of subjective impressions and also depend on the recording technology and the quality of the photos.
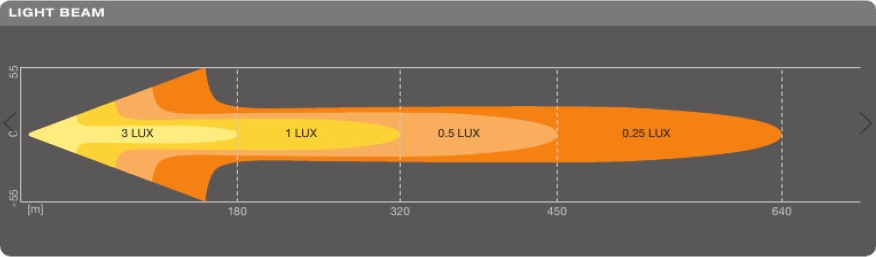
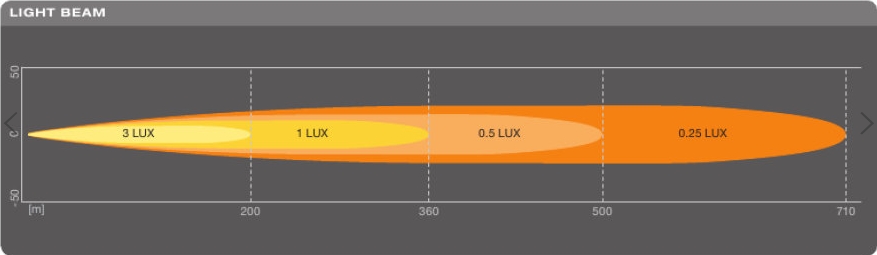
Objectively, lights can only be compared with a standardised measuring method, the result of which is captured in the ISO lux diagram. In this diagram the spatial distribution of the light over an area is shown by its intensity (unit: lux). It’s very easy to understand. The X-axis shows the distance, the Y-axis the width of the illumination. How strong it is, is shown by the differently coloured areas with the matching lux value for each area. That way you can see very quickly how bright, far and wide a light shines.
For comparison, the ISO lux diagrams of the same spotlight light bar (Osram FX250), as a combo light with side illumination and as a spot light that only does distance illumination.
Where work lights make more sense
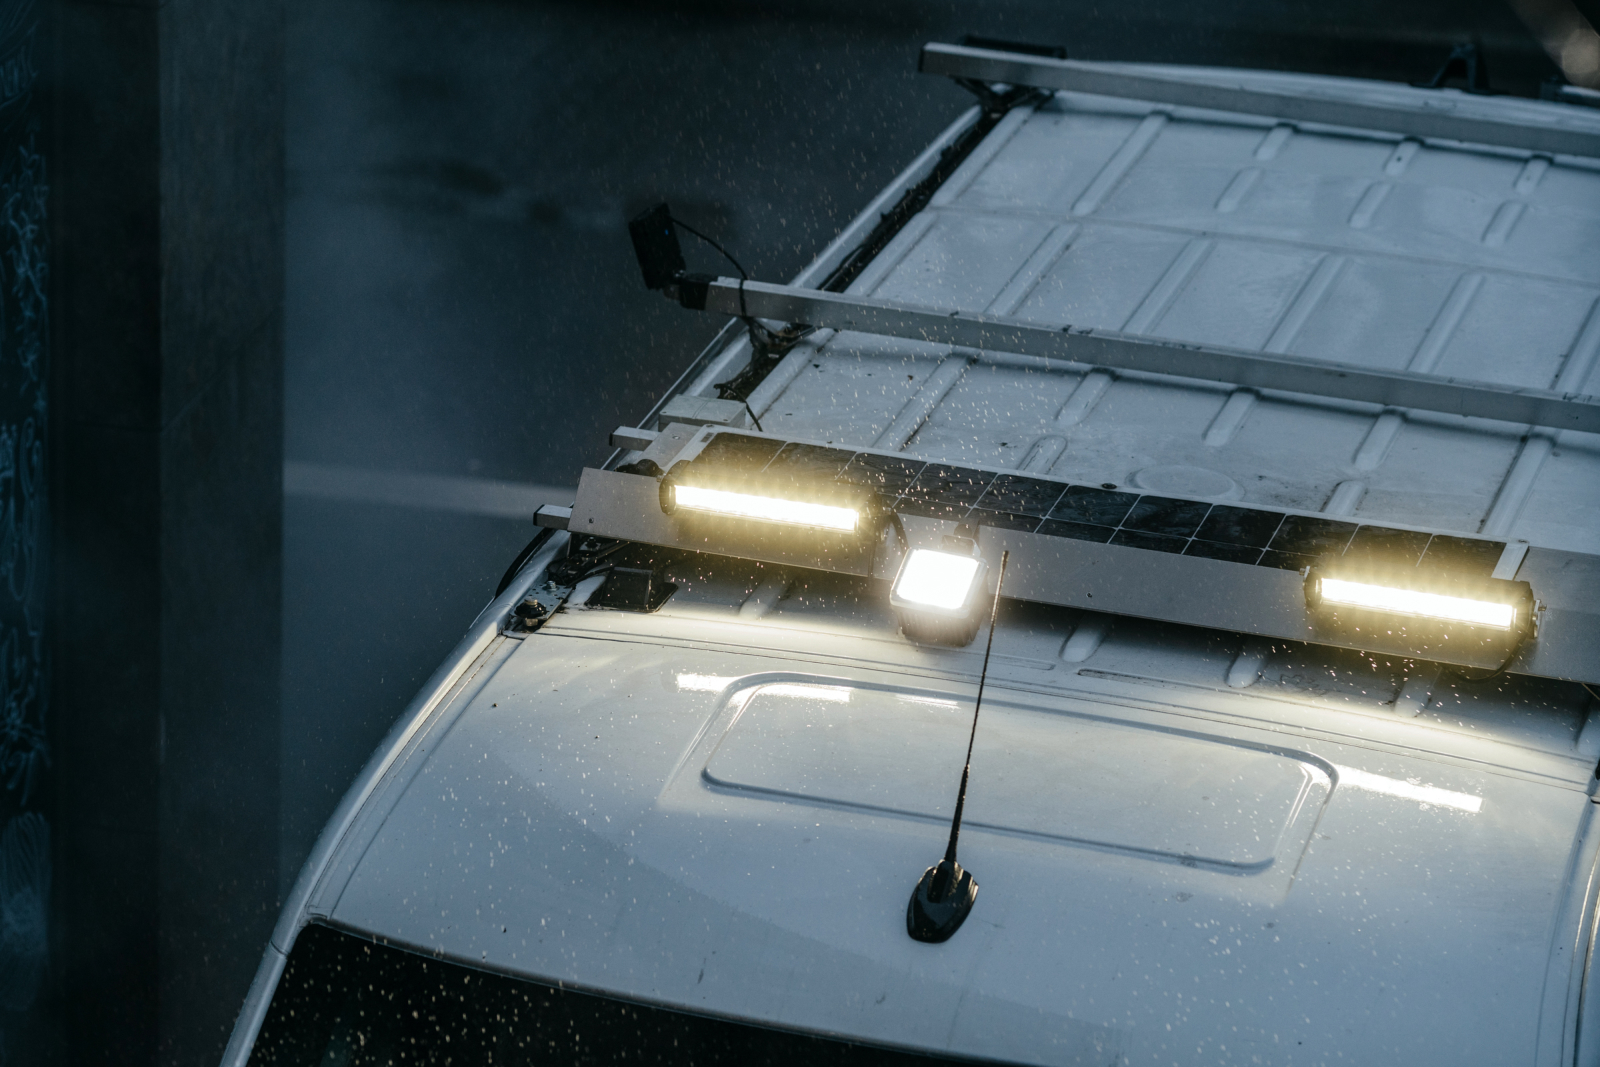
If you’re often moving slowly in difficult terrain, or your vehicle is a working tool, the advantages of the high position can win out. When the way is lit from above, it’s easier to manoeuvre in difficult terrain. On top of that, good side illumination helps you move about safely, while driving but also on foot after getting out.
But that’s more the domain of a work light, which is a bit of a nudge in that direction. Work lights shine less into the distance, since they light the near surroundings more broadly instead. It might be worth considering mounting work lights above the windscreen frame rather than spotlights. That also leaves room and capacity (number of pairs and reference number) for high beam in a lower position.
Work lights can be mounted in any position and in any number, including facing forward, as long as no other rules and regulations on vehicle fittings are broken. In return, they must not be able to switch on together with the vehicle lights. They have to be switched separately. But that has advantages for work and off-road use. When you’re working with the winch, you can switch off the dipped beam so you’re not constantly looking into the glaring light and dazzled again for two minutes. At the same time your work area is brightly lit from above. Speaking of bright, work lights have no restrictions in that respect either, unlike the reference number that applies to high beam.

Our recommended setup
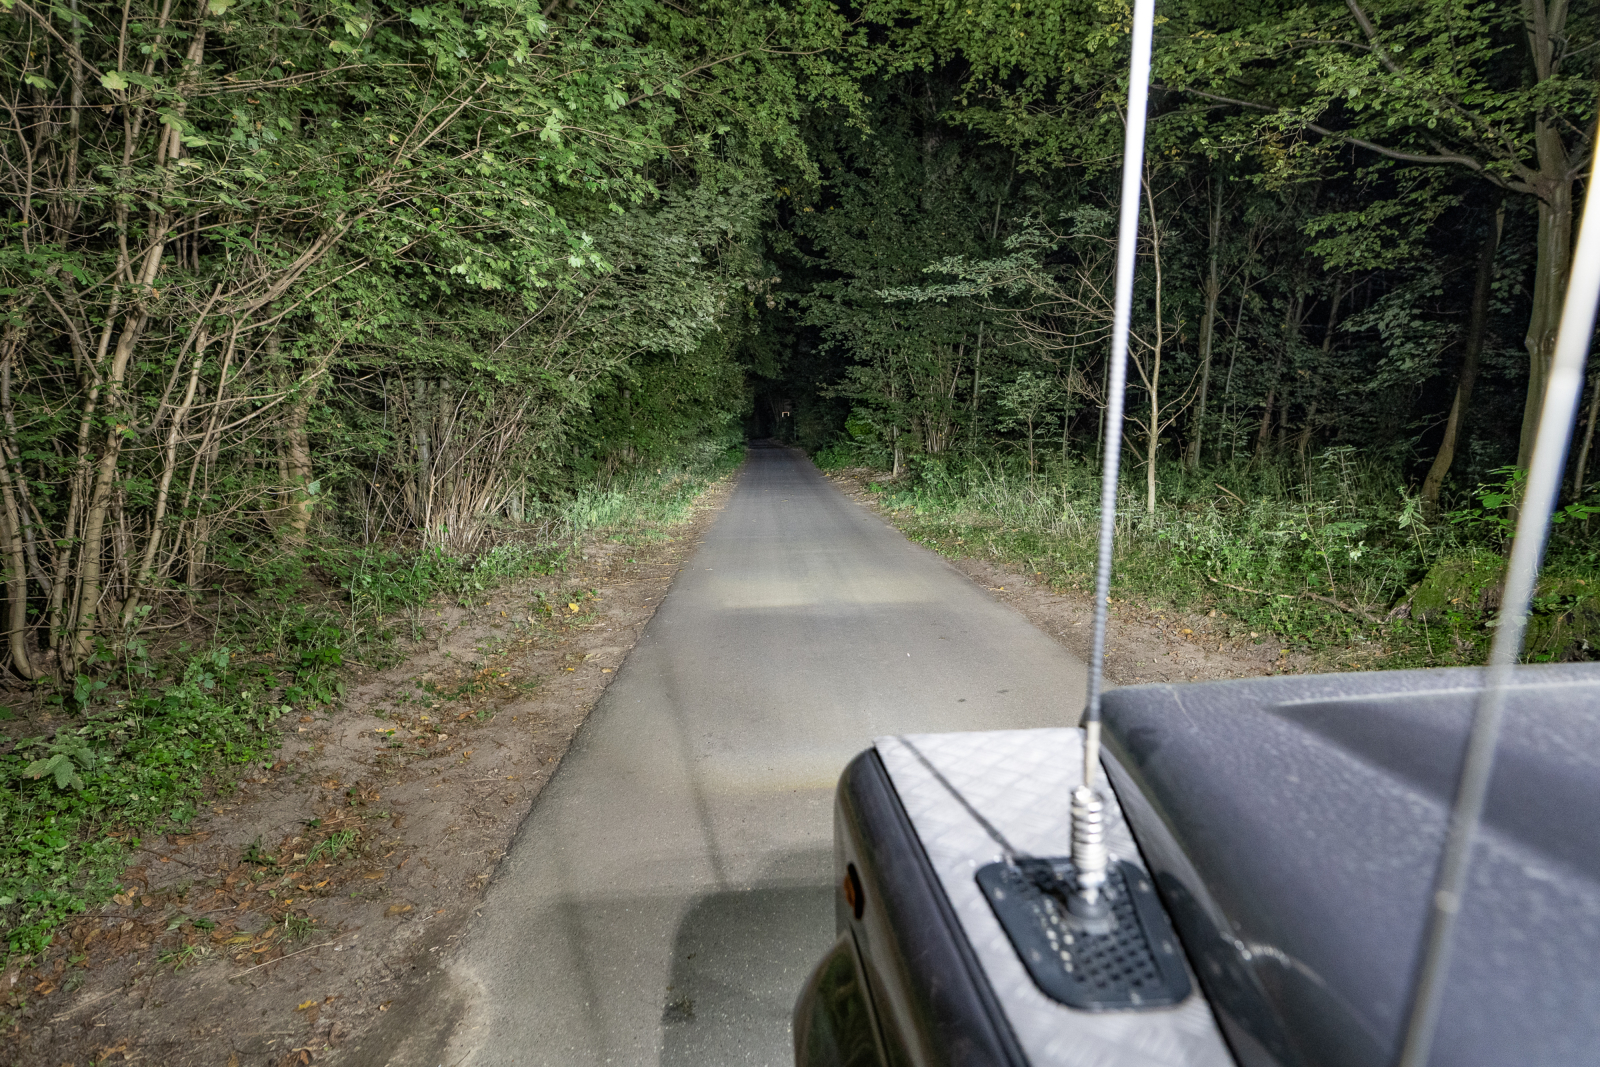
Our recommendation is therefore a good work light that lights the area in front of the vehicle from above and can be switched on when needed, plus high beam without glare below your own line of sight, so that on a brisk track drive you sit in the dark and aren’t dazzled. That way you maximise your vision on night drives. When things are slow or you’re stopped, you have enough work light from above so everyone can move safely around the vehicle and the terrain around it is well lit.
Telling high beam and work light apart
Very often you find lights on vehicles in numbers and positions where they aren’t permitted. Then it’s pure luck or chance if this setup isn’t flagged at the roadworthiness test. This applies especially to the distinction between work and spotlights. Anyone who wants to do it properly, to avoid a nasty surprise, should keep the following in mind.
Every vehicle lamp with a marking of its lighting function also has to be fitted, wired and used exactly that way. So if an extra light carries the marking “R” or “HR” with the matching reference number, then it’s a high beam (you’ll find more markings here: Scheinwerfer LUXX FAQ). As such, all the rules defined in UN-ECE R48 apply to this light:
- Mounted in pairs, max. three pairs
- Facing forward
- From a height of 1.4 metres, high beam has to be set according to the specifications
- White light
- The maximum value of all reference numbers of all spotlights must not exceed 100 (= 430,000 candela)
- Switching on in pairs possible, switching off at the same time required
Work lights must not carry a marking
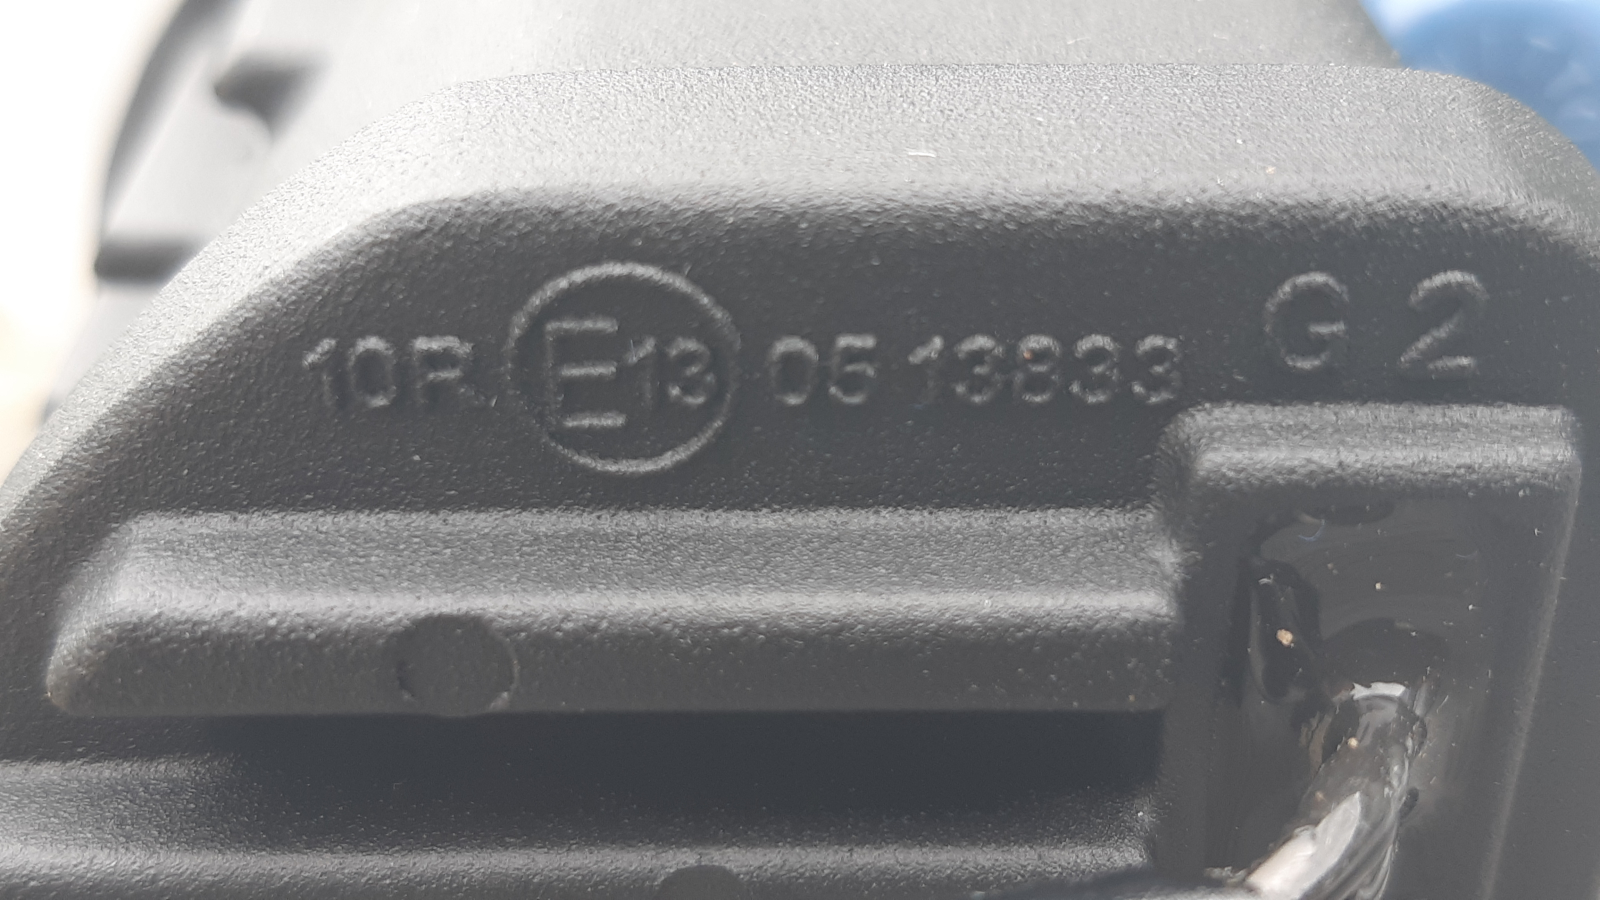
Work lights, on the other hand, must not have any lighting-function marking. The only E marking they must have, like all other vehicle lamps, is for UN-ECE R10, shown with the E mark and the code “10R”. That’s the proof that this lamp is EMC-safe and neither disturbs others nor is disturbed itself. That’s not trivial, especially on modern vehicles with electronic driver-assistance and safety systems. This R10 also includes the “CISPR 25” test, which guarantees interference-free radio operation. If an LED lamp that carries a proper E marking disturbs your reception, have a look at the radio to see whether it also carries a “10R” marking.
You can use a forward-facing high beam as a work light, but you must not mount it facing other directions on the vehicle. To make things trickier, high beam can often only be switched on permanently if the dipped beam is on as well. Not an ideal setup. With a work light you’re much more flexible there.
Wiring up extra high beam
There are various options for wiring up extra high beam. To meet the legal requirement that it goes off together with the vehicle high beam, coupling it to the vehicle’s high-beam switch is the obvious choice.
With the exception of classic cars and a few more recent contemporaries like the Land Rover Defender up to the Td4 2.2-litre model, the vehicle light isn’t run directly through the switch but via a relay. That takes the load off the switch, which can then be made smaller since no high current flows through it. You should keep it that way too. You integrate a further relay into the circuit of the high-beam switch (control circuit) or of the high beam itself (load circuit). The latter is often easier to reach, since the leads to the spotlights (load circuit) are easier to get at, especially if the vehicle has a very compact, enclosed cockpit.
You can take the power supply for the extra high beam from various places. Directly from the starter battery, the auxiliary battery, or ideally from an existing auxiliary fuse box. However you do it, the circuit has to be fused, and as close to the battery as possible. That’s very important! Otherwise you risk a vehicle fire. Safe operation also includes the right sizing of the cables in terms of cross-section. You’ll find more on that here: cable cross-section. For the cable you should use approved automotive cable of type FLR or FLRY.
How do you work out the current?
To determine the cable cross-section you need, depending on the calculator, the power in watts or the current in amperes. The lamp’s data usually only gives the power. With that you can easily work out the current yourself:
Current (A) = power (W) / voltage (V)
If you have, for example, an Osram Lightbar VX1000-CB-SM at 108 watts, that gives a current of 9 amperes: 108 W / 12 V = 9 A.
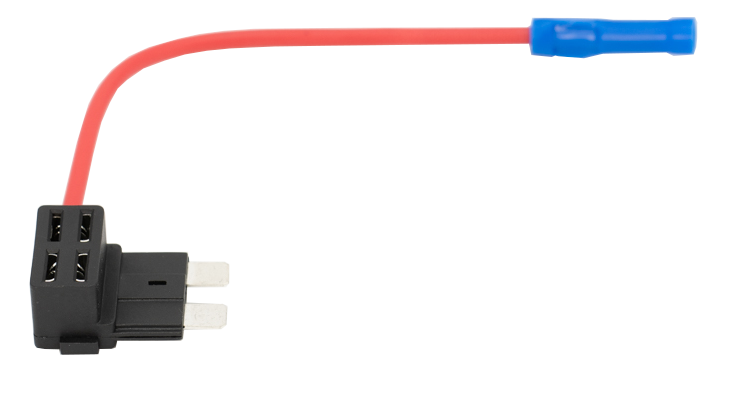
If you don’t have an auxiliary fuse box, you can also use a free position in the normal fuse box that has a power supply to it. Alternatively, with a special fuse tap you can use an already-occupied slot without affecting that slot’s actual function. It’s best to use uncritical functions for this, the rear-window heater or the blower, for example. Here the tap goes into the fuse box instead of the fuse. The removed fuse goes into the tap, which restores the original function, and the fuse for the high beam goes into the second fuse slot.
If you go straight from the battery, then please use properly crimped cable lugs that can be bolted to the battery terminal. Right behind it you can fit an in-line cable fuse, and then that point is sorted too. A clever solution is also a relay with an integrated fuse. If you can mount that close to the battery, you’ve fused the load circuit of your auxiliary lights at the same time.
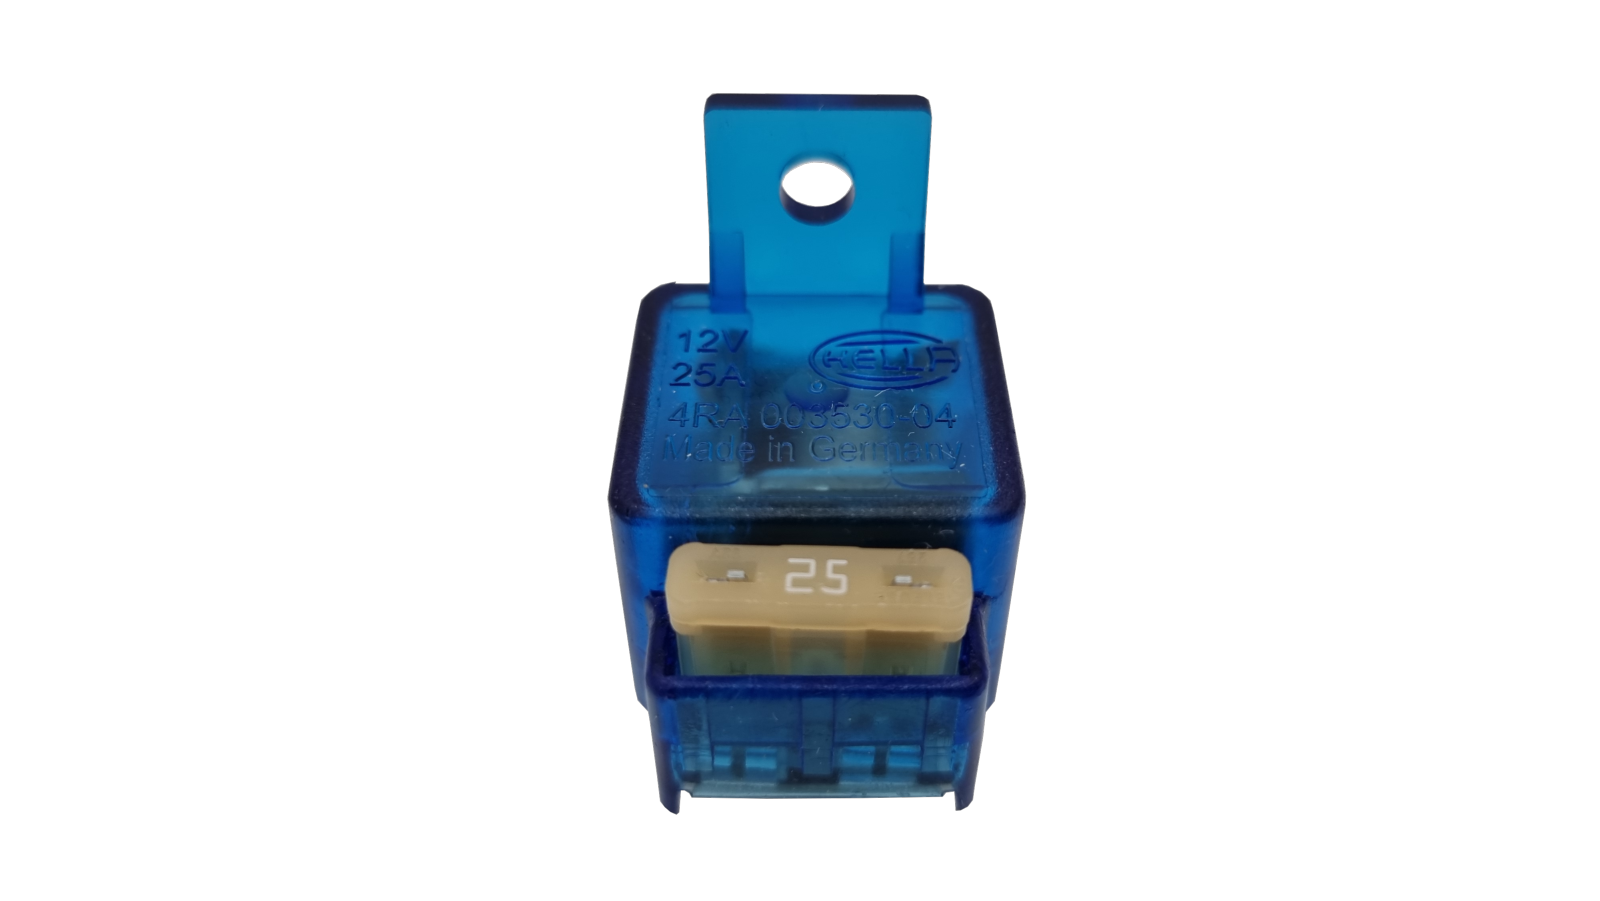
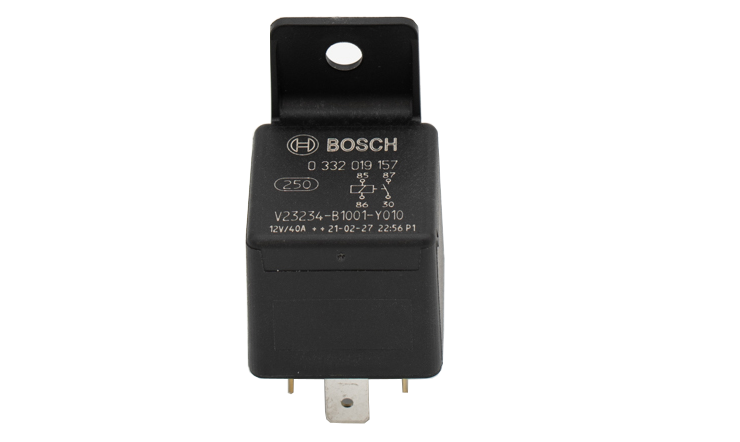
With the power-supply cable you go to the relay pole usually labelled “30”. From pole 87 you run a cable to the lights. To pole 85 you connect the control circuit, that is a cable from the vehicle’s high-beam load circuit or from the high-beam switch. 86 is run to earth. Ideally the relay is plugged into a relay base. For the relay base you use cable lugs with a metal tab that lock into the base.
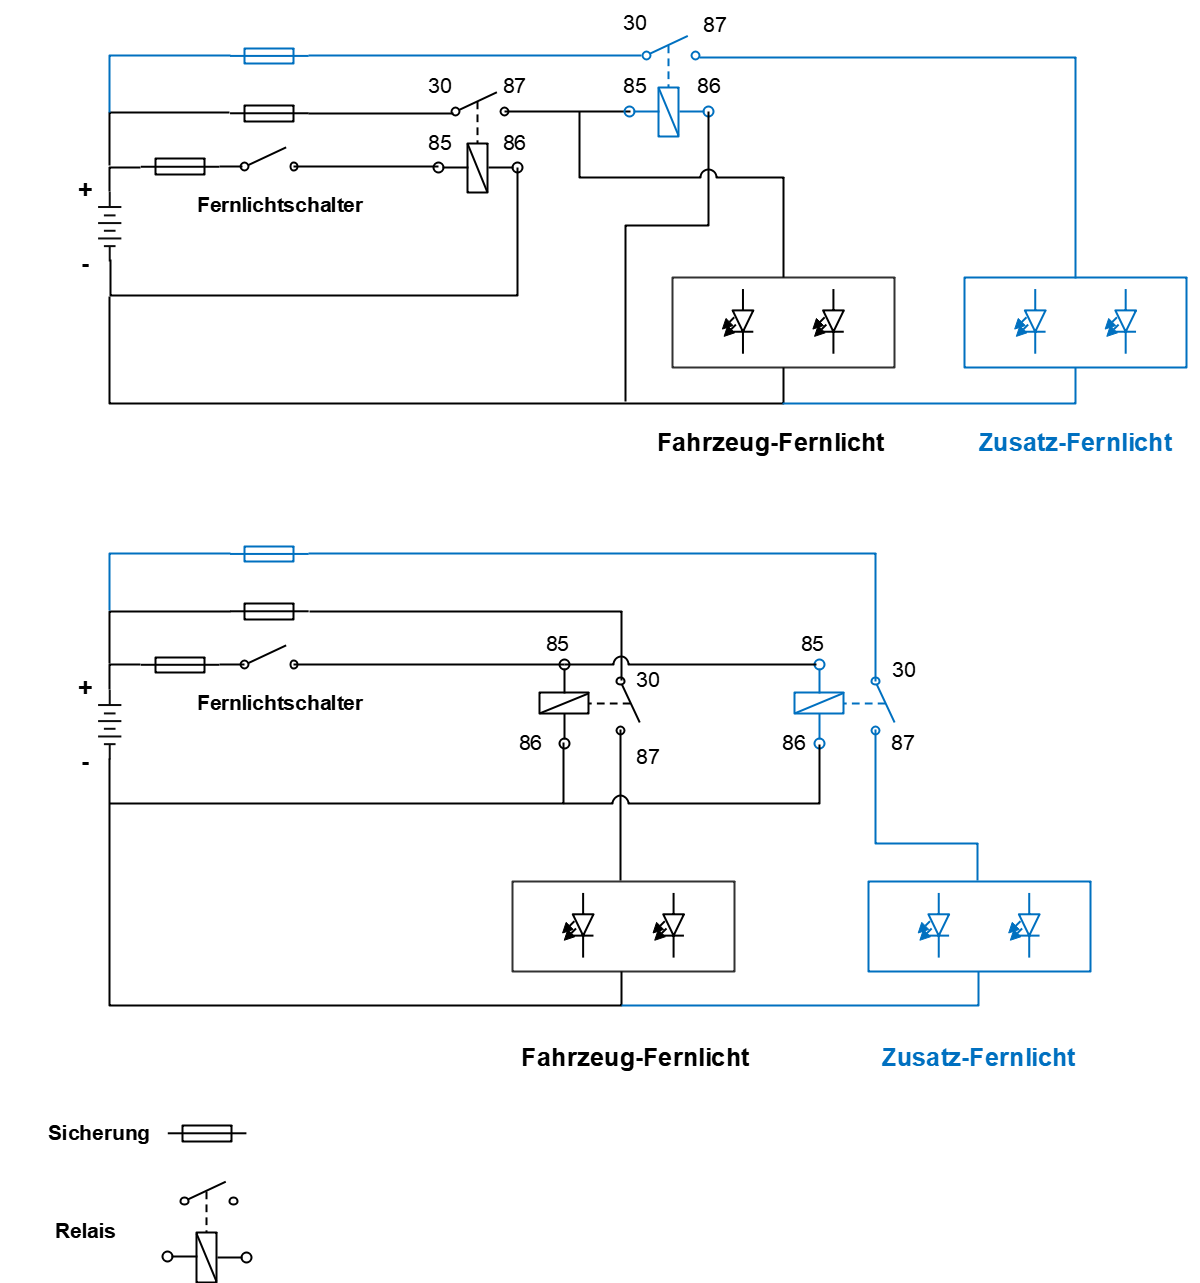
The diagram shows two connection options as simple wiring diagrams. In the top one the auxiliary relay for the high beam is wired into the load circuit of the vehicle high beam, in the bottom one into the control circuit. For the latter, note that the vehicle relay and the auxiliary relay are wired in parallel.
Still looking for a sturdy light switch?
At Scheinwerfer LUXX we have high-quality, waterproof stainless-steel switches with laser-etched pictograms. With these switches you can switch up to 5 A of load on, off or over. The switches light up in green, red or yellow in freely configurable combinations. That way, at 12 V, lamps up to 60 watts or the automotive relays can be switched safely.
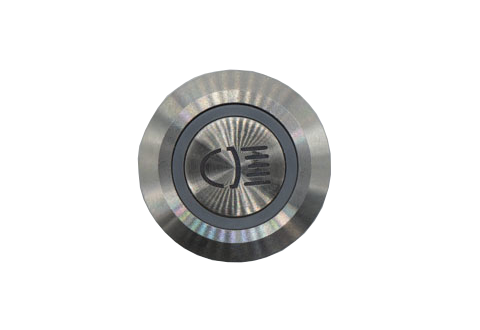
You can see more about this switch and the various pictograms here:
Still have questions?
If you still have questions or need advice, get in touch with Scheinwerfer LUXX. Send us an email with your questions to shop@scheinwerfer-luxx.de or take a look in our FAQs.
On the Scheinwerfer LUXX YouTube channel you’ll also find explanations, product presentations and tips all around LED lighting.