Checking the vehicle before a trip is a given for many of us. We’ve written a fair bit about it already. Whether the vehicle is used all year or only at certain times, regular servicing is essential when it comes to keeping it working, reliable and holding its value. It also lets you spot problems coming in good time.
For some people, servicing is a tiresome, annoying chore. They’d rather hand the car to their trusted mechanic and pick it up again later. Others make a ritual of caring for their pride and joy and fuss meticulously over every corner and every bolt. Wherever you sit on that scale, one thing stands: servicing matters. Because that’s the only way you’ll keep enjoying your vehicle.
Experience shows that care and good servicing pay off
Our authors Björn and AWo have long experience with 4x4s, travel, off-road driving and the tech. Experience has taught them that care pays off. They know the spots that matter and the ones that aren’t always urgent. They also know that even the best servicing doesn’t protect you from every problem, but it cuts the chance of a breakdown a lot.
During servicing it can always happen that you find a bigger problem. But closing your eyes doesn’t help. Better to find the problem at home and fix it, or have it fixed, in an orderly way than to get stranded with it somewhere.
There’s general servicing work that runs pretty much the same on every vehicle, and there’s vehicle-specific servicing. The latter is model-dependent points down to the design, the tech and materials used, and the specific weak spots of the vehicle.

Tip: Every vehicle maker has a service schedule for its models, worked through at the main dealer. If you have access to this schedule, it’s a very good starting point. It tells you what should be checked and replaced, and when.
We introduce the areas where servicing should happen and show you why servicing matters
That helps you with the DIY, or to understand why this or that job matters.
The intervals for the individual jobs vary. There’s work that comes round more often and other work that maybe only needs doing once a year or even less. So we like to split our work into one big service day, where we do all the yearly jobs or even longer-interval ones, and several smaller service days for the things that need doing more often.
There’s also servicing work that’s better left to a specialist workshop. Because you lack the tools, space, skills or time, for example. A classic case is renewing the timing belt. And there are other reasons: maybe the vehicle is still under warranty, or you want a complete service record in the service book. Then only the smaller, in-between jobs are left for you.
Of course servicing isn’t exactly cheap, but the potential damage from a backlog of neglected servicing is usually a lot dearer. So good servicing matters.
The different servicing areas
It makes sense to split the work into separate areas. Depending on the scope and time, you can spread the servicing over several service days that way. For this article we find the split by individual area the most sensible.
- The vehicle in general
- Engine
- Gearbox & drivetrain
- Brakes
- Suspension
- Wheels & tyres
- Steering
- Electrics & lighting
- Kit, recovery gear, etc.
- Extra equipment
Useful tools for servicing
For a service you naturally need a fair bit of kit. That’s not the subject of this article, because we’ve already put plenty together on that. And depending on the vehicle, special tools may be needed. Have a look at our article Useful tools for travel, MATSCH&PISTE guide and the various vehicle-specific recommendations here on Matsch&Piste. For many vehicles there are workshop or repair manuals where you’ll find valuable pointers on the tools and gear for your home workshop. These come not only from the makers for the workshops, but for the hobby spanner too, for example the manuals from Haynes*.
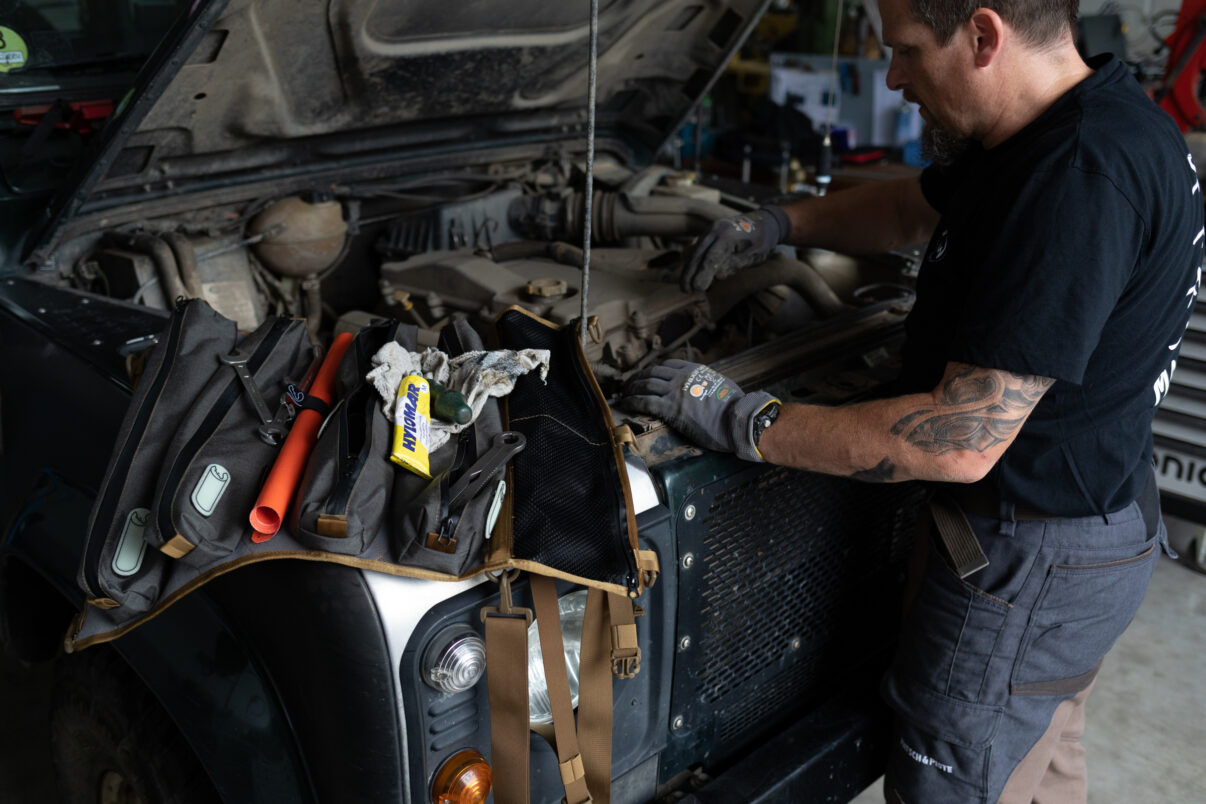
Let’s start with a walk around the vehicle
Before you start servicing, a thorough wash and clean is a good idea. On a clean vehicle you can spot potential damage more easily, and there’s no point in dirt trickling into open filter housings or into your eyes while you work under the vehicle.
At the start of the service, a walk around the vehicle is worth it, a thorough visual check on and under the vehicle. Much like any pre-drive check. While you’re at it, give the add-on parts a good shake and see whether everything’s tight. That way you spot obvious damage right at the start. This visual check is easier if you have a way to lift the vehicle.
Take a look at the bolts and nuts of your add-on parts too. Heavy rust? Then it’s time to swap them. It’s never wrong to keep a set of various bolts and nuts at home. Better to swap them early than to free them later only with trouble or a sheared head. Was thread paste used on the previous assembly? If not, you could use the chance and treat the new bolted joint with copper paste (don’t use where it contacts aluminium) or Molykote 1000*. Both help against corrosion, and the Molykote paste also evens out the friction value, which is especially useful on torqued bolted joints.
Tip: Right at the start of servicing, think about your safety. After all, you’re handling hazardous or health-damaging materials and heavy parts. We have a separate article on safety for the hobby spanner here on Matsch&Piste.
Moving parts need regular care. Looking after rubber seals, latches, door, flap and bonnet hinges, fuel-filler caps and locks, plus other moving parts like the wiper arms, is part of good vehicle care and servicing, and it’s even more important in winter so you don’t end up standing at locked or frozen-shut doors. Does your vehicle have water drains? Then check them for blockages from leaves and dirt, or grease from the last rustproofing job, and clean them. We’ve put together a few special tips for winter travel, by the way, on our winter topic page.
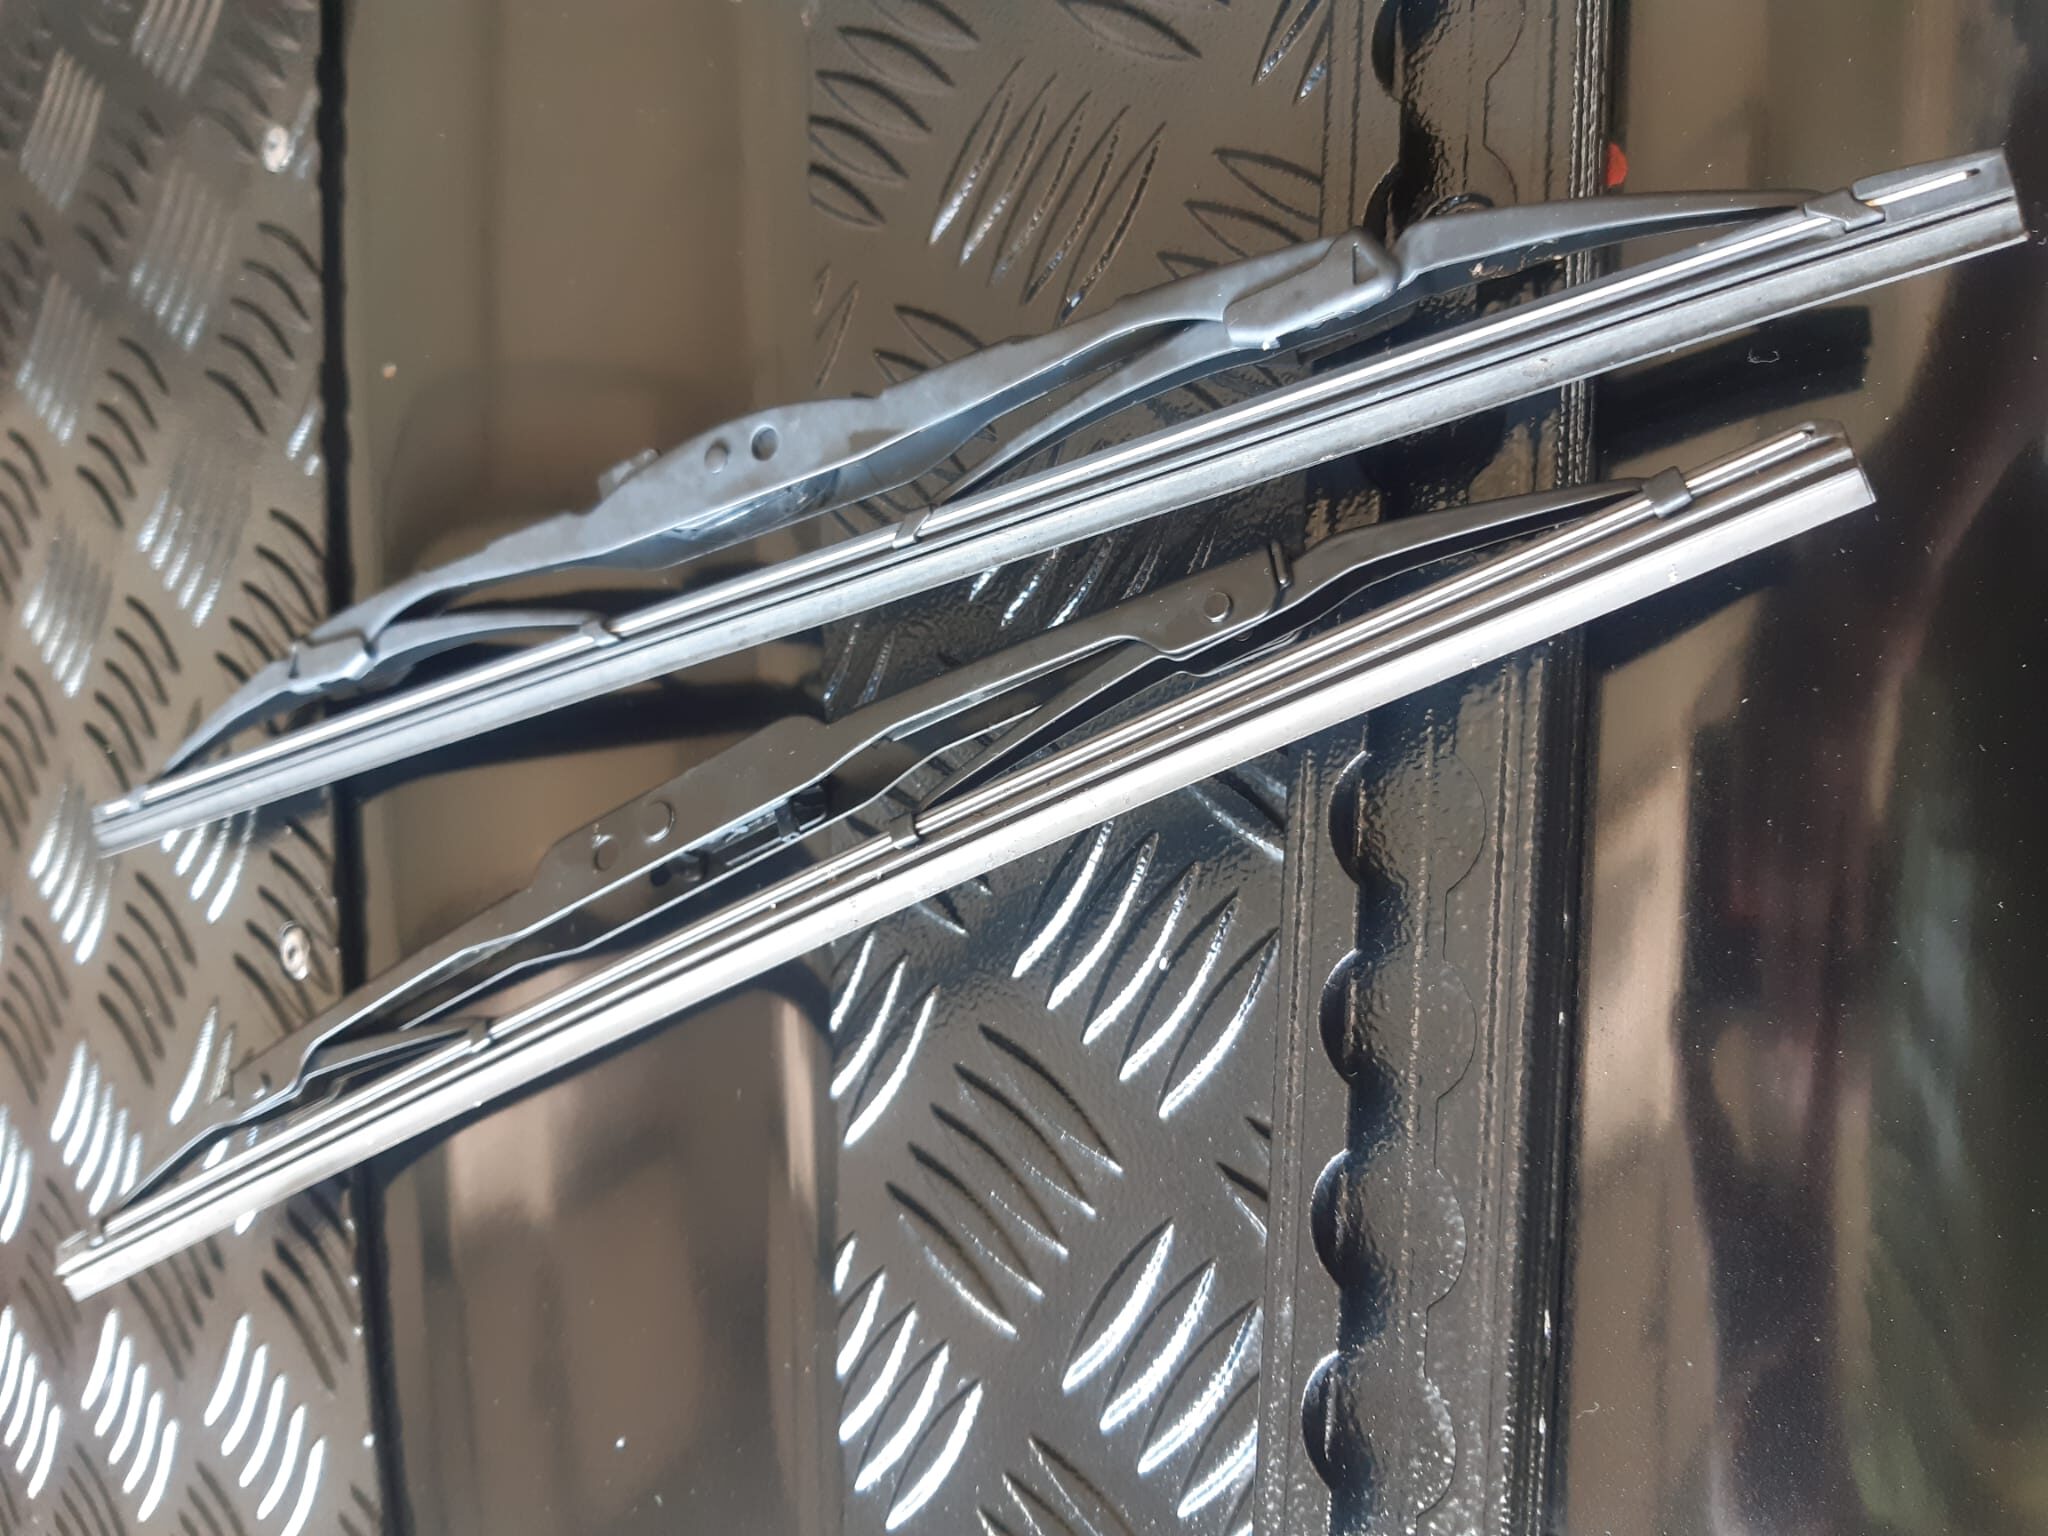
A clear view matters. So while you walk around the vehicle, eyeball the wiper blades. If they’re already damaged or smearing, swap them, because a clear view matters. Depending on the design, the wiper mechanism can take a bit of lubrication too. Don’t forget the screen wash, because in winter especially you usually need plenty of it for a clear view. Check the windscreen for damage too.
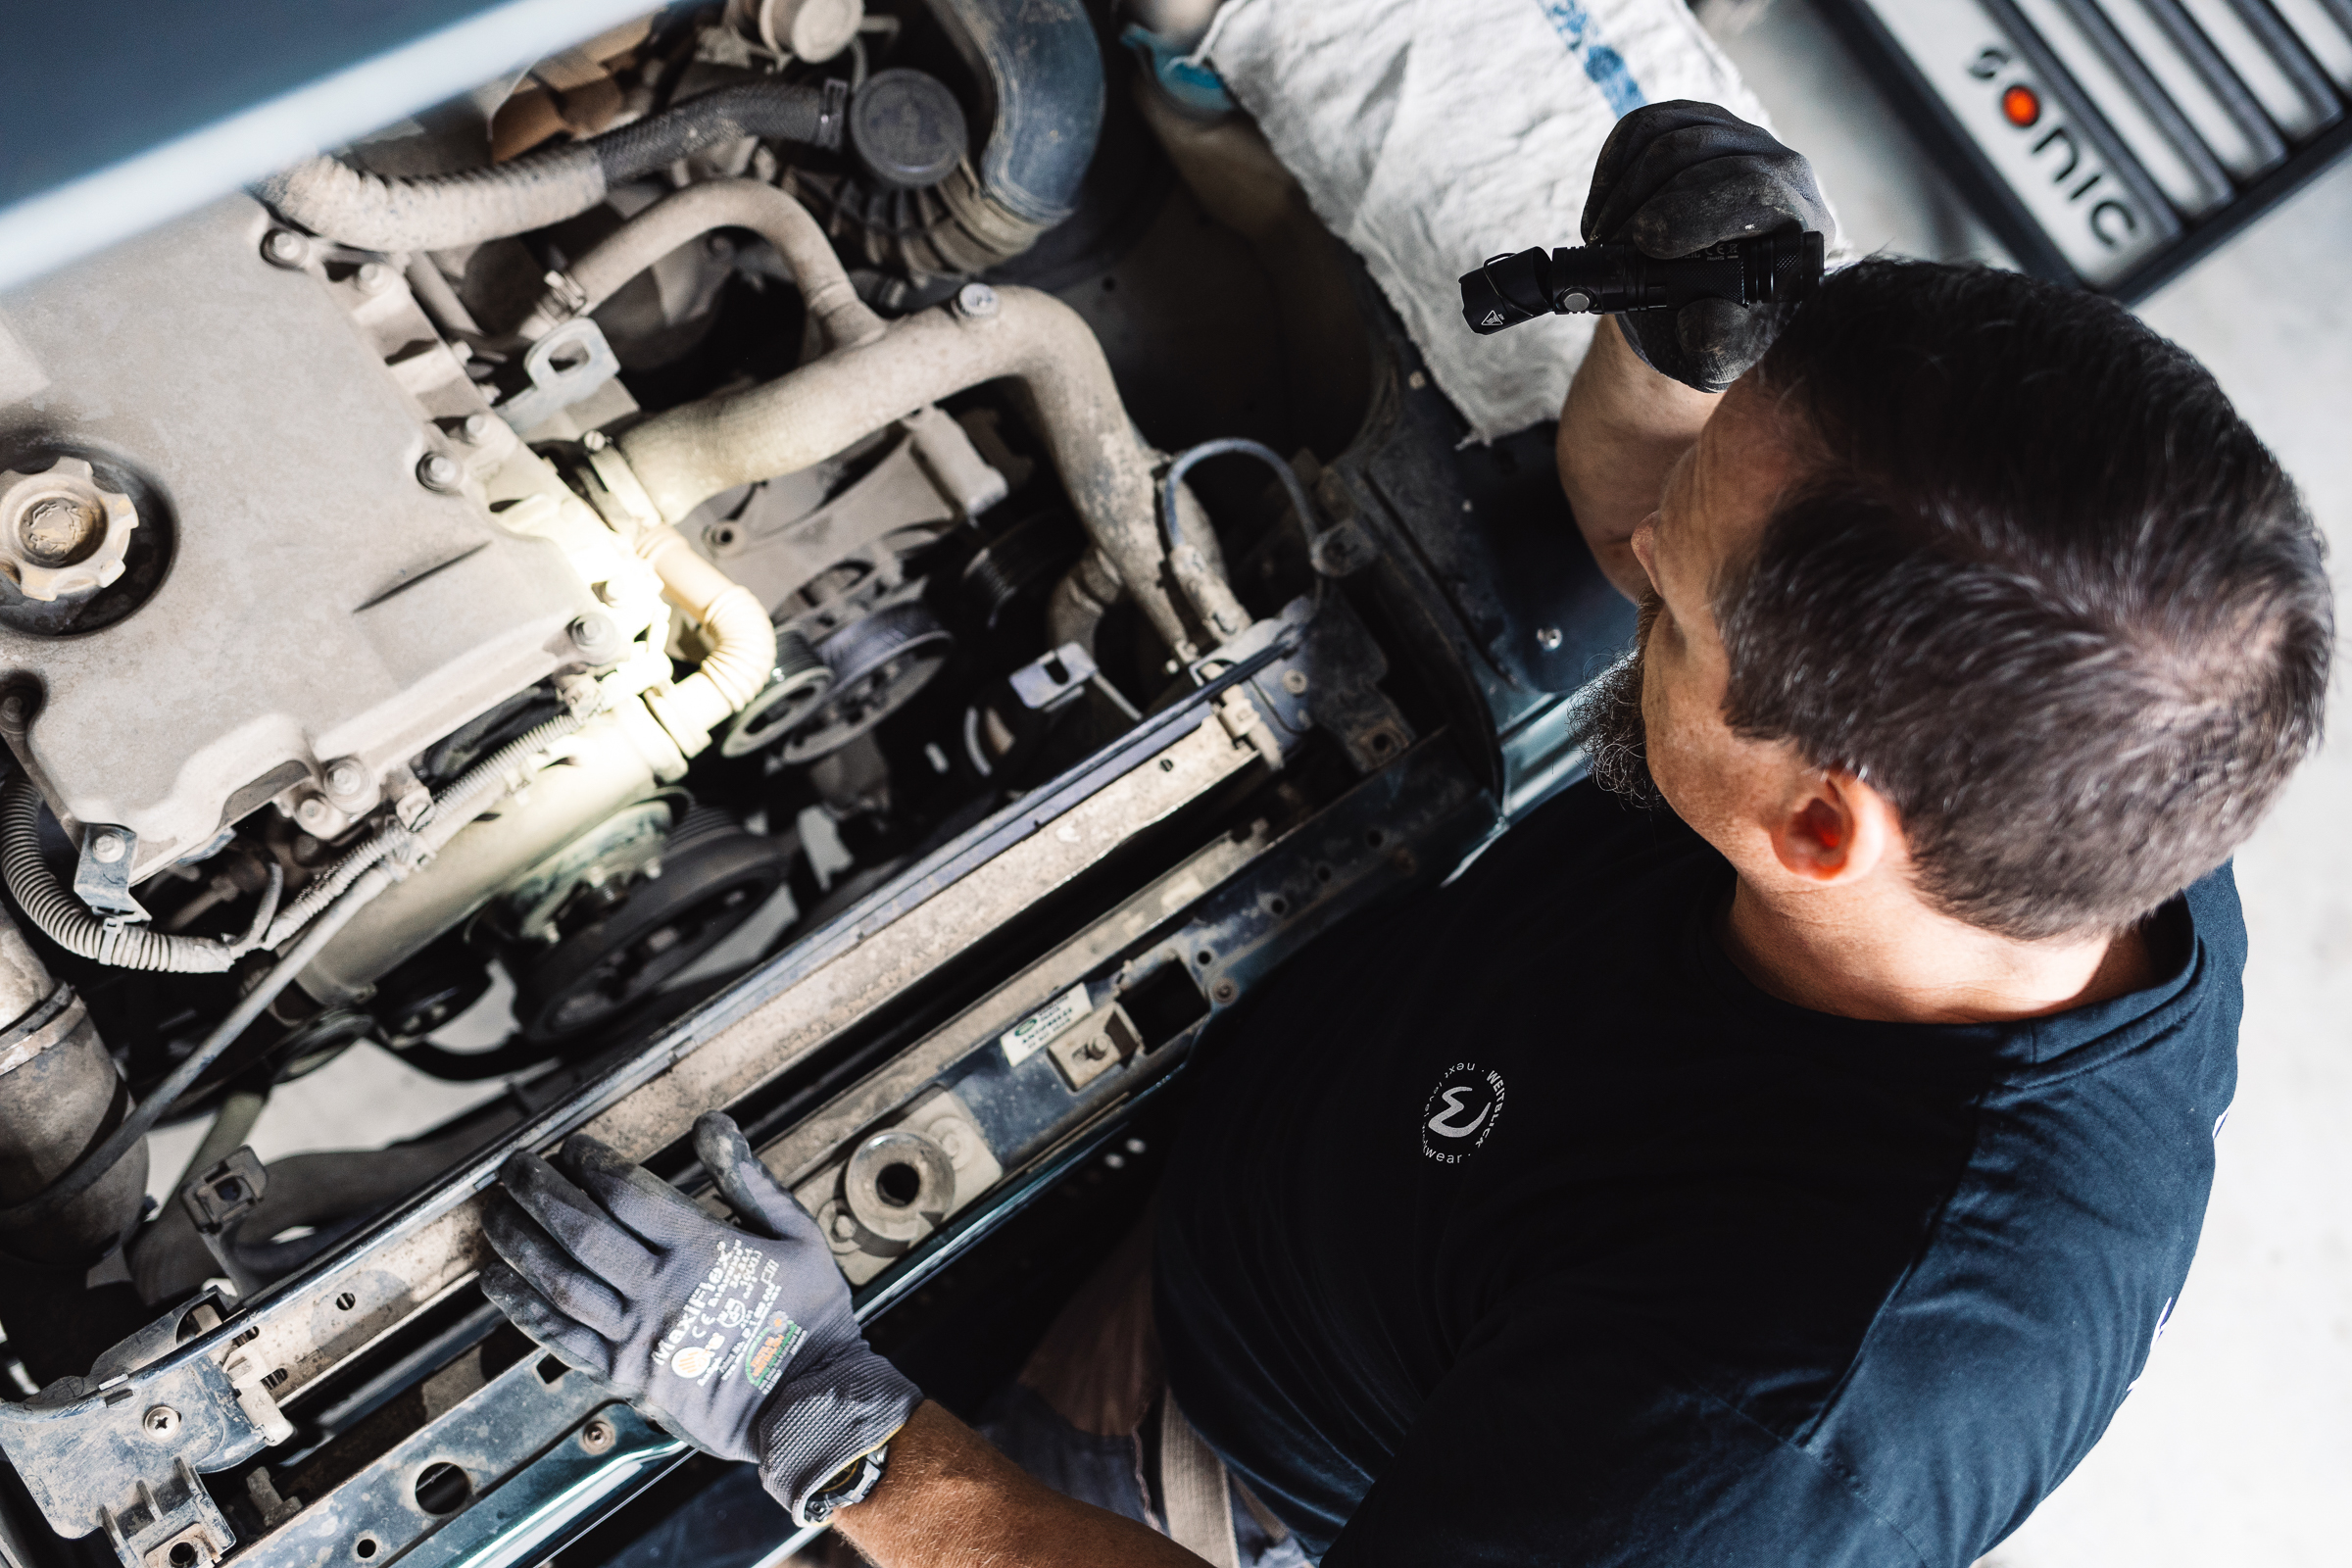
Then comes the heart of your vehicle, the engine and its parts
We start again with a thorough visual check, this time in the engine bay. To spot damp spots, like oil or fuel leaks, better, take a lamp. Look closely at hose connections, seals, the areas around any turbocharger, the injection pump, injectors, along fuel lines, the various filters and tanks, and around the rocker-cover gasket. Light up hard-to-reach spots well. Now you can also check all the fluid levels here.
Turbo
Look at the bypass or the VGT control of the turbocharger (variable turbine geometry). The bypass linkage should move, even if stiffly. Unhook the VGT linkage and move the lever back and forth, that should go quite easily. If the VGT linkage can’t be unhooked easily, switch on the ignition. Normally a test runs where the VGT linkage moves. If that doesn’t work either, start the engine and rev it. By now at the latest, the VGT linkage should move.
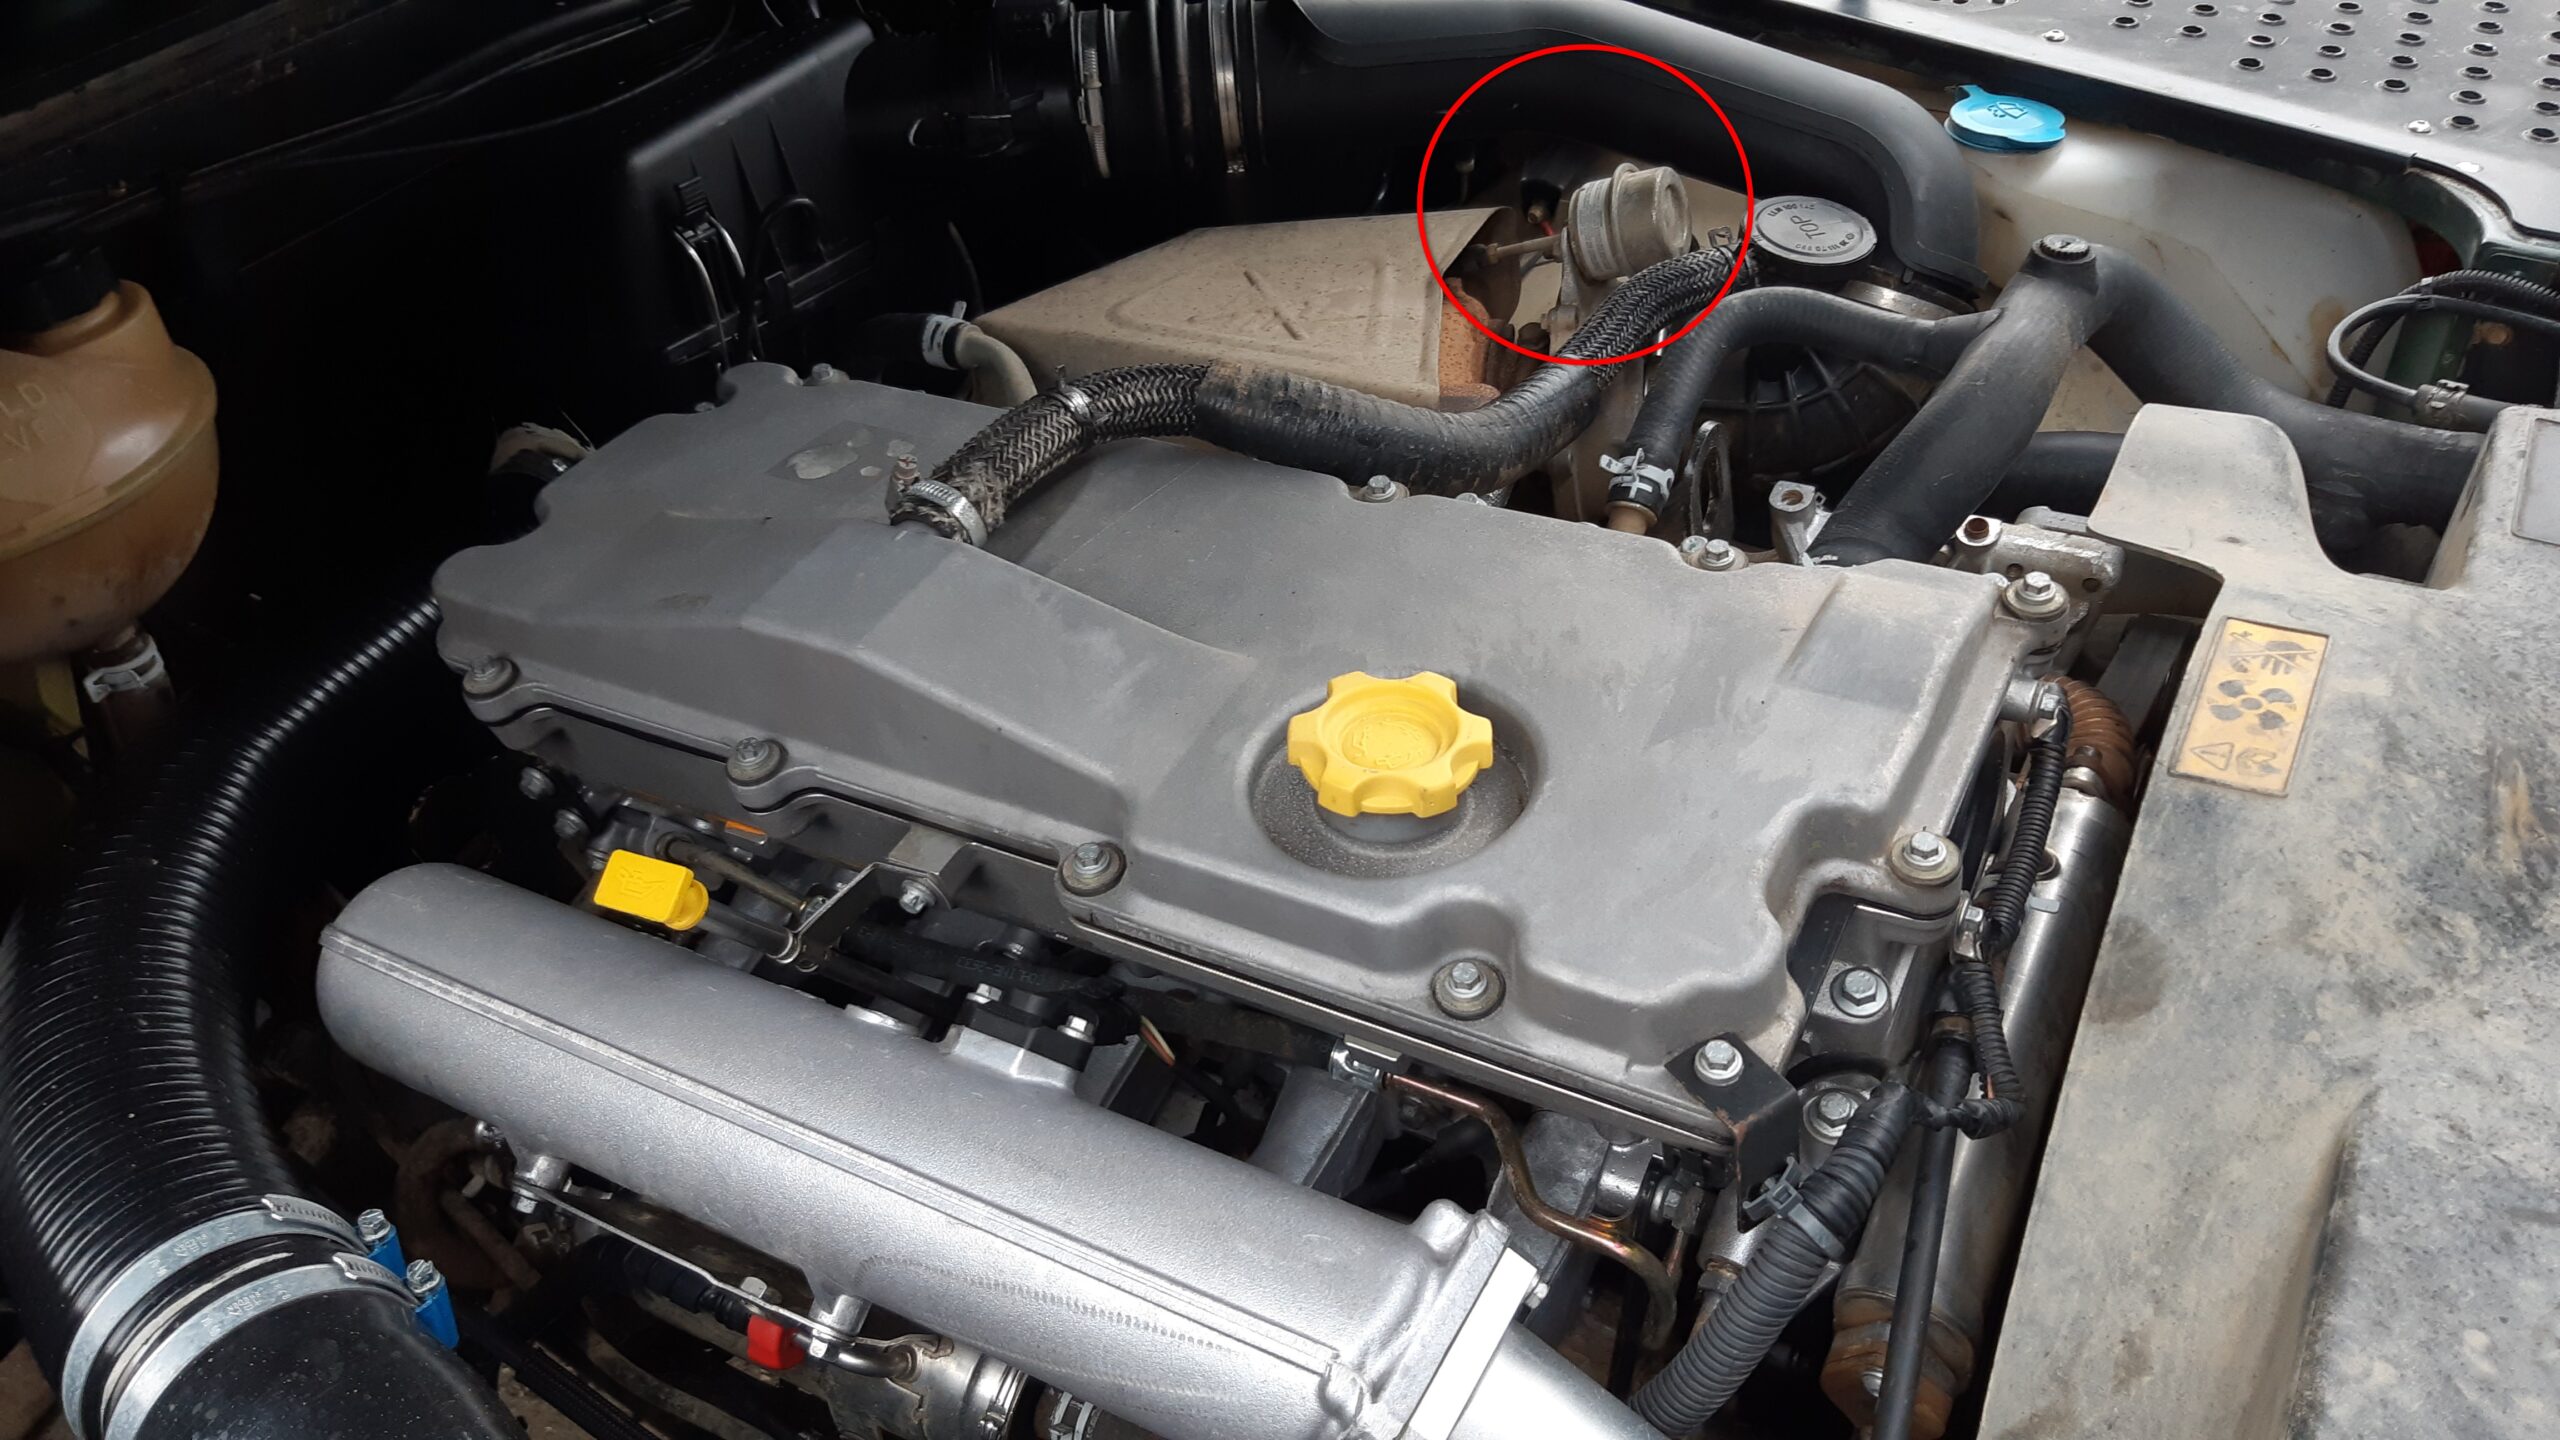
Bypass and VGT control the turbocharger’s speed. The bypass caps the maximum speed by routing exhaust gas past the impeller above a preset pressure. The VGT narrows or widens the exhaust feed cross-section under electronic control, so the turbo works even at low revs and is capped at the top. If this adjustment sticks, the engine either has no power or, worse, the turbo spins too fast, which leads to expensive damage. Read more here: The turbo, the diva of the engine.
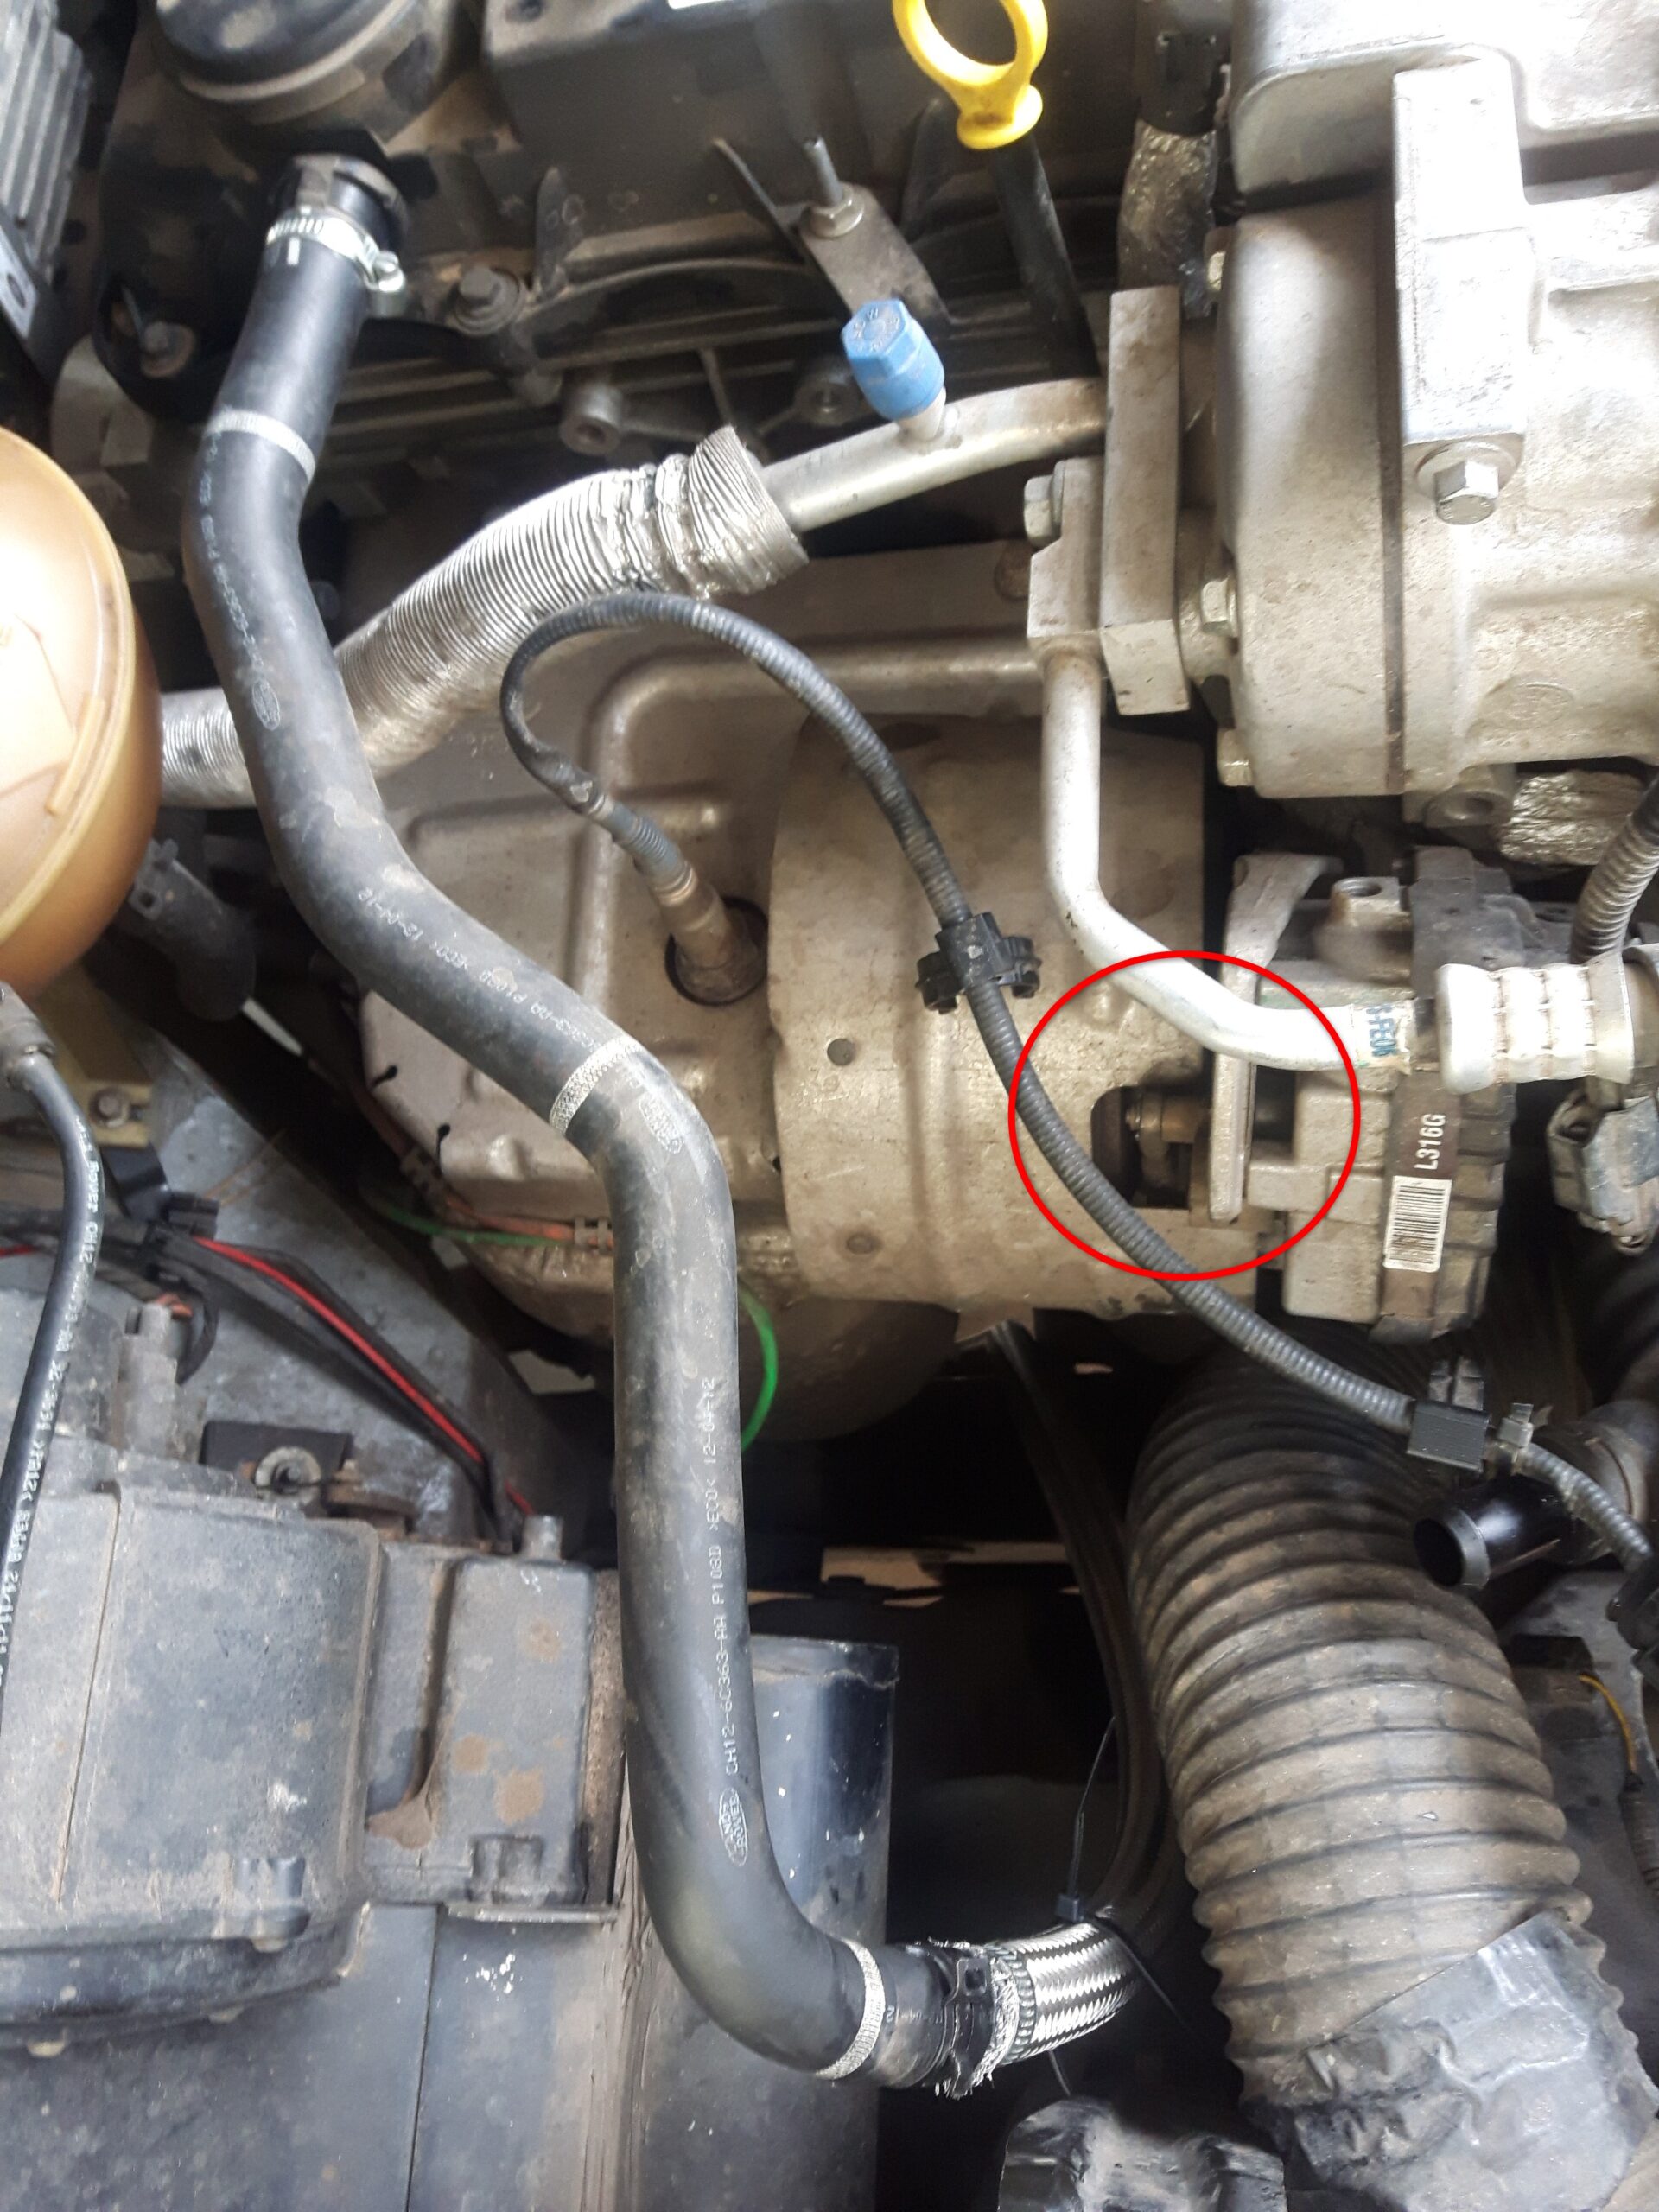
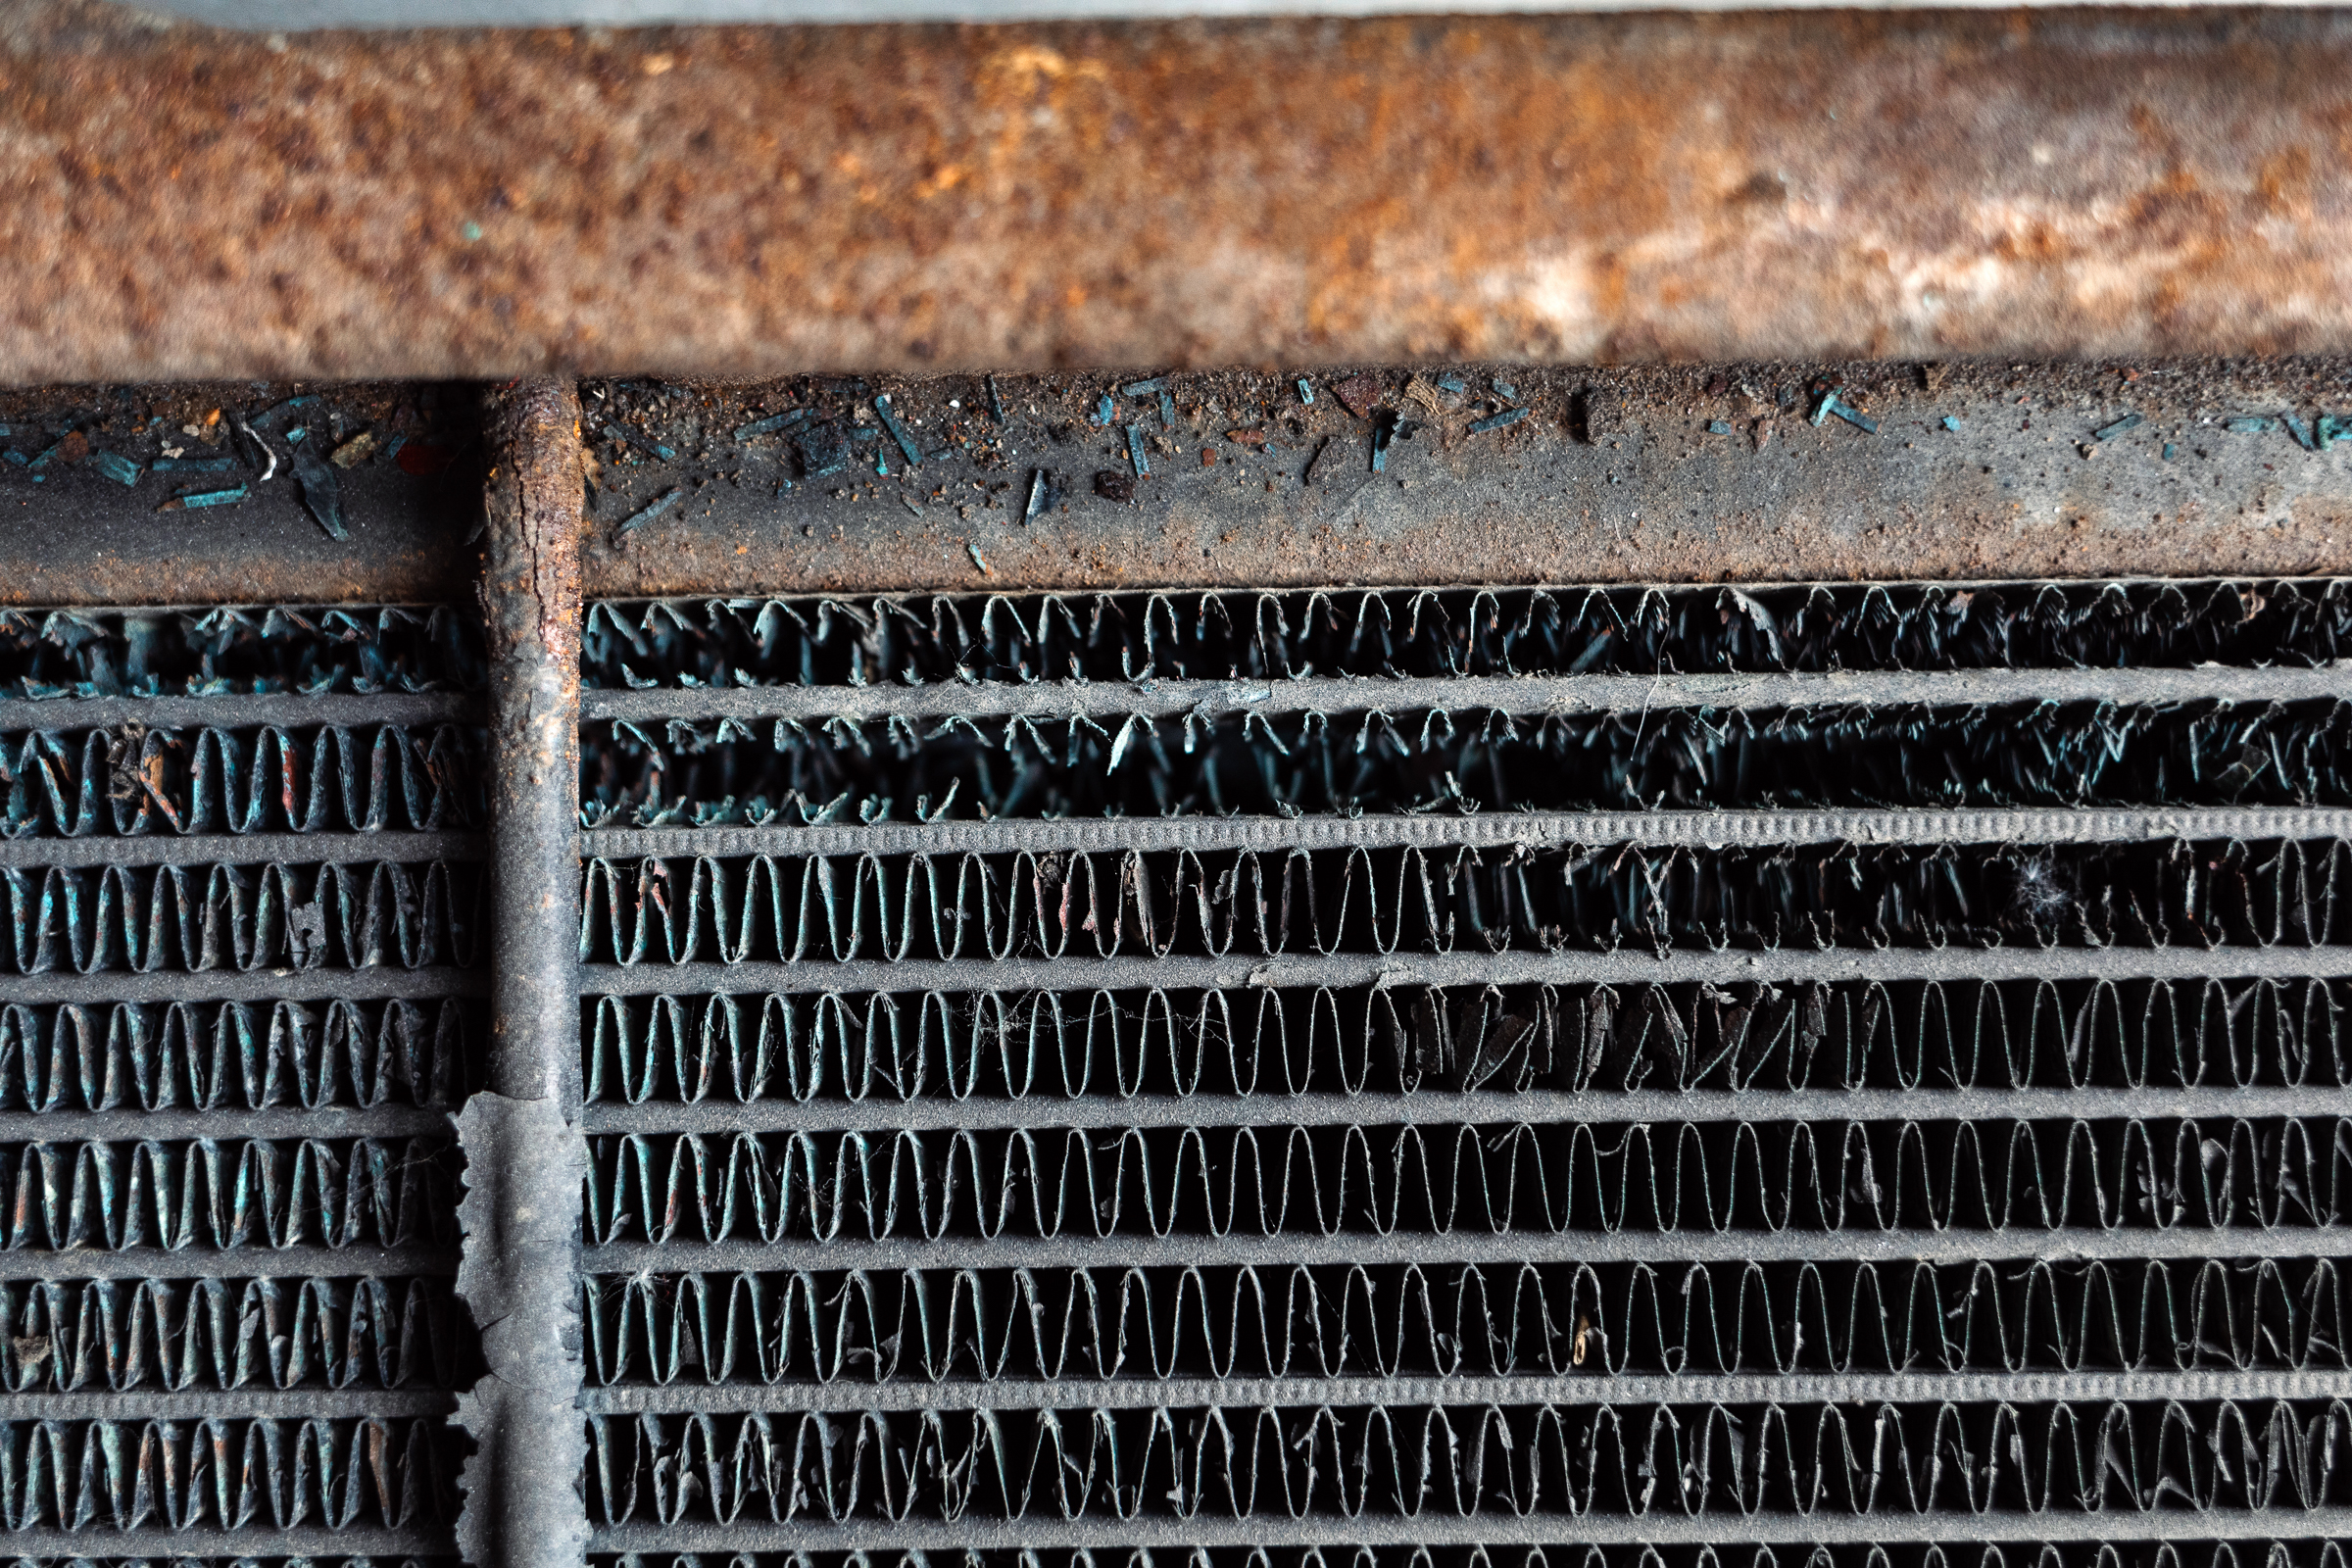
Next up, the radiator
Check it for damage. Especially if you take your vehicle off-road, stone chips for example can cause damage. A common sign: visible traces of coolant and badly bent fins. Heavy dirt you can carefully flush out of the radiator with a jet of water from behind. To reach the radiator better, it may be necessary to remove any fan that’s there.
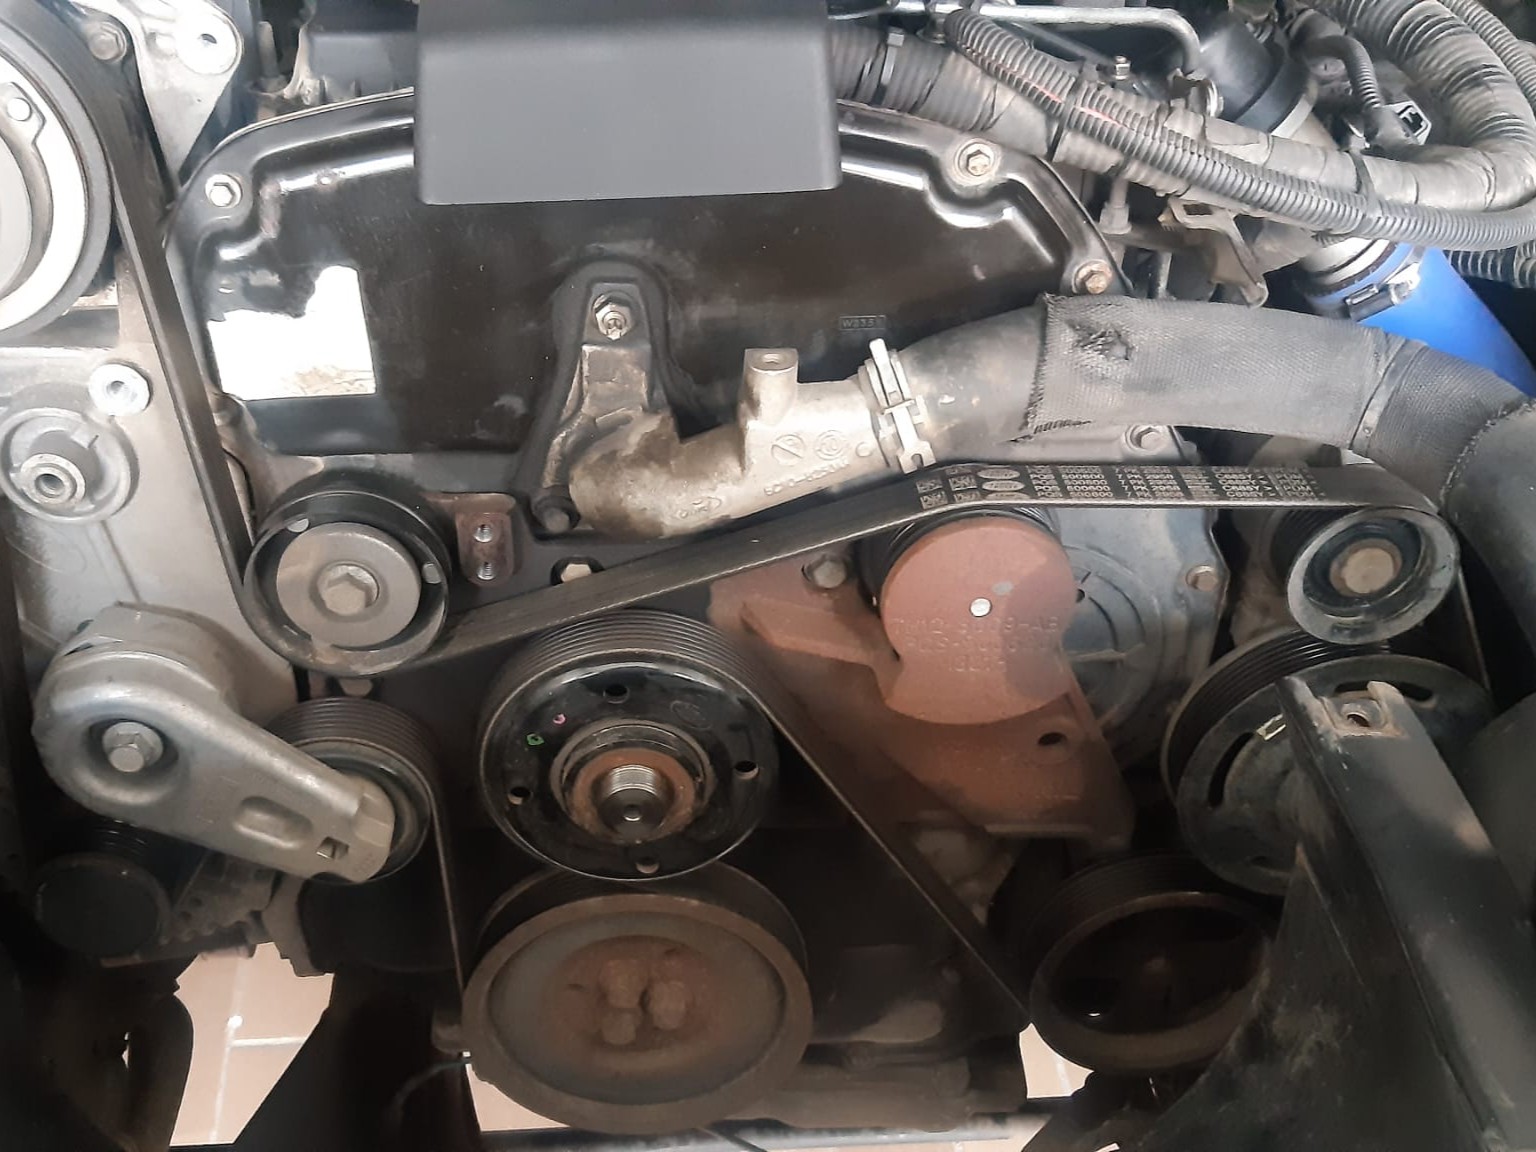
Then you’ve got good access to the drive belt or belts. Check the drive belts for damage and age-related wear, like brittle spots, cracks and the like, and swap them if needed. Because if the belt snaps, expensive knock-on damage can follow. You can see it: good servicing matters. With the belt off, turn all the pulleys by hand, they have to run without odd noises and without any noticeable rubbing. Move them back and forth, up and down, there must be no play.
While we’re at the radiator, we can check the antifreeze straight away. That’s not just the level, which on most vehicles you check easily at the expansion tank when cold, but the frost resistance too. You check that best with a refractometer*. From a small sample, it shows you down to what temperature your coolant is frost-resistant.
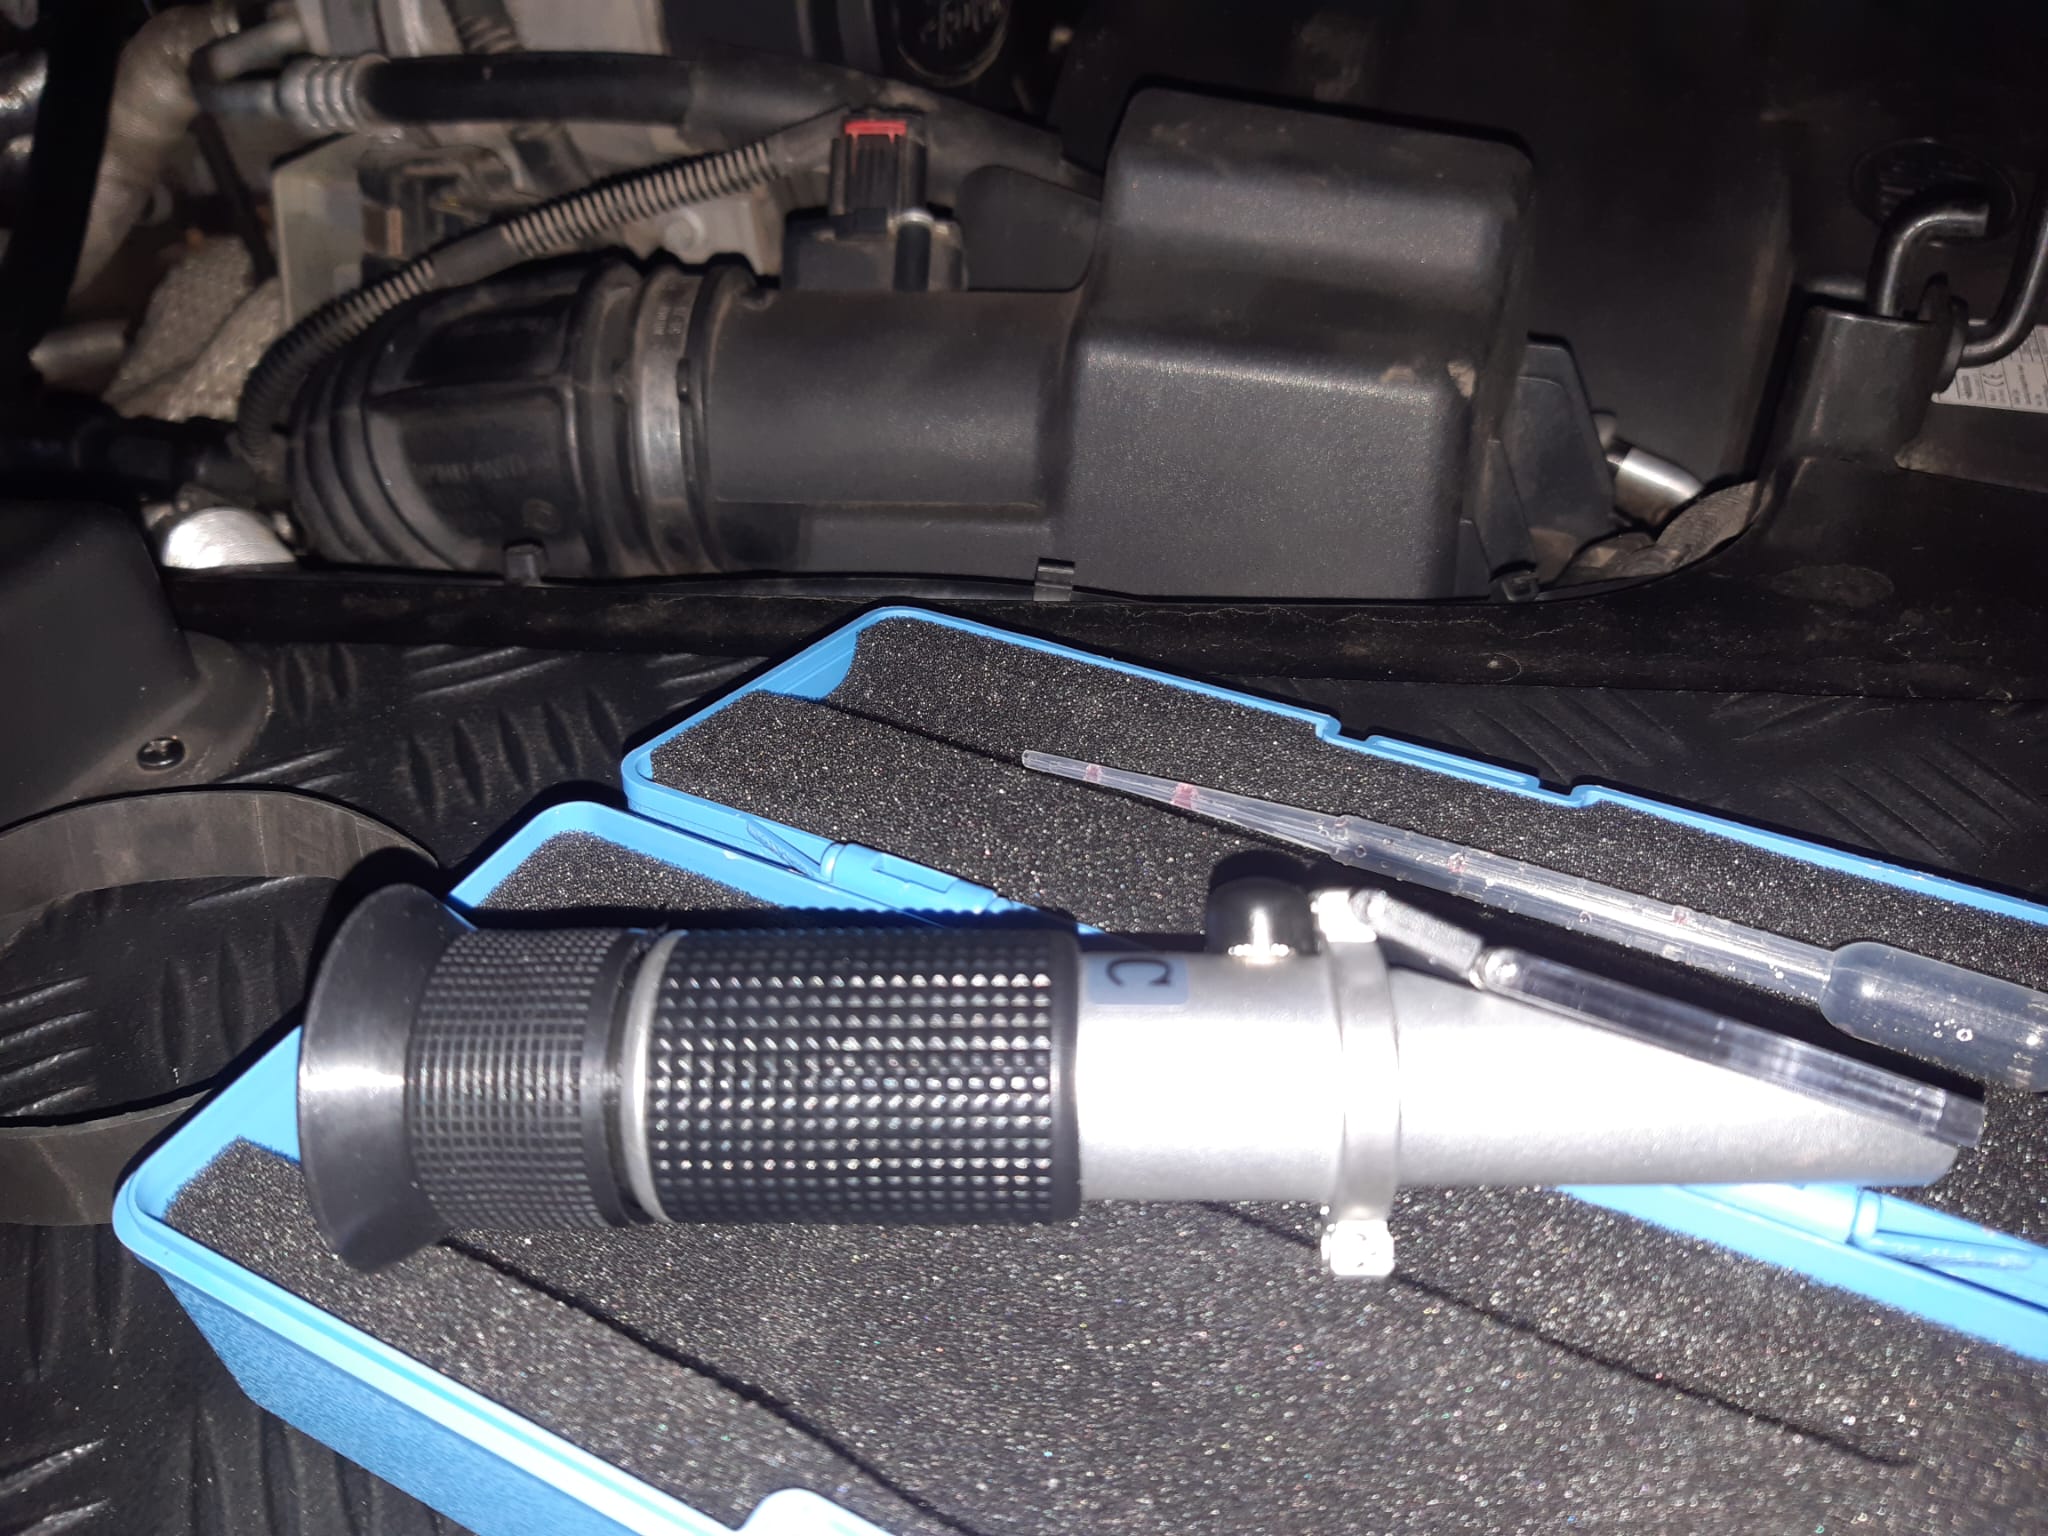
The coolant should also be changed regularly, because besides cooling, it also protects the engine from corrosion. We’ve put more on that together here: All about antifreeze, MATSCH&PISTE guide. The various metals in the engine, like aluminium, grey cast iron, copper, brass and so on, form a galvanic system with the coolant as the electrolyte, where the least noble metal (usually aluminium) gives off ions and dissolves in the process. Antifreeze evens out the surfaces by forming an oxide layer. This layer, and the ability to form it, is lost over time. The result is corrosion and pitting. If you change the coolant regularly, you keep the corrosion protection up.
Include the thermostat in the visual check. Maybe there are traces of coolant on it? That points to leaks. A thermostat is a wear part and can fail. Signs can be unusual swings in coolant temperature or a weak cabin heater. Before longer trips and high mileage, better to swap it preventively. We’ll come to preventive servicing later.
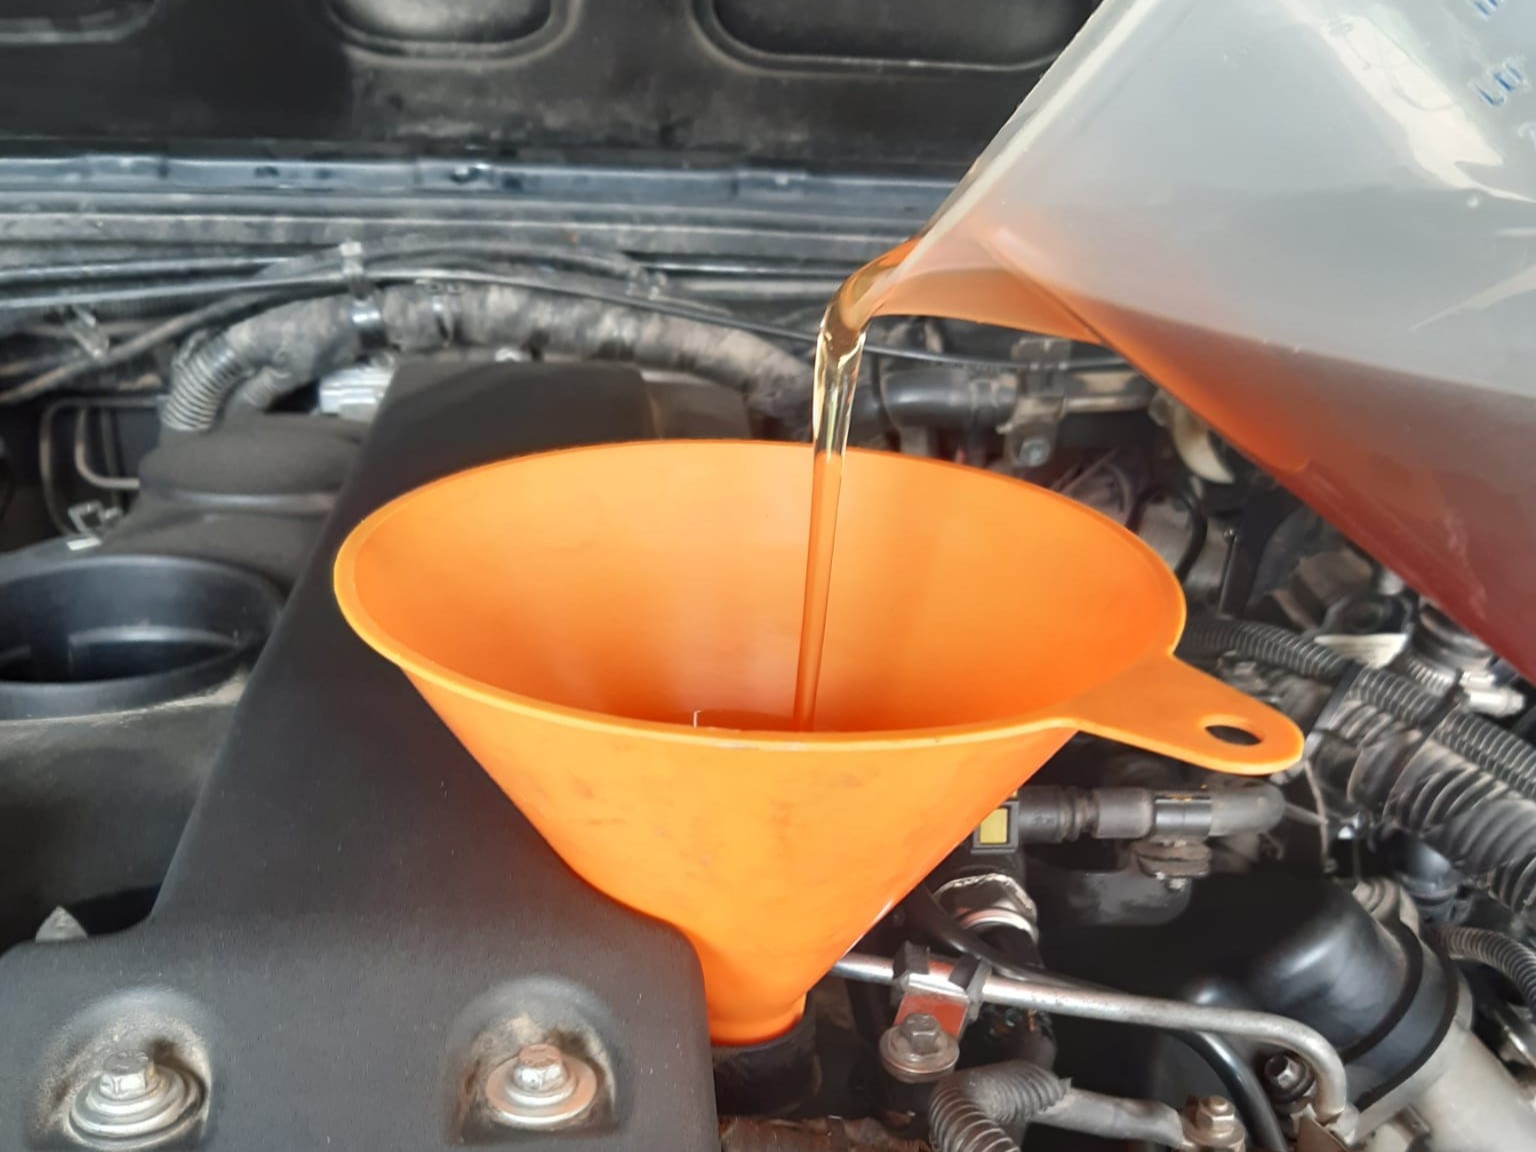
Changing the engine oil along with the oil filter should be a given
Look at the maker’s figures for this and stick to the intervals. If you’re heading off on a trip, it’s well worth bringing the change forward rather than overrunning it. If the vehicle works hard, with a lot of off-road driving, harsh conditions like sand and dust, or towing, then shortening the intervals is a good idea. Many makers already specify this in the specs. Does your vehicle have very high mileage? Here too it’s wise to shorten the intervals. So which is the right oil for your vehicle? Simple: the one the maker specifies.
Make sure you use good-quality filters. There are known cases where the paper dissolves in cheap filters, or the filters contract, so the filter can no longer do its job or only partly.
If you’re more interested in everything around engine oil, have a read of our article on oil viscosity and engine lubrication.
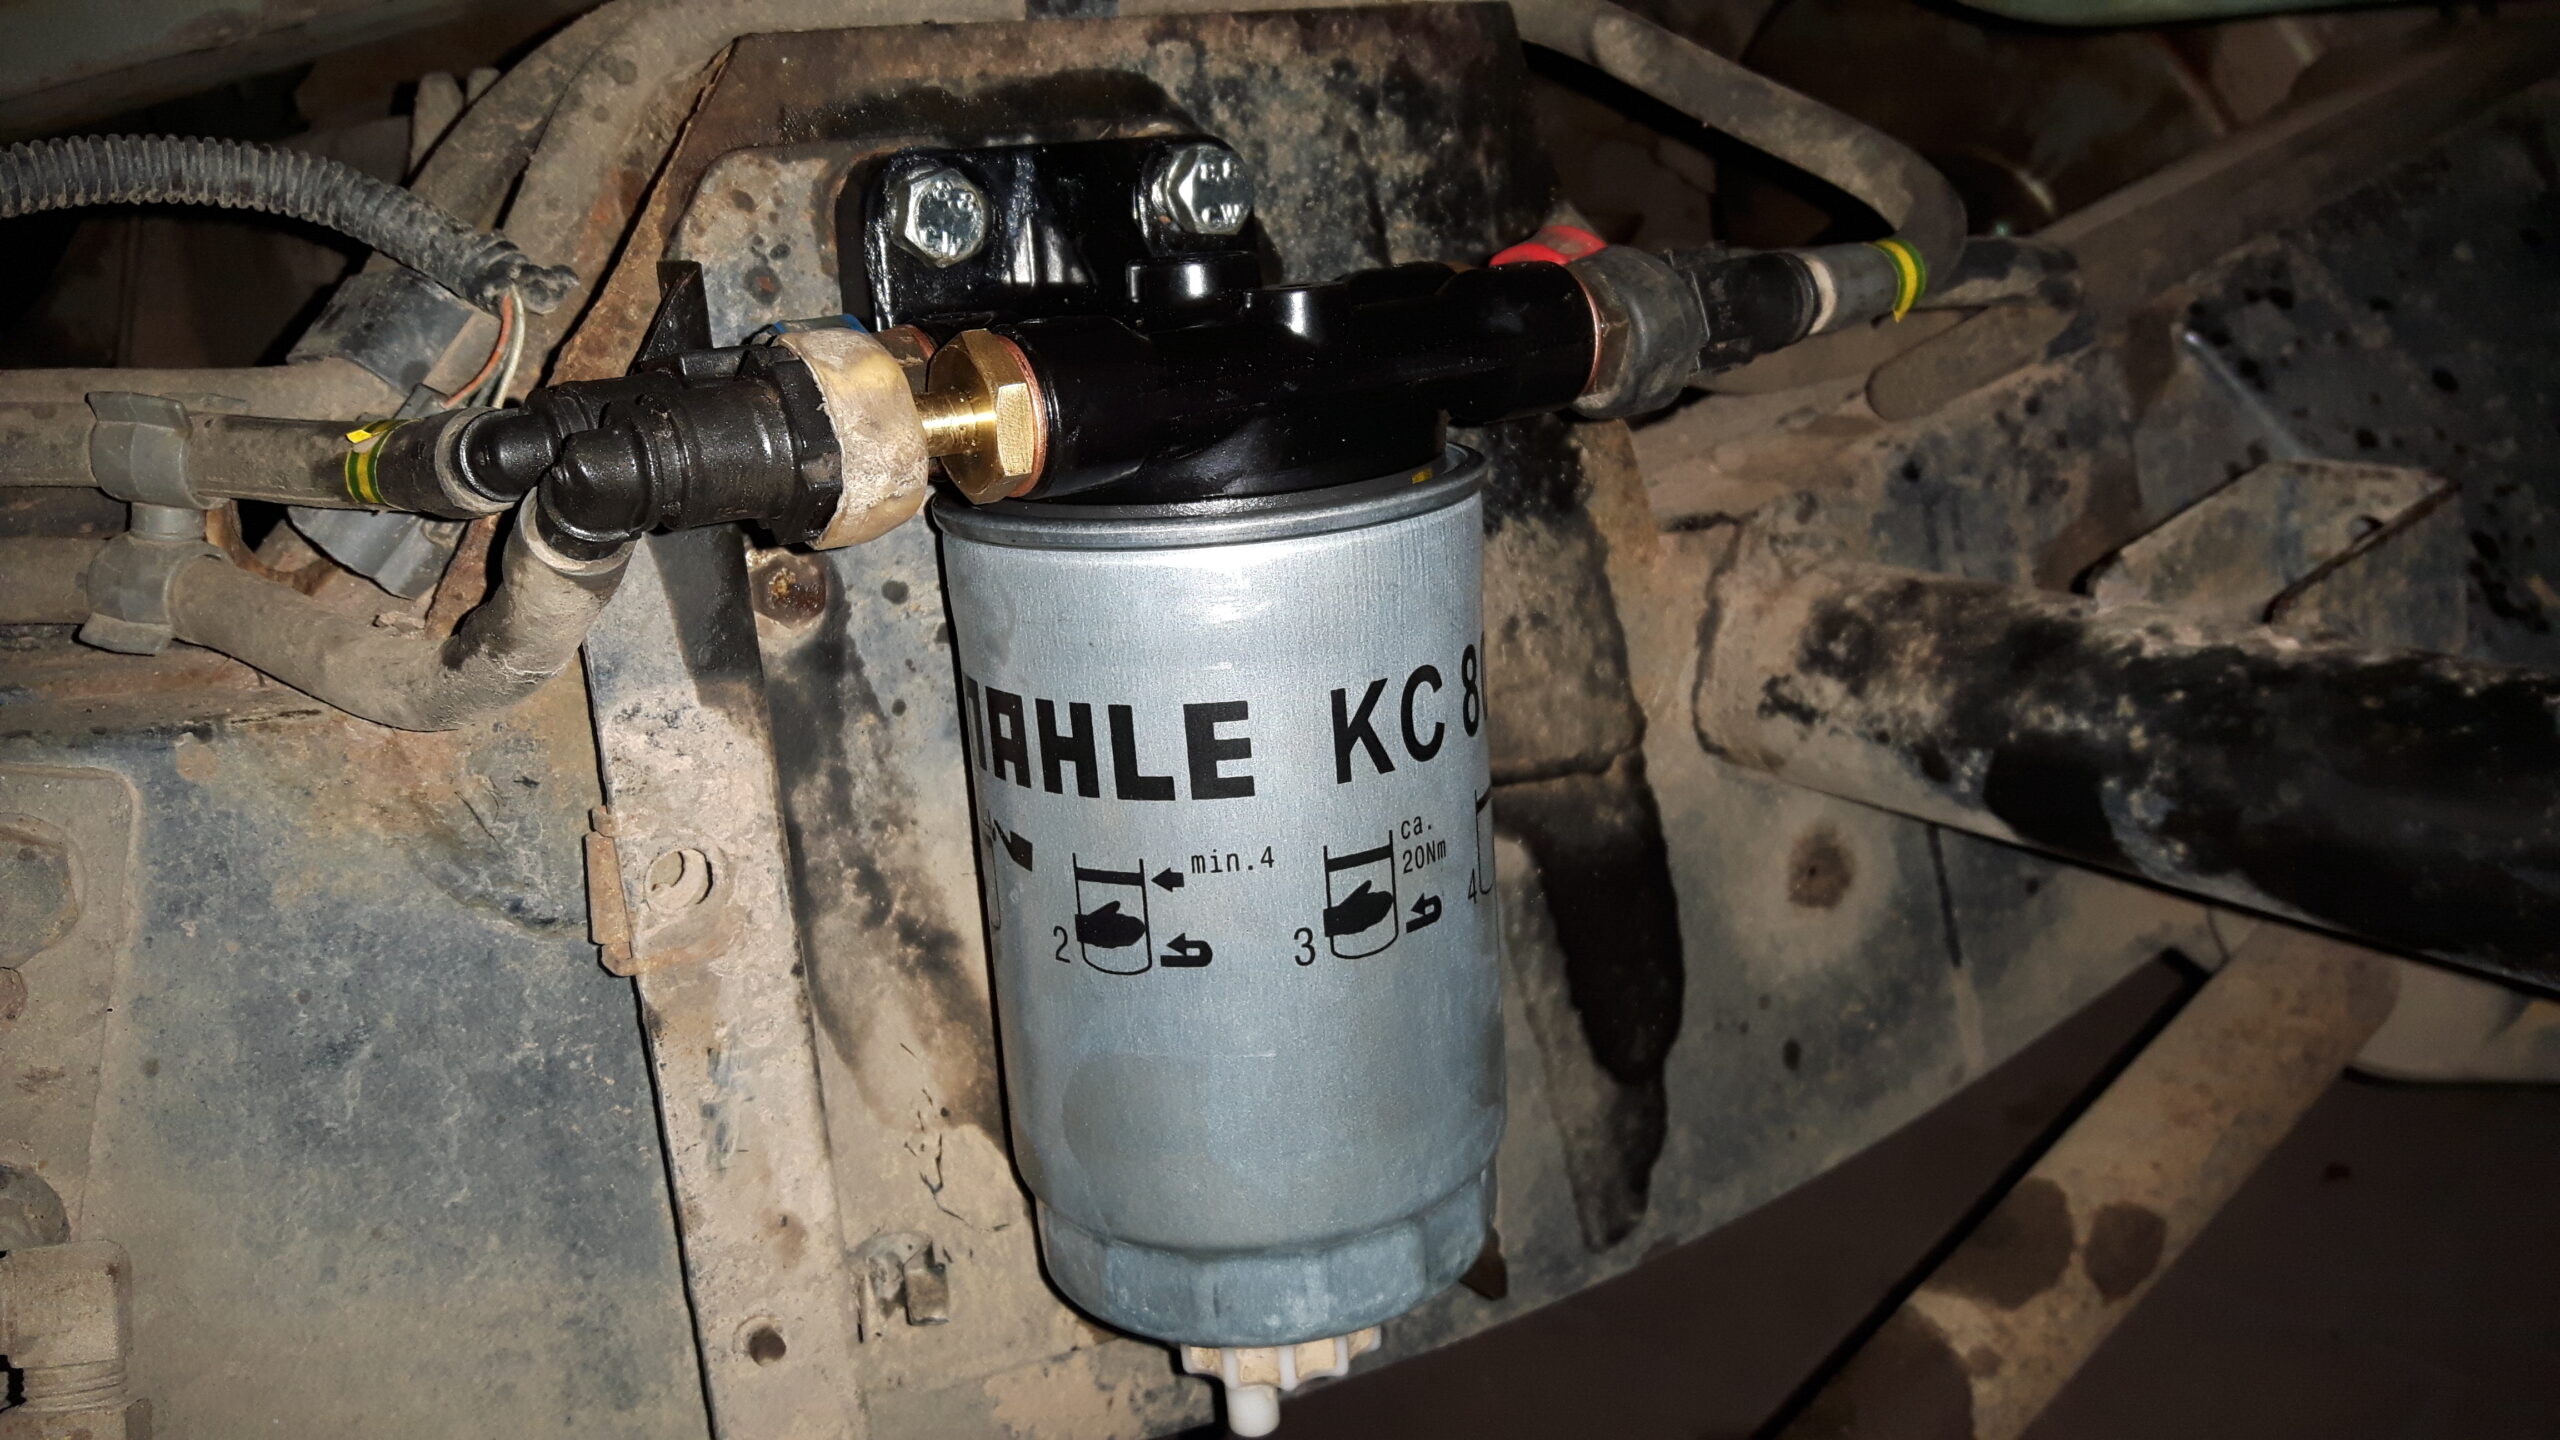
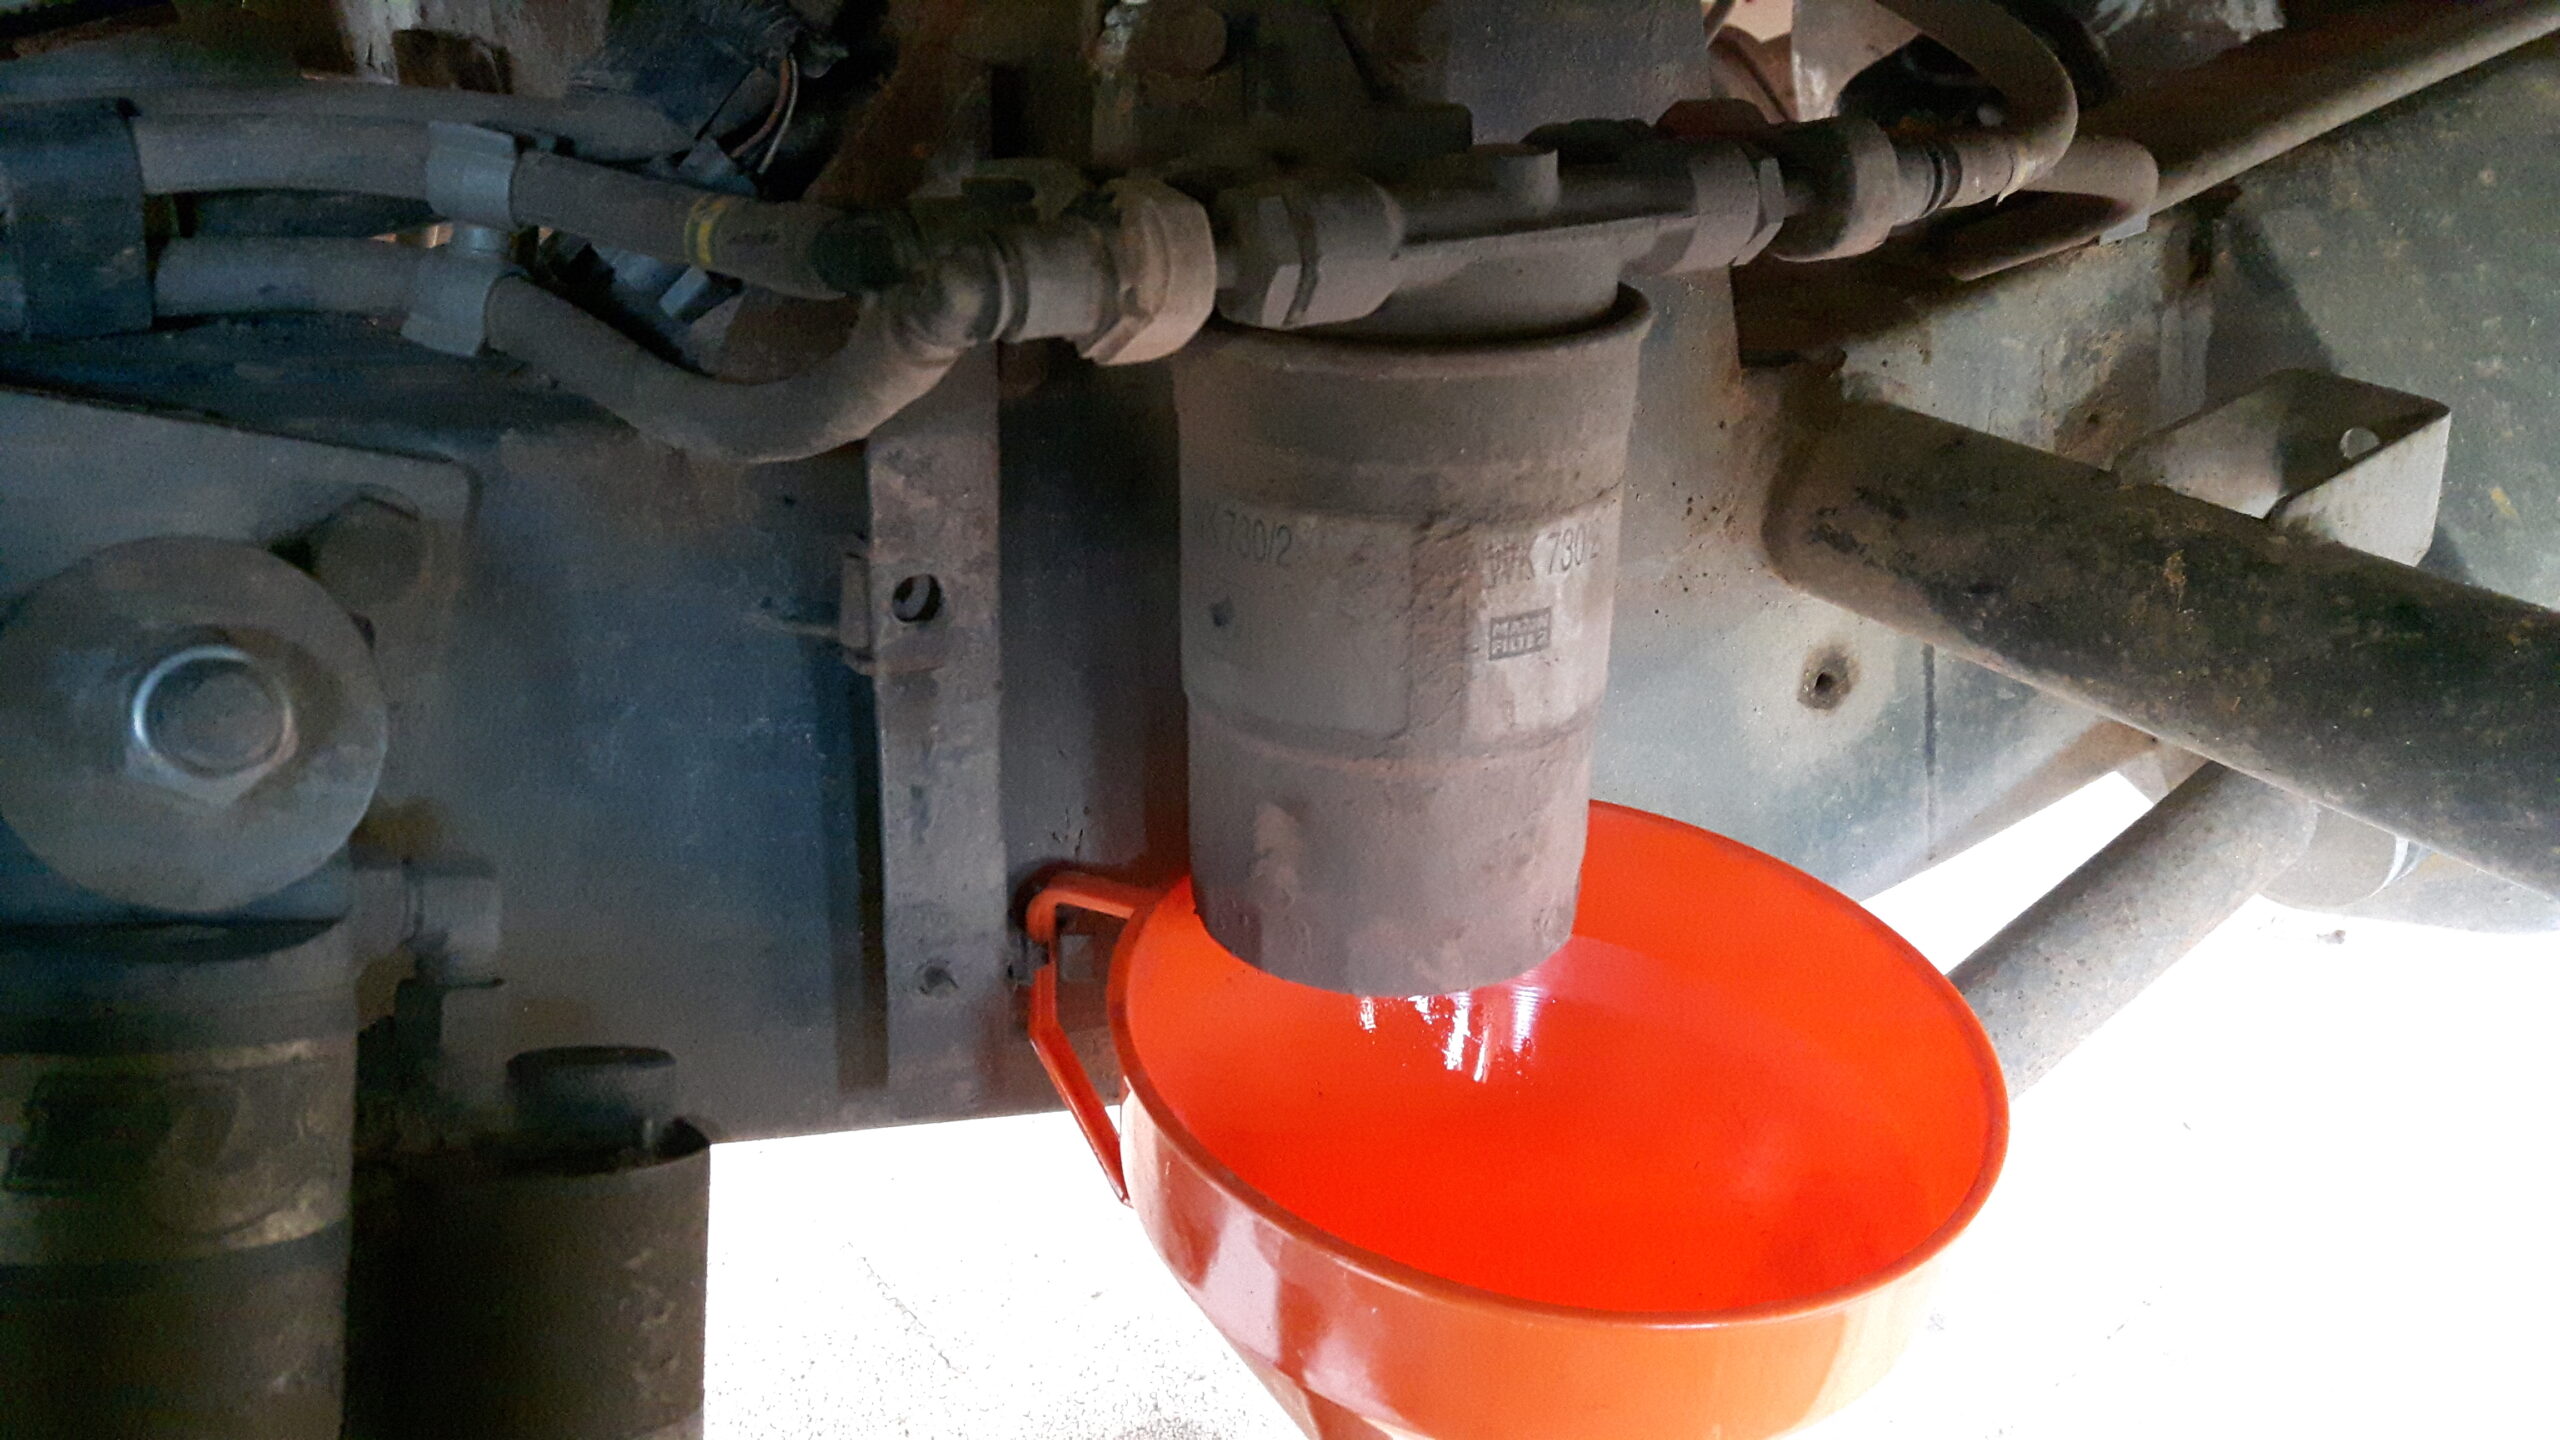
A filter that often gets neglected in vehicles is the fuel filter
And yet it’s important, namely protecting the engine and its injection system from contamination in the fuel. On diesels the neglected interval then often only shows up in a frost. Because at low temperatures, vehicles keep getting stranded when, for example, water in the filter has frozen. Check your manual for what the maker specifies. Otherwise it’s proven good to change the fuel filter once a year (before the cold season), or more often whenever the vehicle has been used in areas where contamination in the fuel is to be expected. If your vehicle has the option, check the filter for water build-up and drain it regularly.
Have you or the previous owner perhaps fitted a second fuel filter? That’s often done as a second line of defence for water separation. Don’t forget to check this one too and, if needed, drain or swap it. Often there’s a valve at the bottom of the filter that you open and let the fluid out for a moment. First comes the water, then the diesel. Put a container underneath so nothing spills. As described, such a separator can be built into the standard fuel filter too.
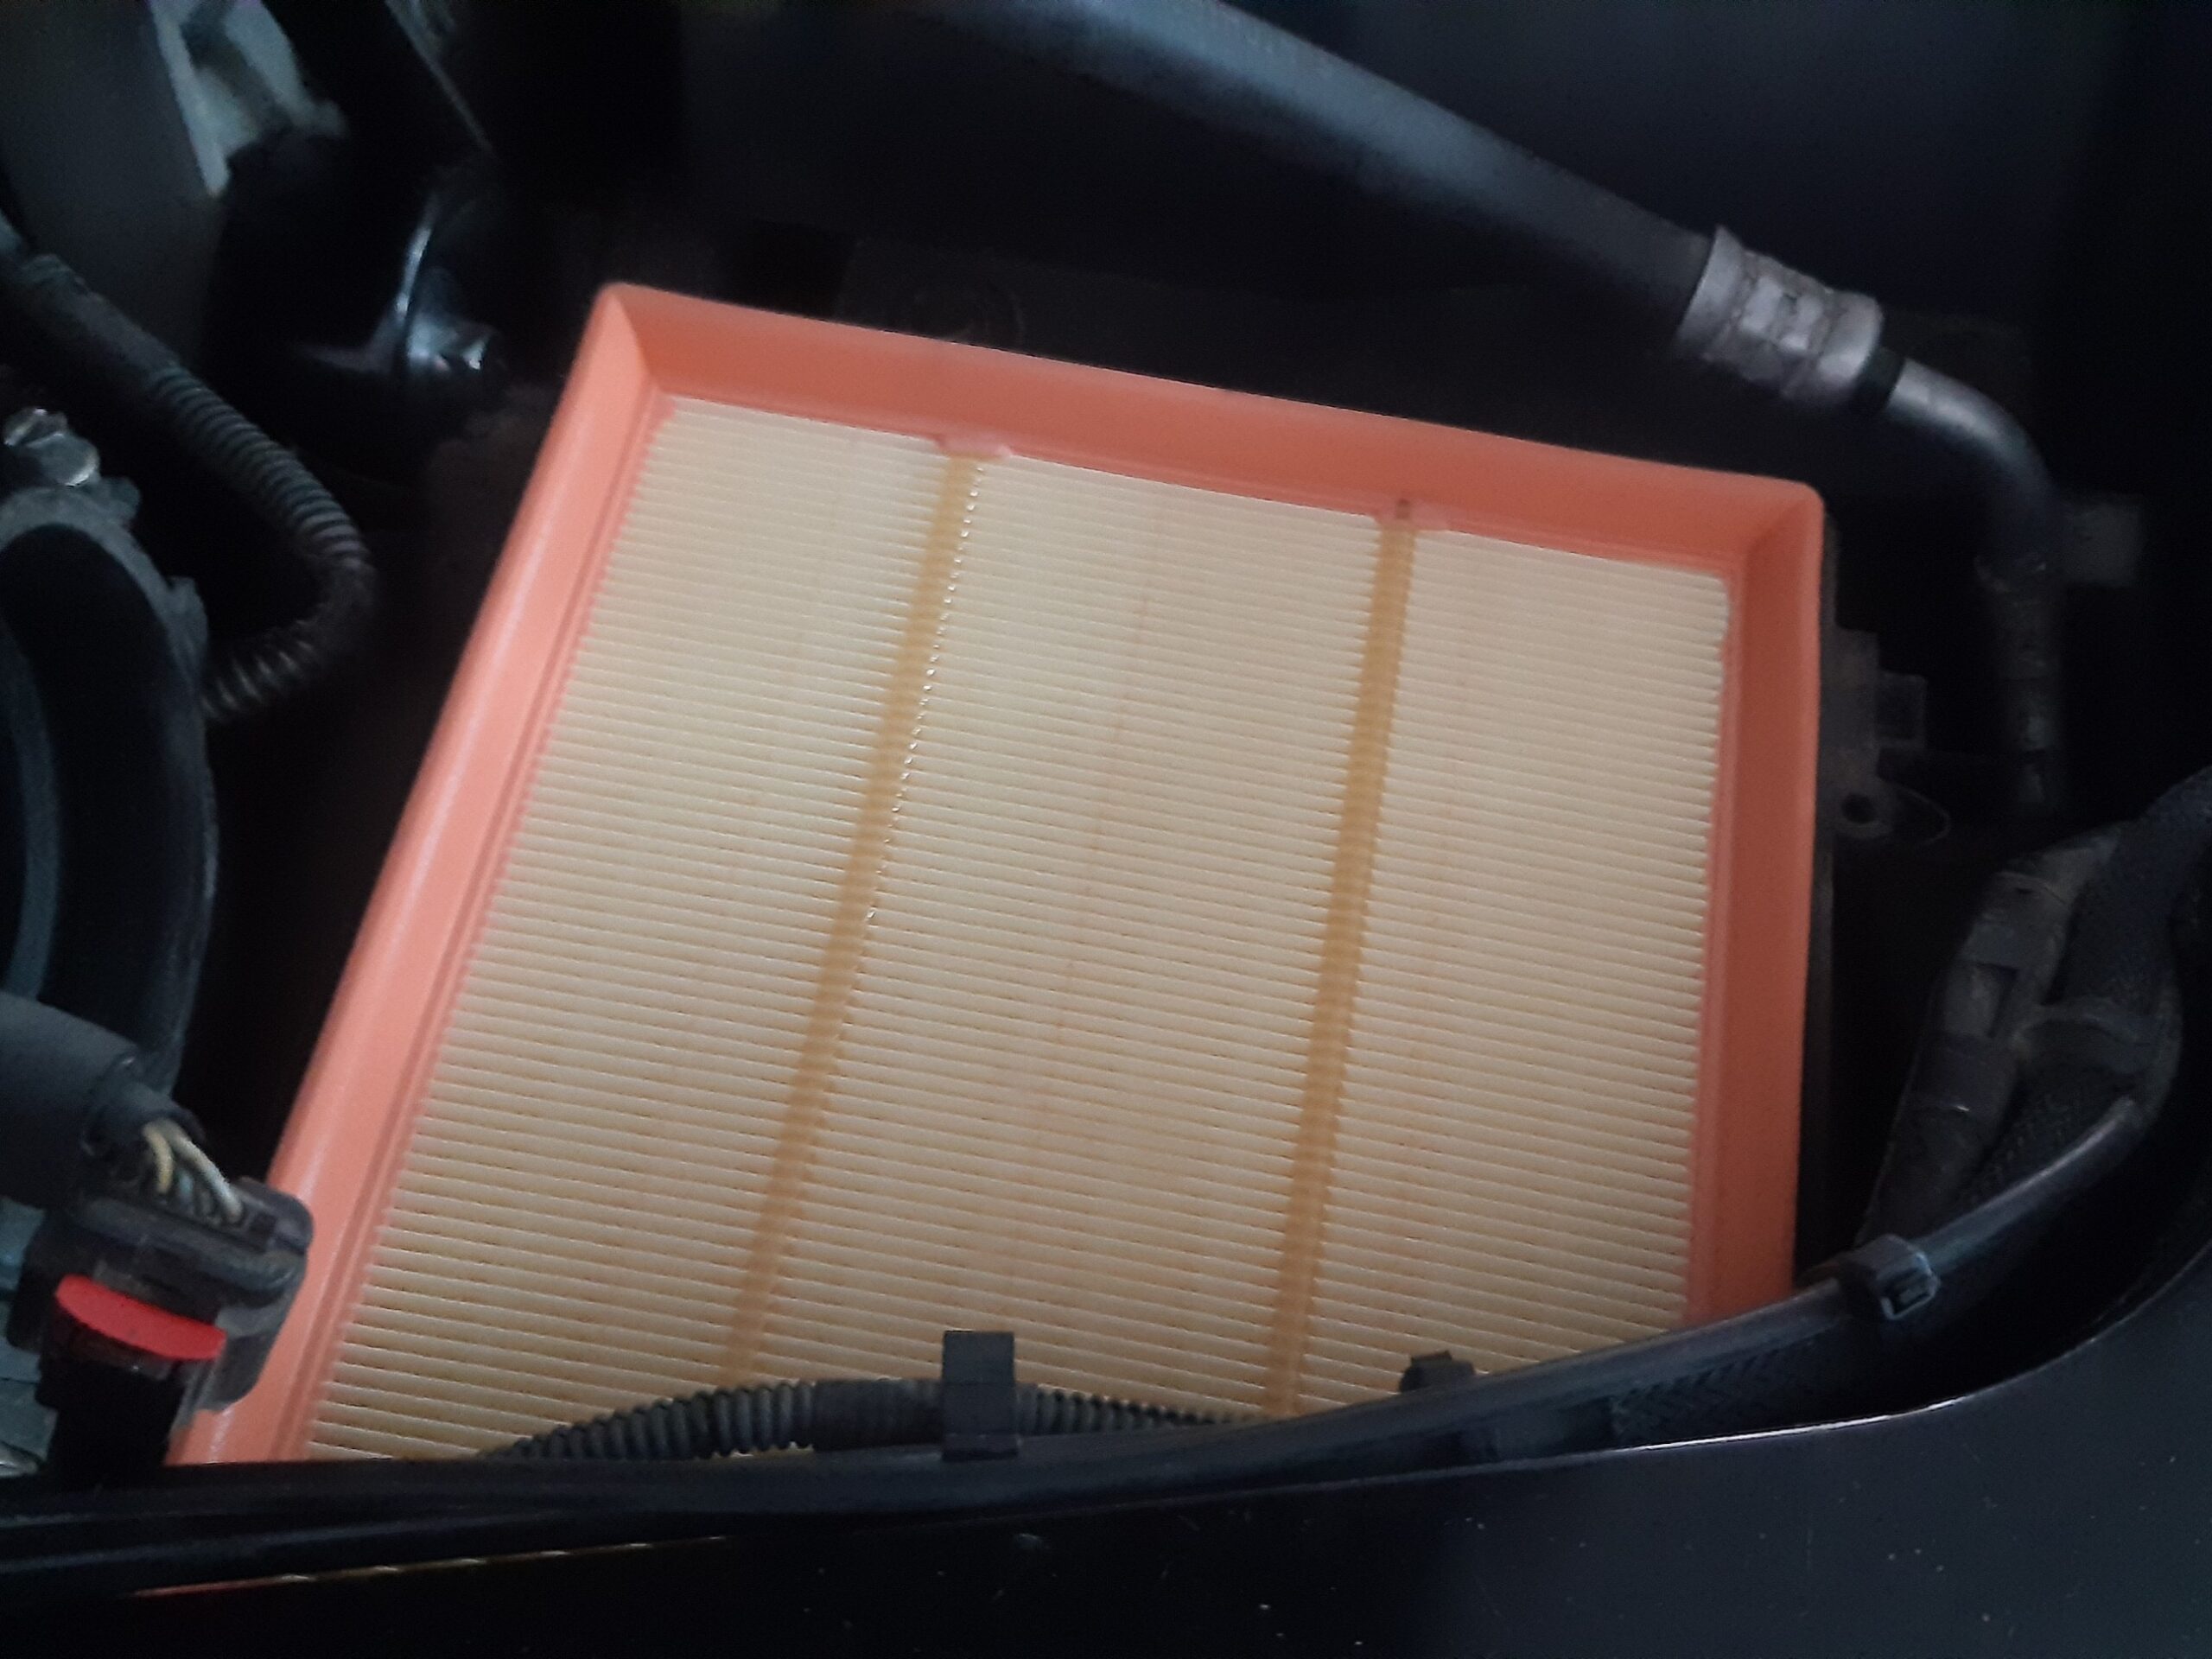
Another filter, the air filter
You should check the air filter regularly anyway and swap it at the set intervals, or earlier if it’s heavily soiled. Look at your air intake during the service or before planned trips with water crossings or heavy dust. Is it properly sealed?
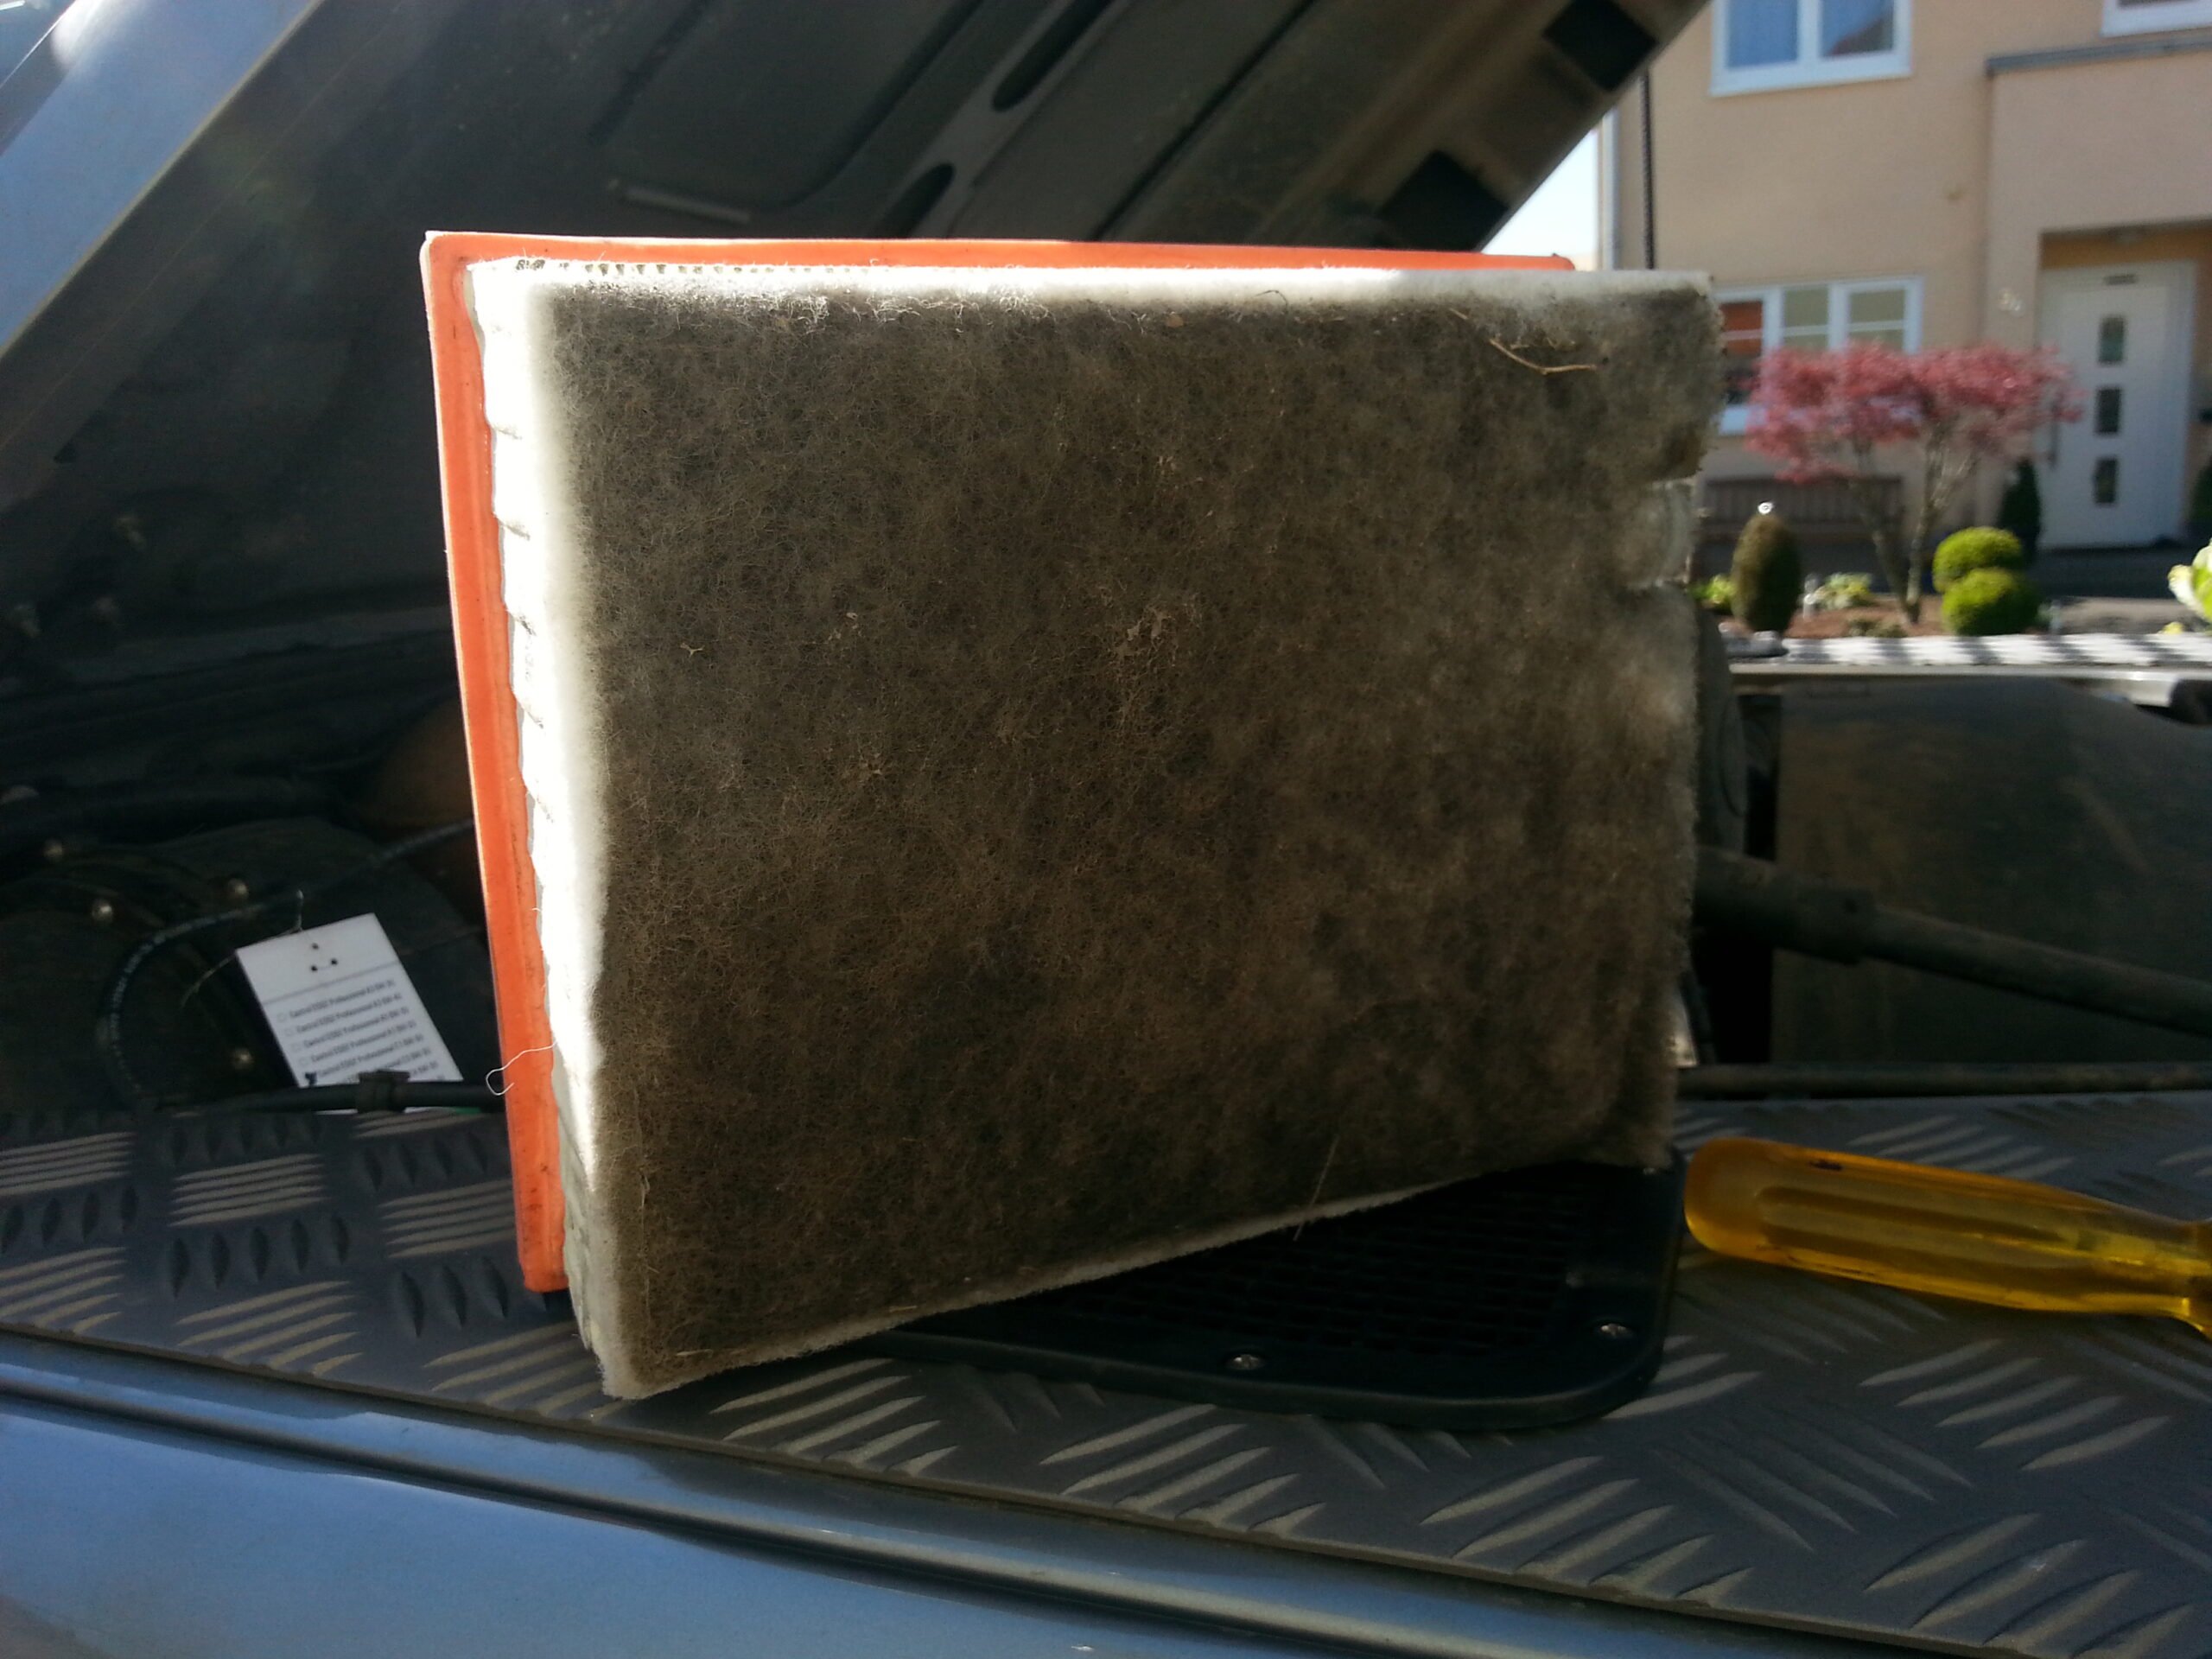
Don’t forget any pre-filters. This could be an extra cyclone air filter, for example. Maintenance is simple and basically just consists of tipping out the separated particles and cleaning as needed.

Timing belt, timing chain and timing gears
The timing belt, timing chain and timing gears are critical parts of a combustion engine. They keep the crankshaft and camshaft in sync. If that sync fails, for example because the timing belt went too long without a change and snaps, you usually get very expensive engine damage.
Servicing, or rather replacing, these parts takes a fair bit of skill and tools. So it isn’t necessarily one for the home workshop. If your engine has a timing belt, it’ll be in the service schedule. Belts that run in oil in particular should be changed by the required interval, or even before it.
Timing chains and their parts are usually called “maintenance-free” and often, at least on cars, aren’t on a service interval in the manuals. Even so, for the reasons above, you should listen for unusual noises. Does the chain rattle? Then it could be a faulty chain tensioner or a stretched, worn timing chain. Get it sorted and, if needed, definitely have it replaced, precisely to head off expensive damage.
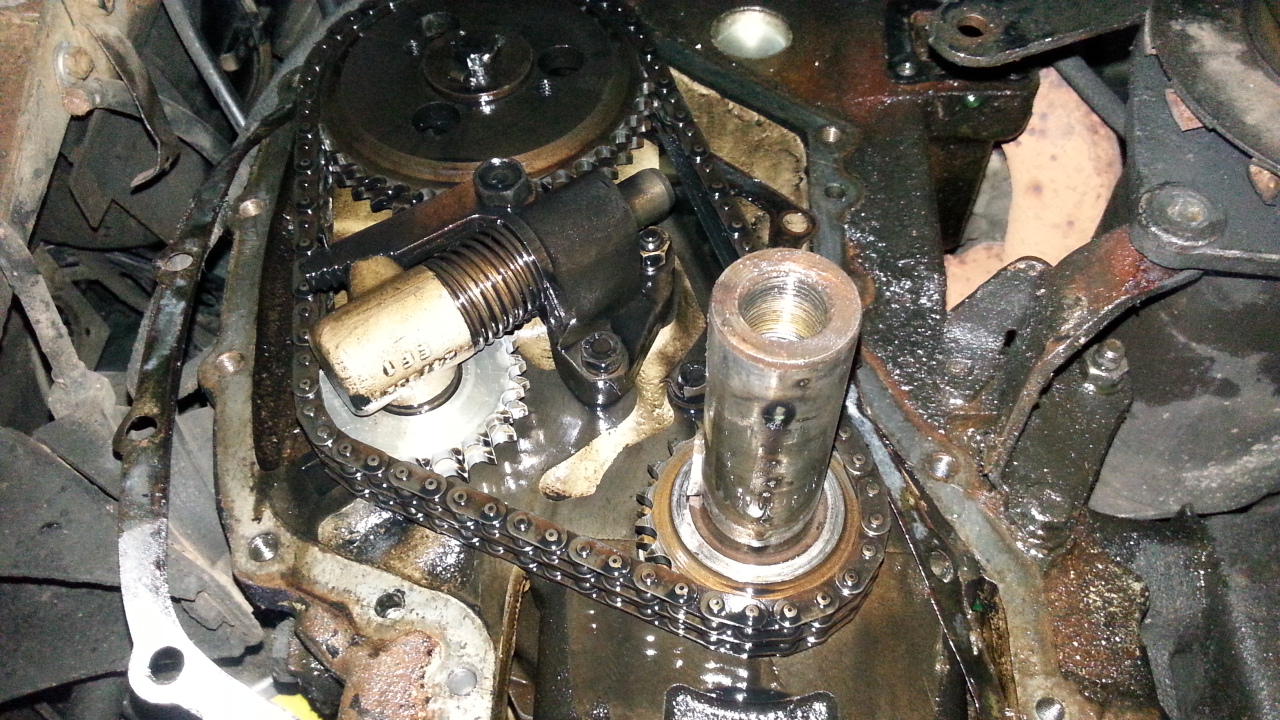
At high mileage it’s also worth swapping preventively, because these parts wear too. That includes, for example, a timing chain stretching or the guide rails wearing. Sadly, on more modern vehicles with their many ancillary units, access to the timing chain or belt is often very awkward and very involved.
Here we’re back at the engine oil change, by the way. The timing chain runs in the engine oil, so oil changes that aren’t done properly can lead to damage. So good servicing matters!
Reading OBD fault codes and the service interval display
If you have a vehicle with an OBD port and a suitable reader, it’s worth reading these OBD faults during a service. Although a deeper fault analysis is usually only possible with professional gear, and faults that the cheap consumer devices for the hobby spanner show you would probably have been spotted earlier anyway.
The OBD port is sometimes used, though, to reset the service interval display. So if you service the vehicle yourself, you have to take care of that.
Tip: On some vehicles the service interval display can be reset with procedures, like combinations of turning the ignition key and pressing various pedals. Here you have to look up the specifics for your own vehicle.
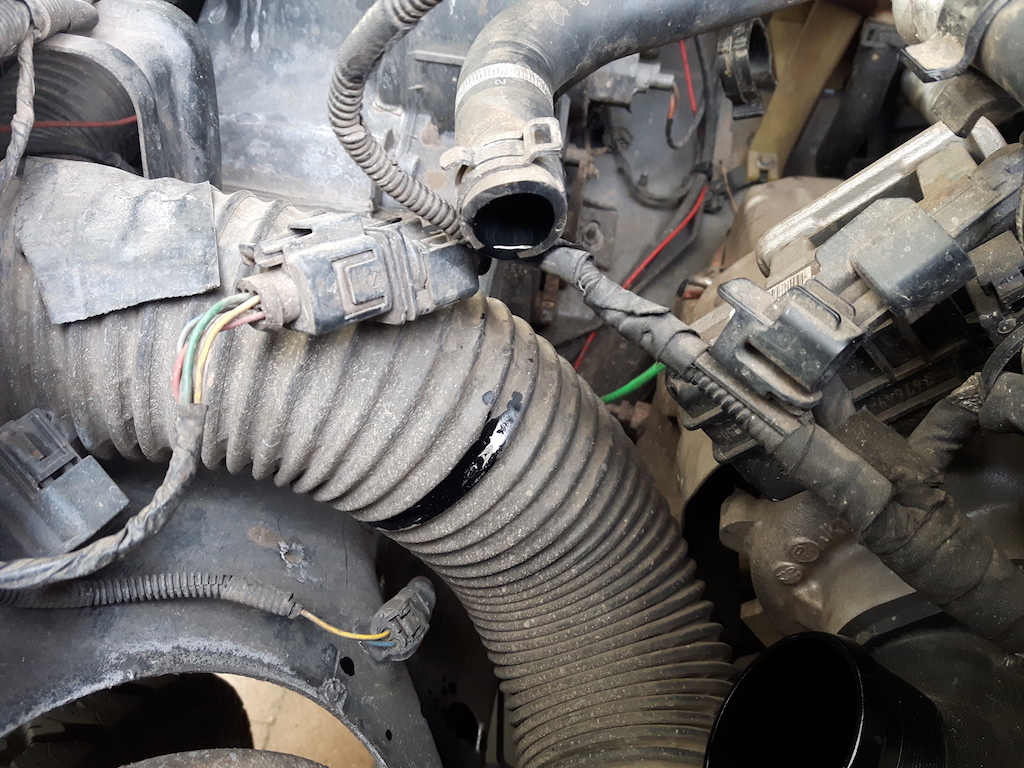
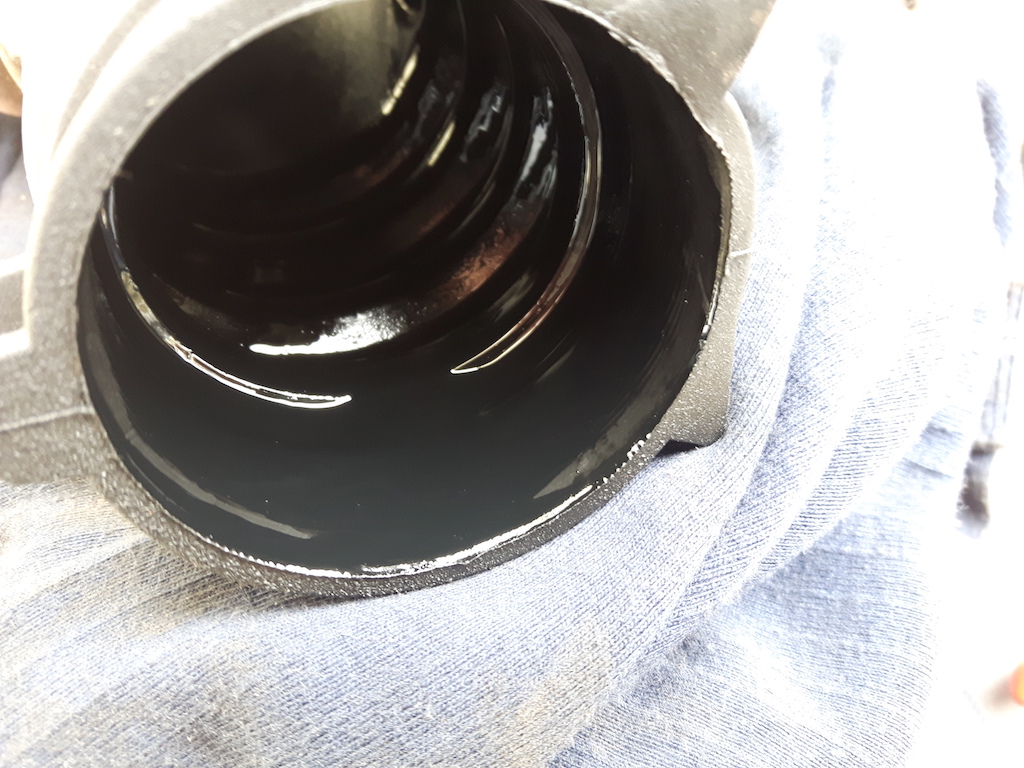
What’s the deal with crankcase ventilation?
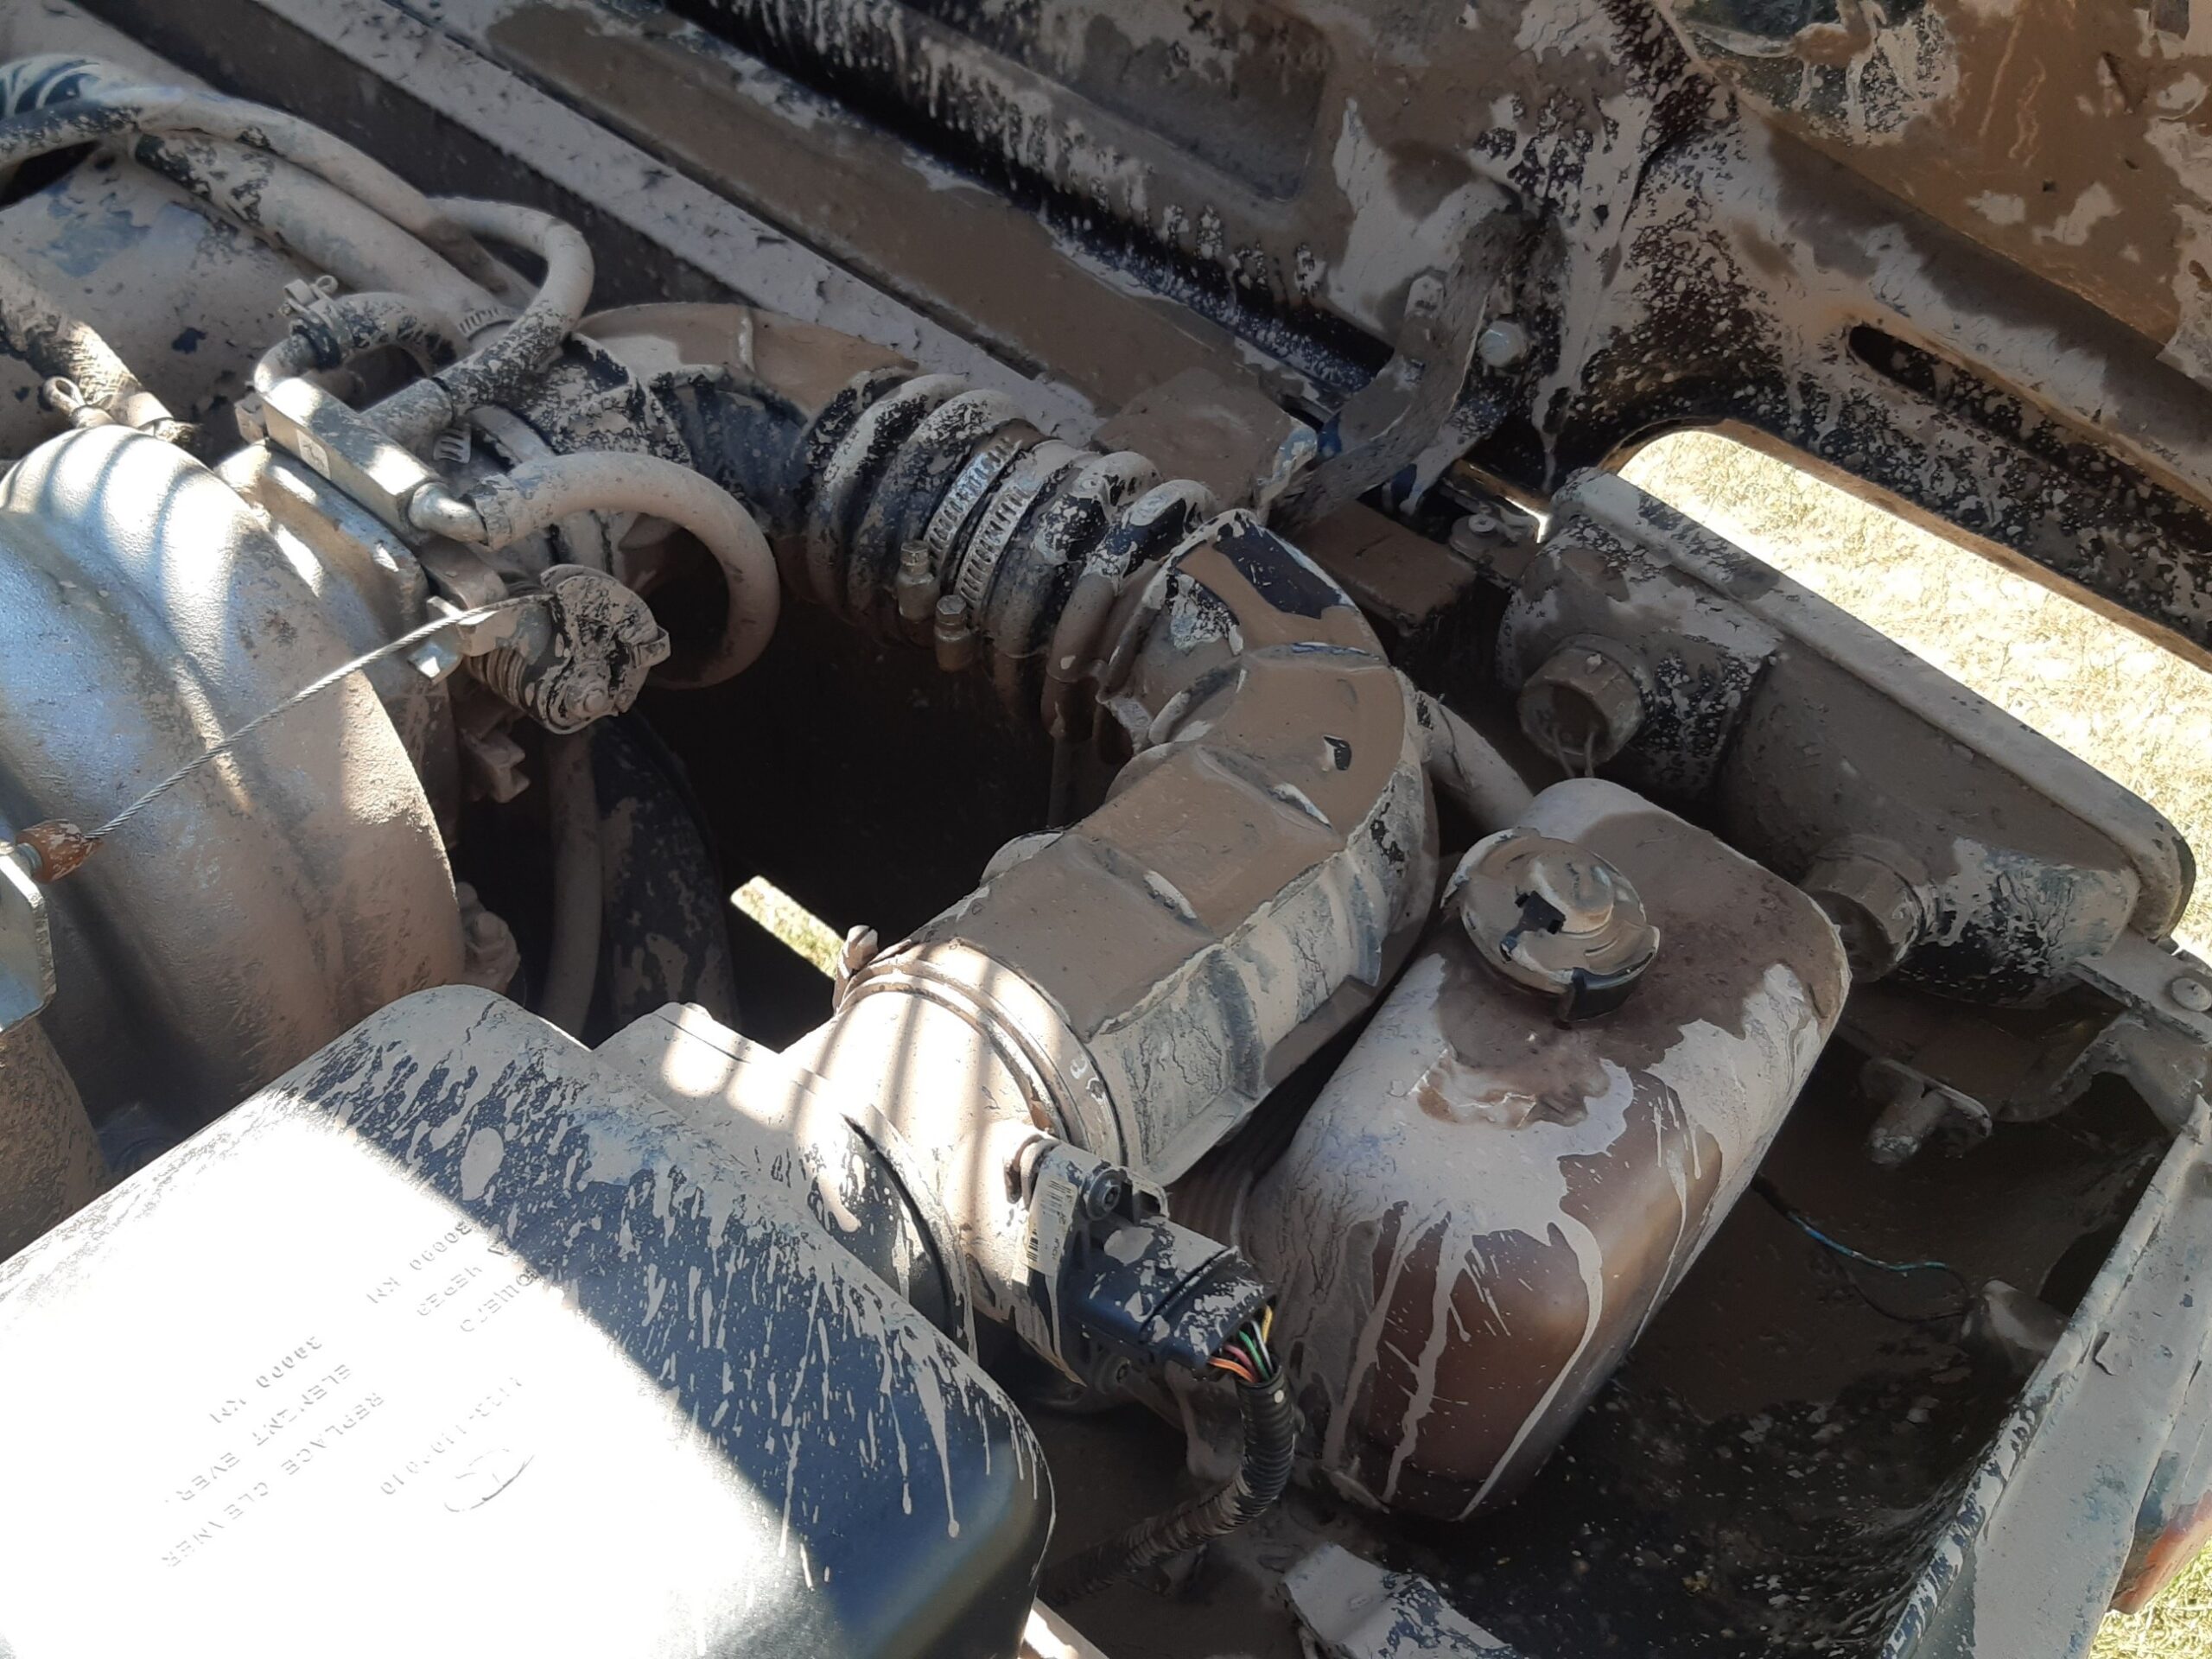
A combustion engine builds up pressure during combustion. Combustion gases slip past the piston rings and end up in the crankcase ventilation. These gases are a mix of the exhaust gases themselves, oil and fuel residue and water. As this residue is no longer simply released into the environment like it used to be, but finds its way into the engine’s air intake, oil and fuel residue can get in there. Most engines have an oil separator for this, and the separated engine oil goes back into the oil circuit instead of harming the engine in the intake. Even so, on many engines you can see contamination reaching the intake. This is especially relevant on diesels.
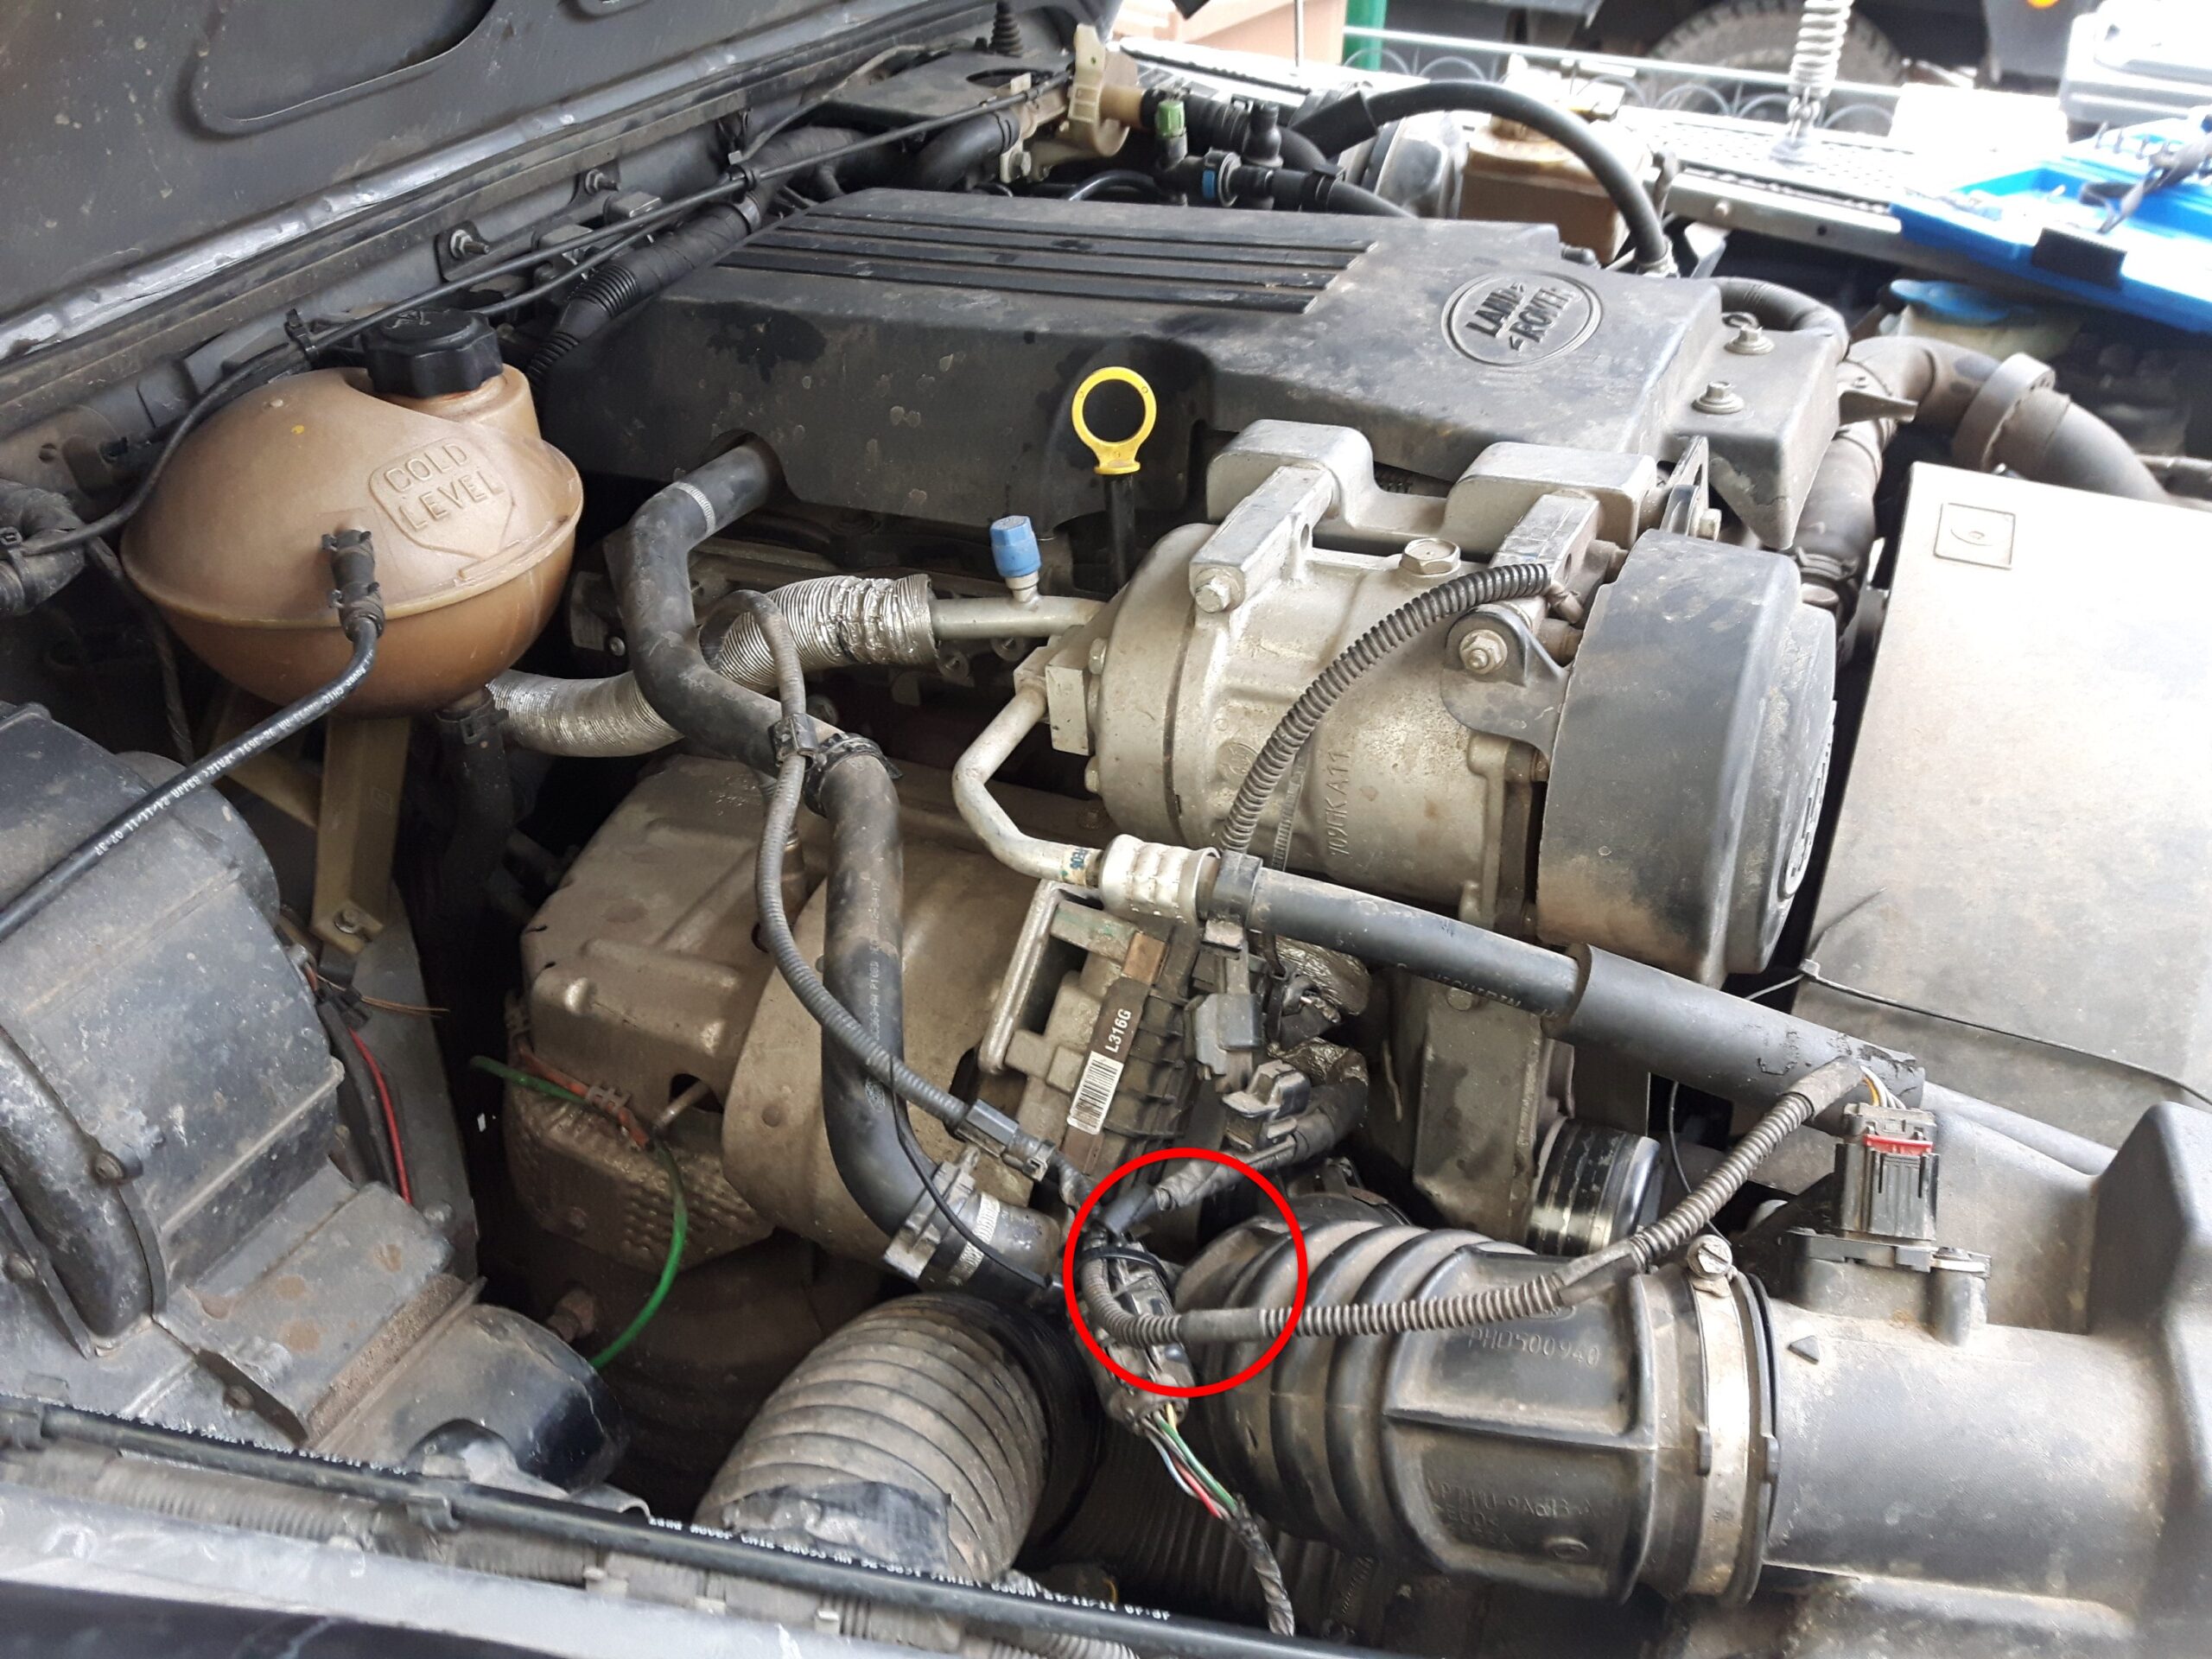
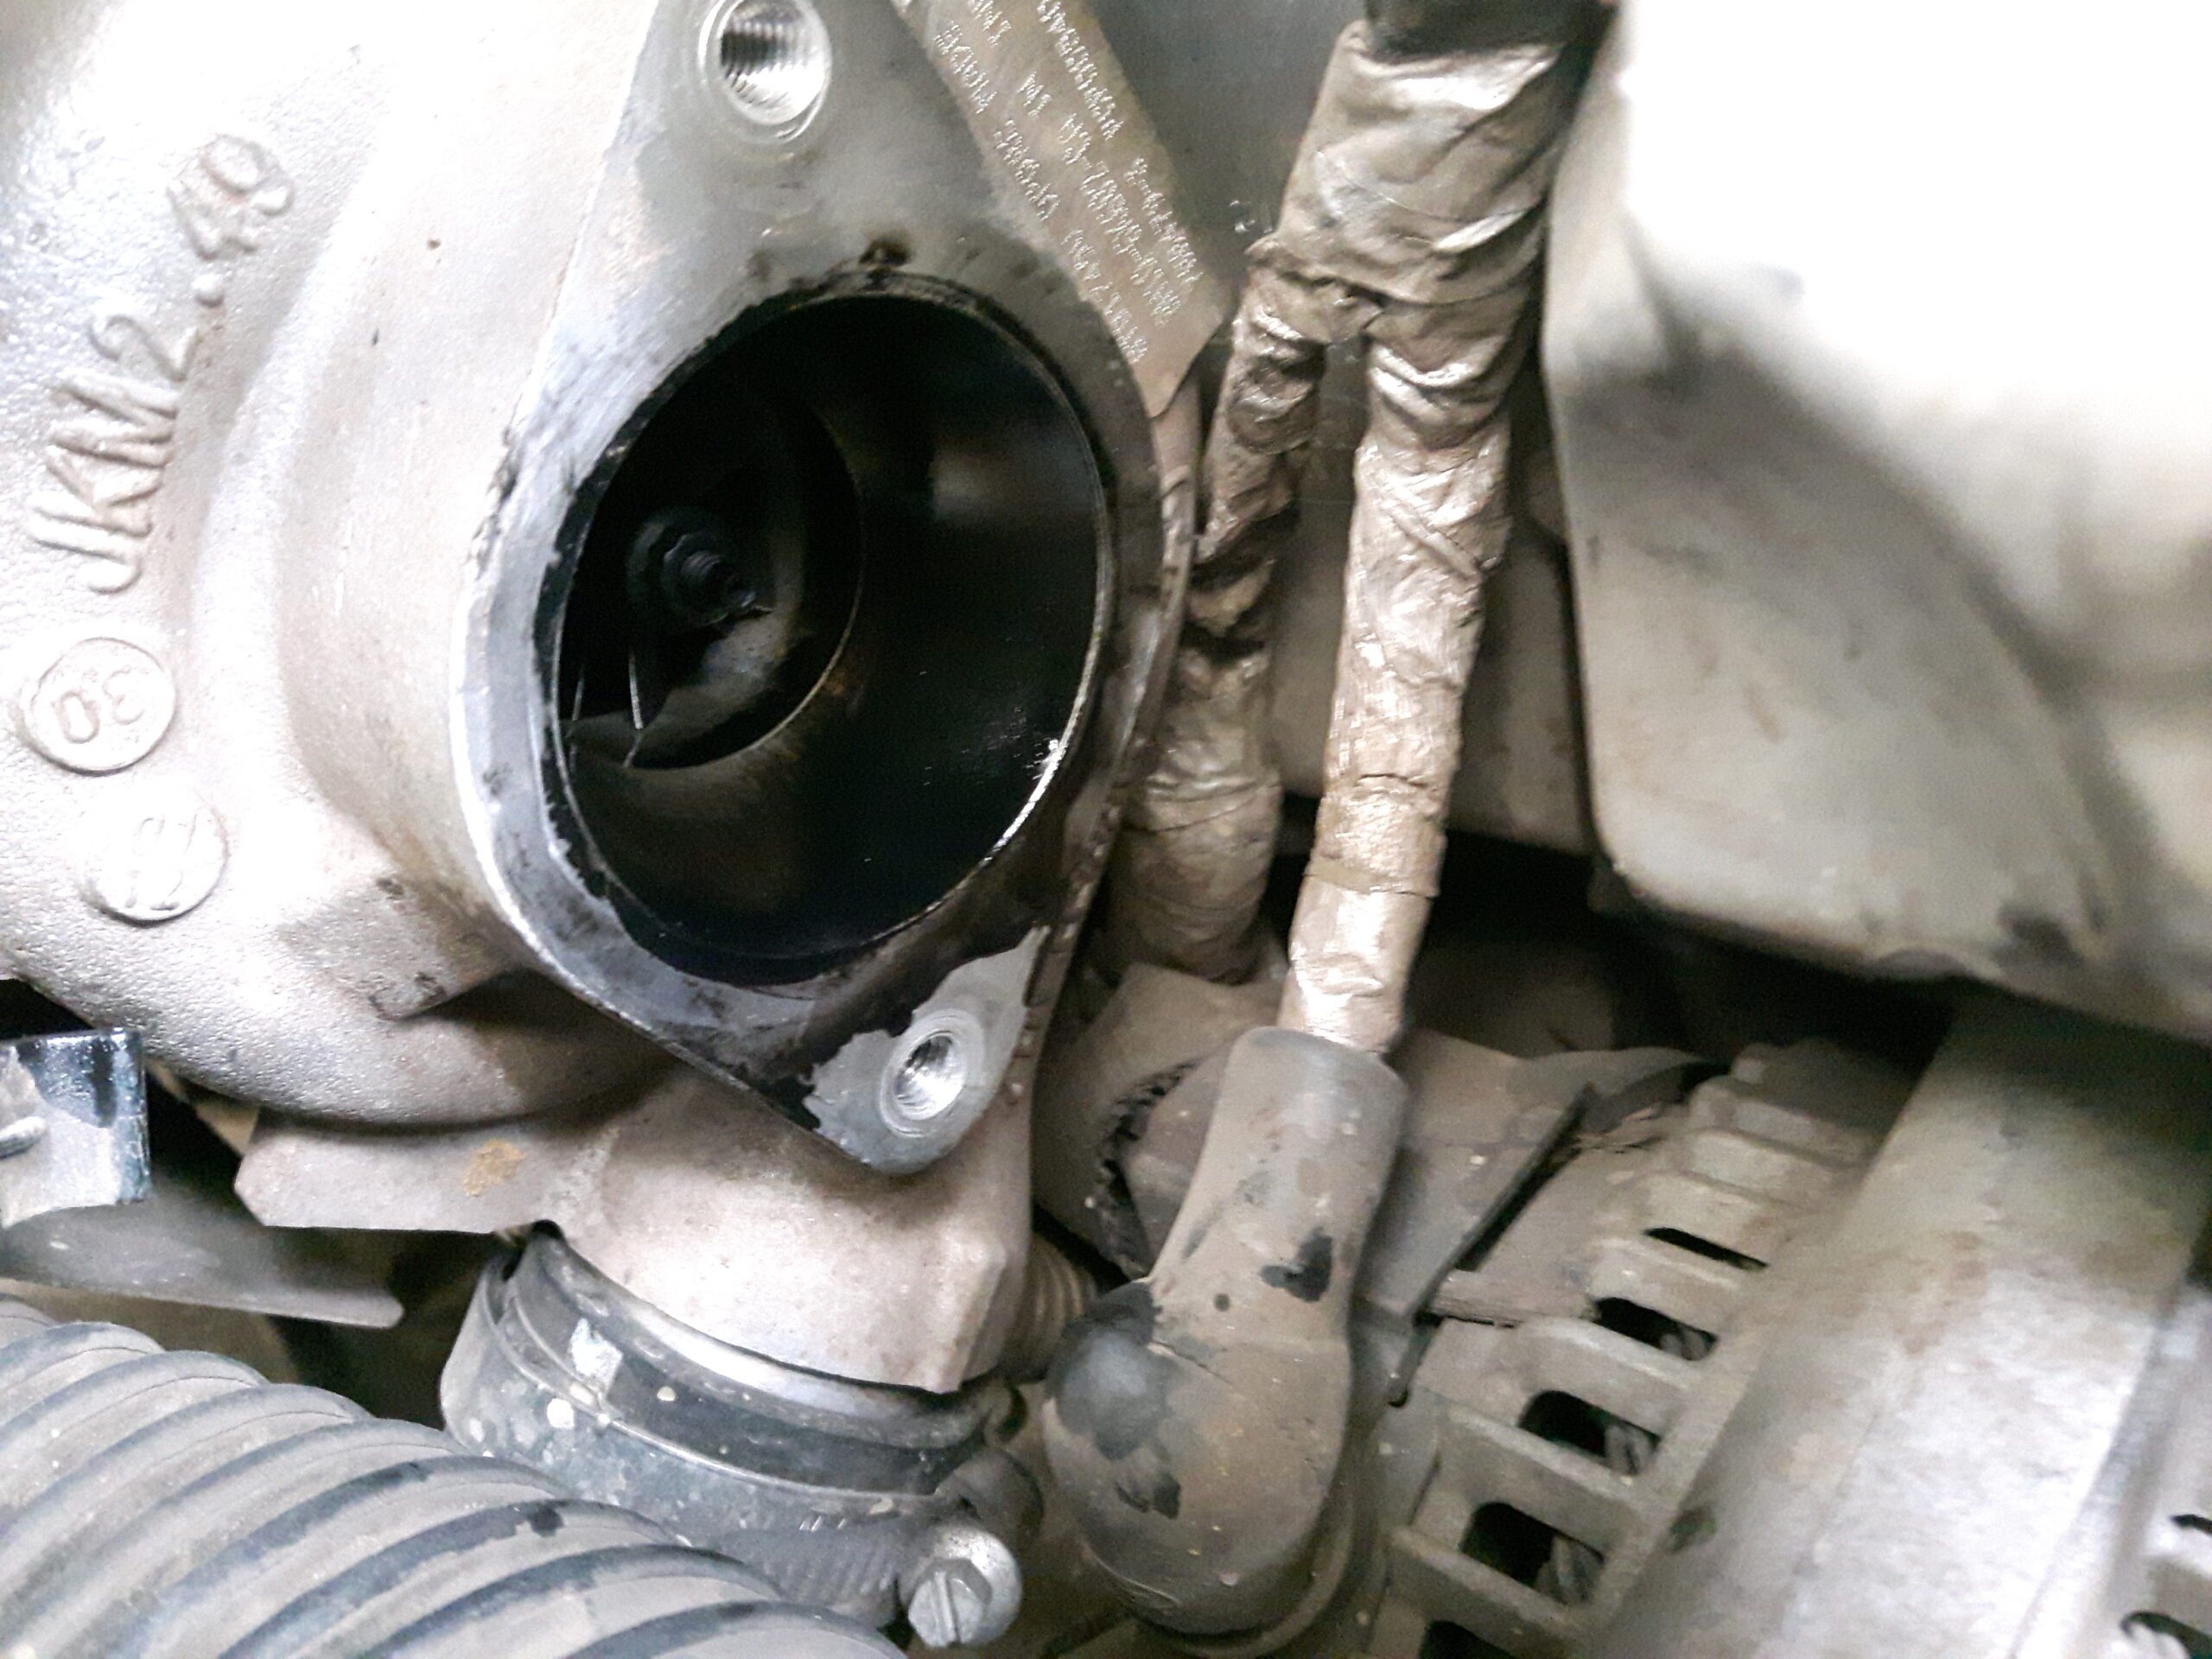
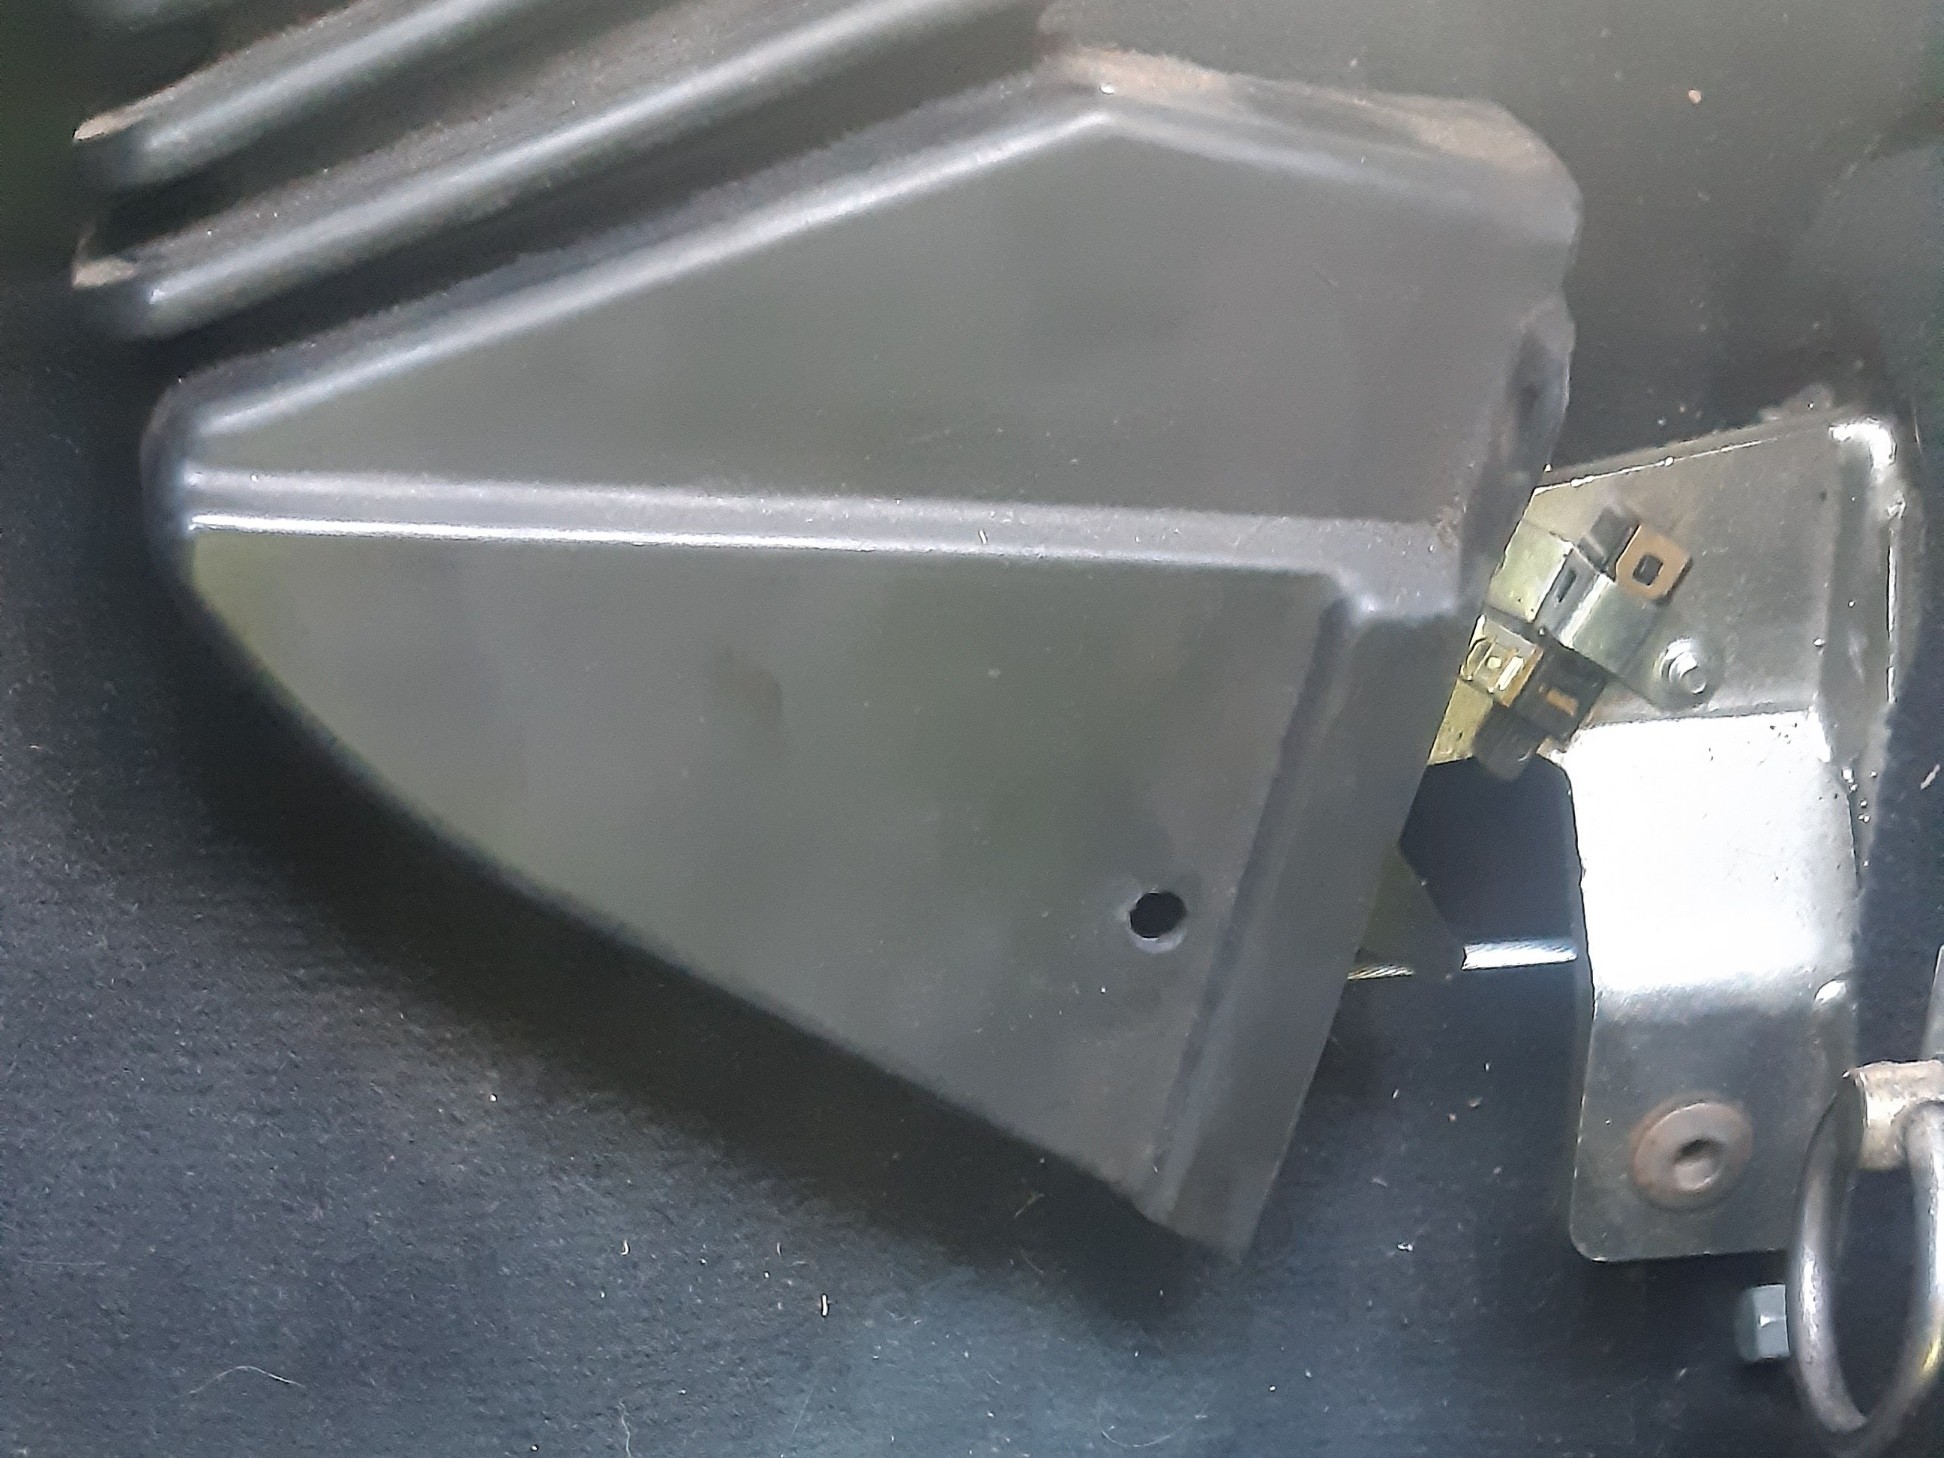
Take the air hose from the air filter to the turbocharger off and look at the hose from the inside, especially after the crankcase ventilation feed (see photo). If there’s a lot of oil in the hose after the crankcase ventilation feed, something is wrong. There should only be a light film. If too much oil goes through here, it harms the turbo and the intercooler can fill with oil over time. If it really gets so full that the engine can draw in the oil, that’s not good. In the best case the car feels like it runs a bit better, in the worst case the engine revs up out of control and you can only stall it with the foot brake in gear. If the air hose is oily inside, you should find the cause and flush the intercooler out, or have it flushed.
A separate separator, known as an oil catch can, can help, fitted between the engine’s crankcase ventilation and the air intake. For a retrofit there are some points for and some against. On one hand such an accessory can prevent carbon deposits building up in the intake and spare the engine, on the other it adds to the servicing work. There are also some reports of blockages, with the pressure in the crankcase rising as a result and finally leading to leaks on the engine. So with builds like this, bear in mind that it’s a big change to the engine design. Not to be overlooked is that a lot of condensate collects here, which at the right temperatures can freeze and cause just such blockages. Many common-rail diesels, which produce little waste heat, have a heated crankcase breather to prevent exactly this.
So if you do have an oil catch can on your engine, it naturally has to be checked and emptied regularly. We’ll cover the oil catch can, its pros and cons and a possible retrofit in more detail in a separate technical article.
The gearbox and drivetrain hang off the engine
Here it’s especially helpful if you have a ramp. If not, you should still go to the trouble and crawl under the car. Of course, secure the car against rolling away first!
As usual you look at the general condition first. Is there obvious damage or leaking? How do the rubber boots look? Cracked or even split? Then check the function of your drivetrain. Run through the various functions of your four-wheel drive and the low range, and check that any manually engaged diff locks work, unless you use these functions regularly anyway and so would have noticed faults already.
We’ve summed up the various four-wheel-drive concepts and functions in this article for you.
The gearbox, transfer case and differentials also need regular oil changes
Much the same applies here as with the engine oil change. Check the intervals and specs in your vehicle’s manual. Before and after a trip, extra oil changes are often sensible, for example if you’ve had a lot of water crossings where water might have got into the differentials or even the gearbox. If no oil change is due, you should at least check the levels.
With automatic gearboxes it can get complicated. If you have an older vehicle, a classic oil change by draining and refilling can usually be done. Be aware, though, that a good half of the oil isn’t changed this way, because it stays in the torque converter. As an alternative there’s the flushing method, where oil is pumped into the gearbox until only new oil comes out. For that, though, you need the right gear, and a certain oil temperature should be held so there isn’t too much or too little oil in the gearbox at the end. This also flushes out suspended particles. Depending on the gearbox type, even the oil filter in the gearbox has to be changed too. For that, the gearbox sump often has to come off. As you can see, this is a job for the specialist workshop. Luckily the oil change doesn’t need doing that often.
Sometimes you’ll hear with the gearbox that no oil change is needed, because it’s a so-called “lifetime” fill. That suggests no change is needed any more. Sadly that’s not the case, because what a maker declares “lifetime” is often a certain mileage, like 180,000 km. Sometimes a look at the gearbox maker’s figures helps, and lo and behold, they do specify service intervals, which often should be done even earlier than the vehicle maker recommends. Look into this carefully and have the oil changed accordingly.
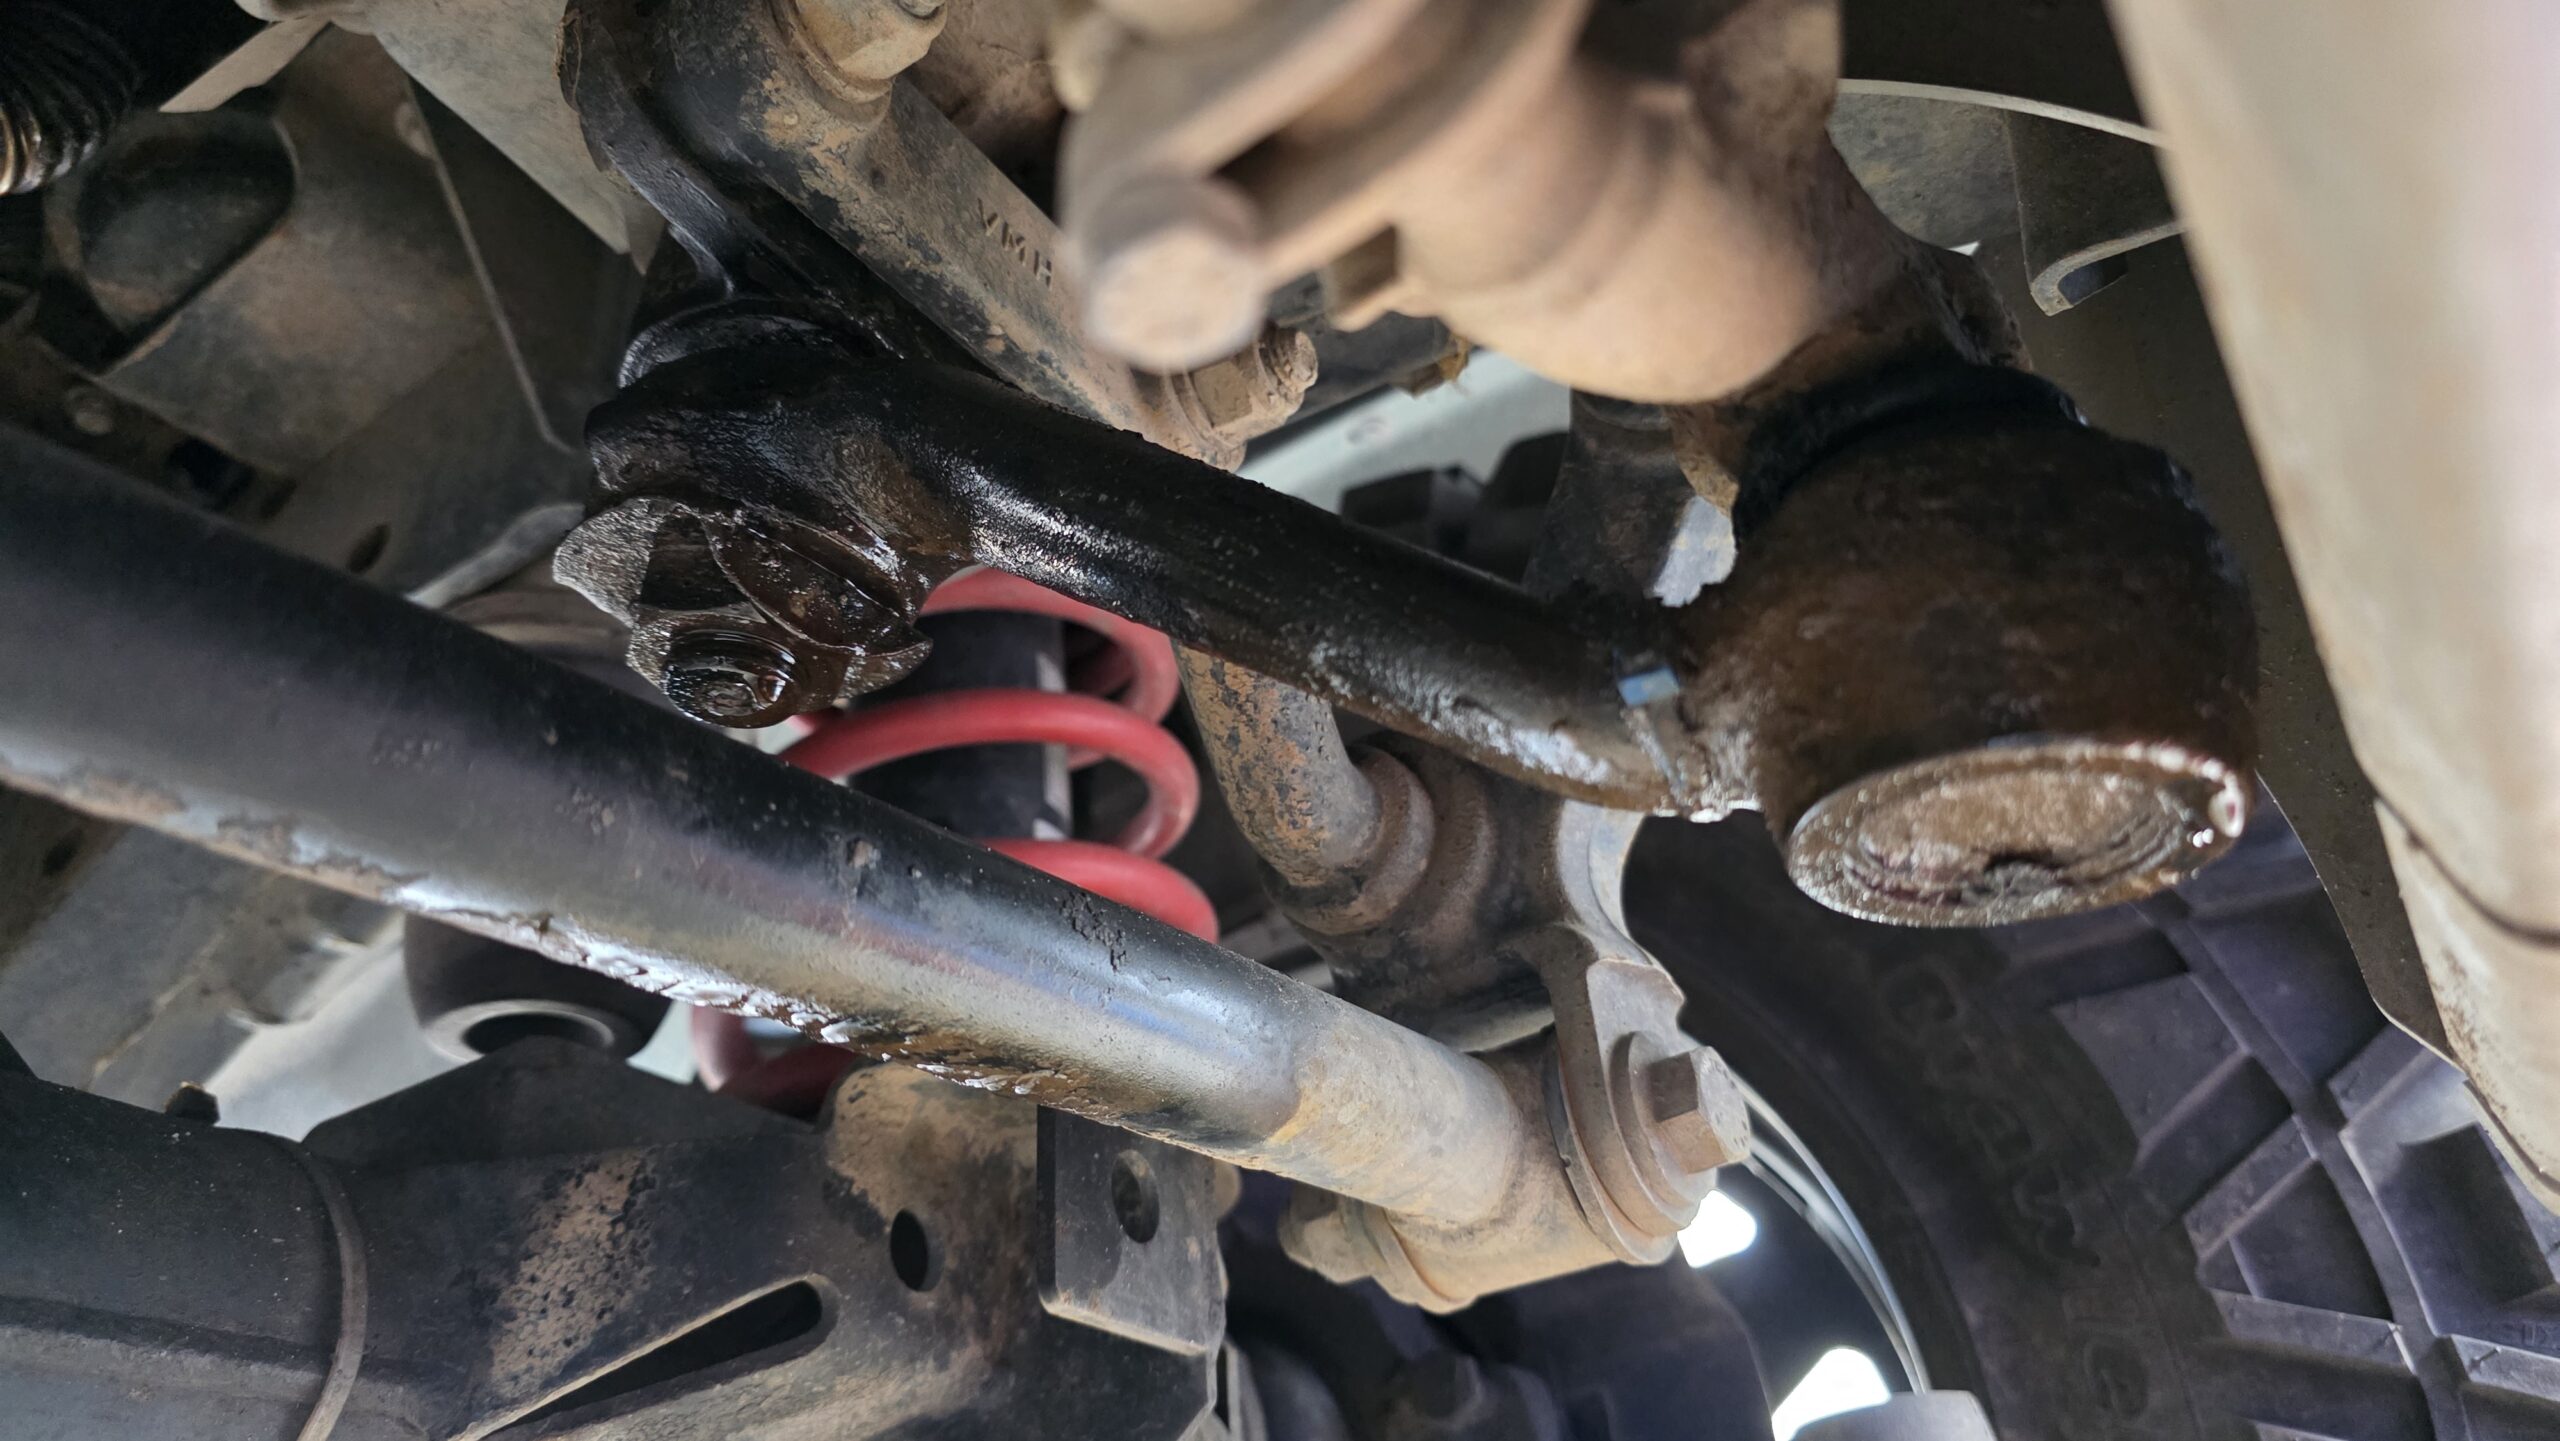
Universal joints
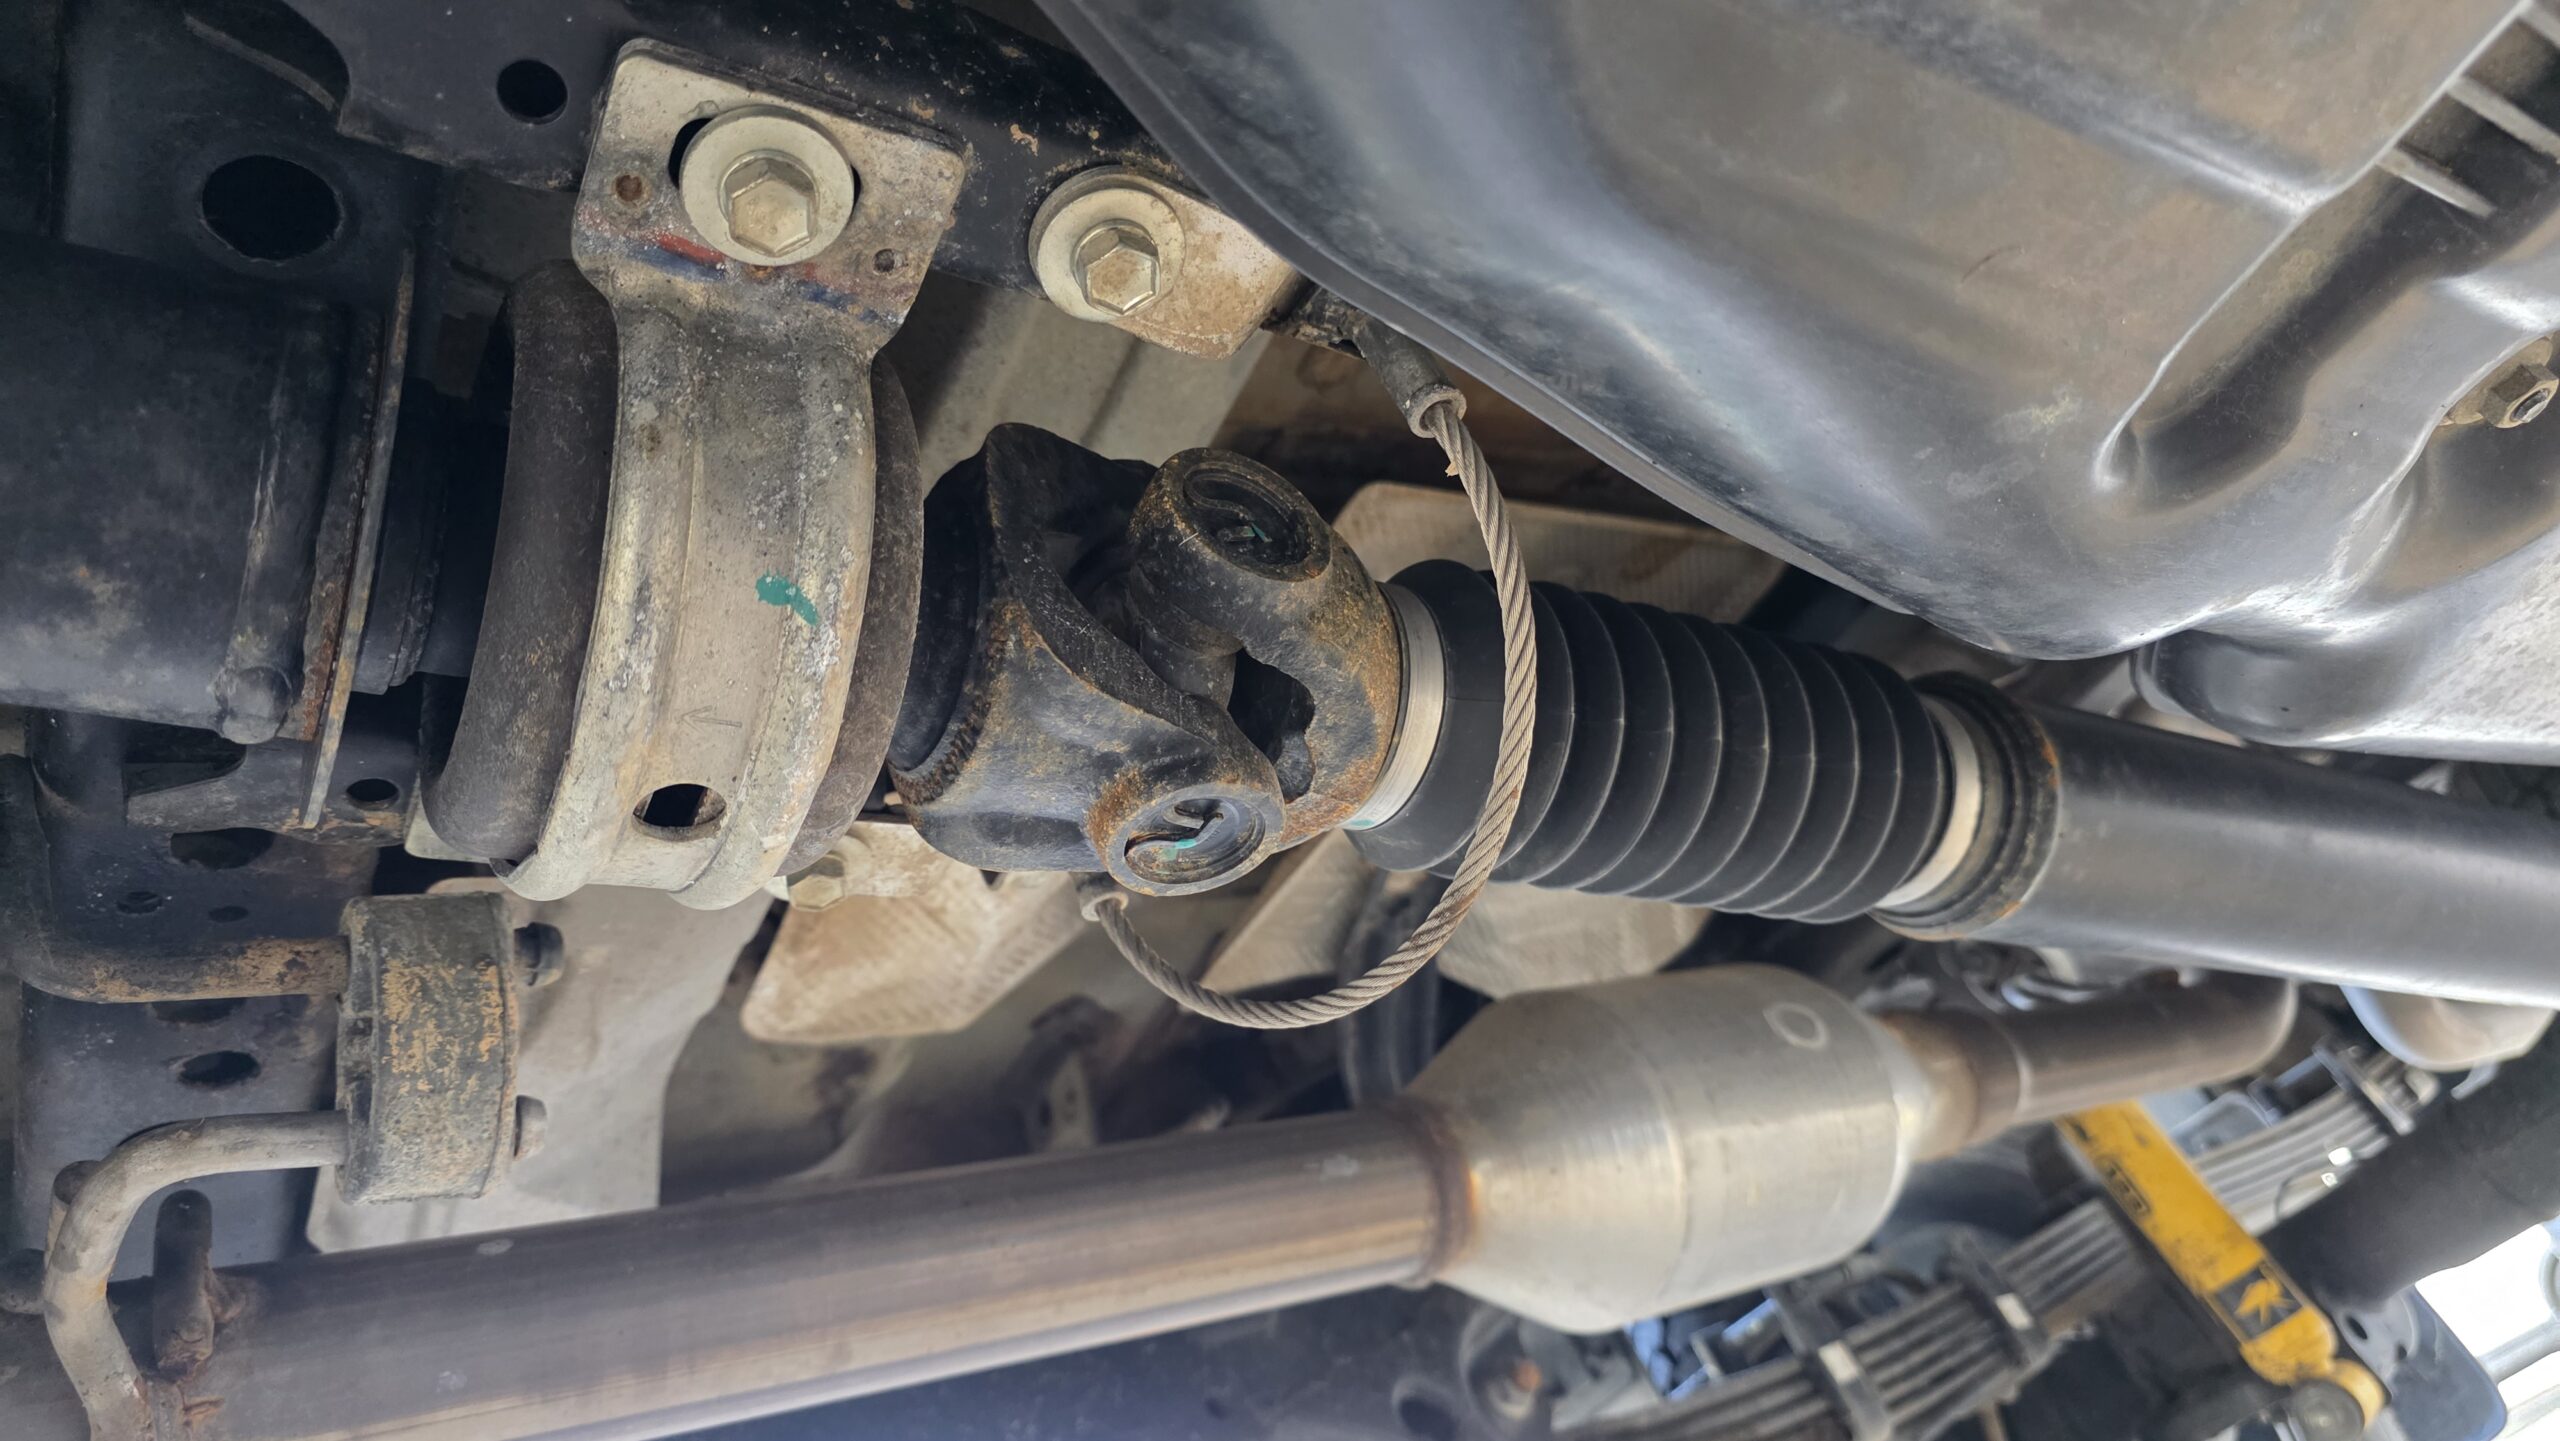
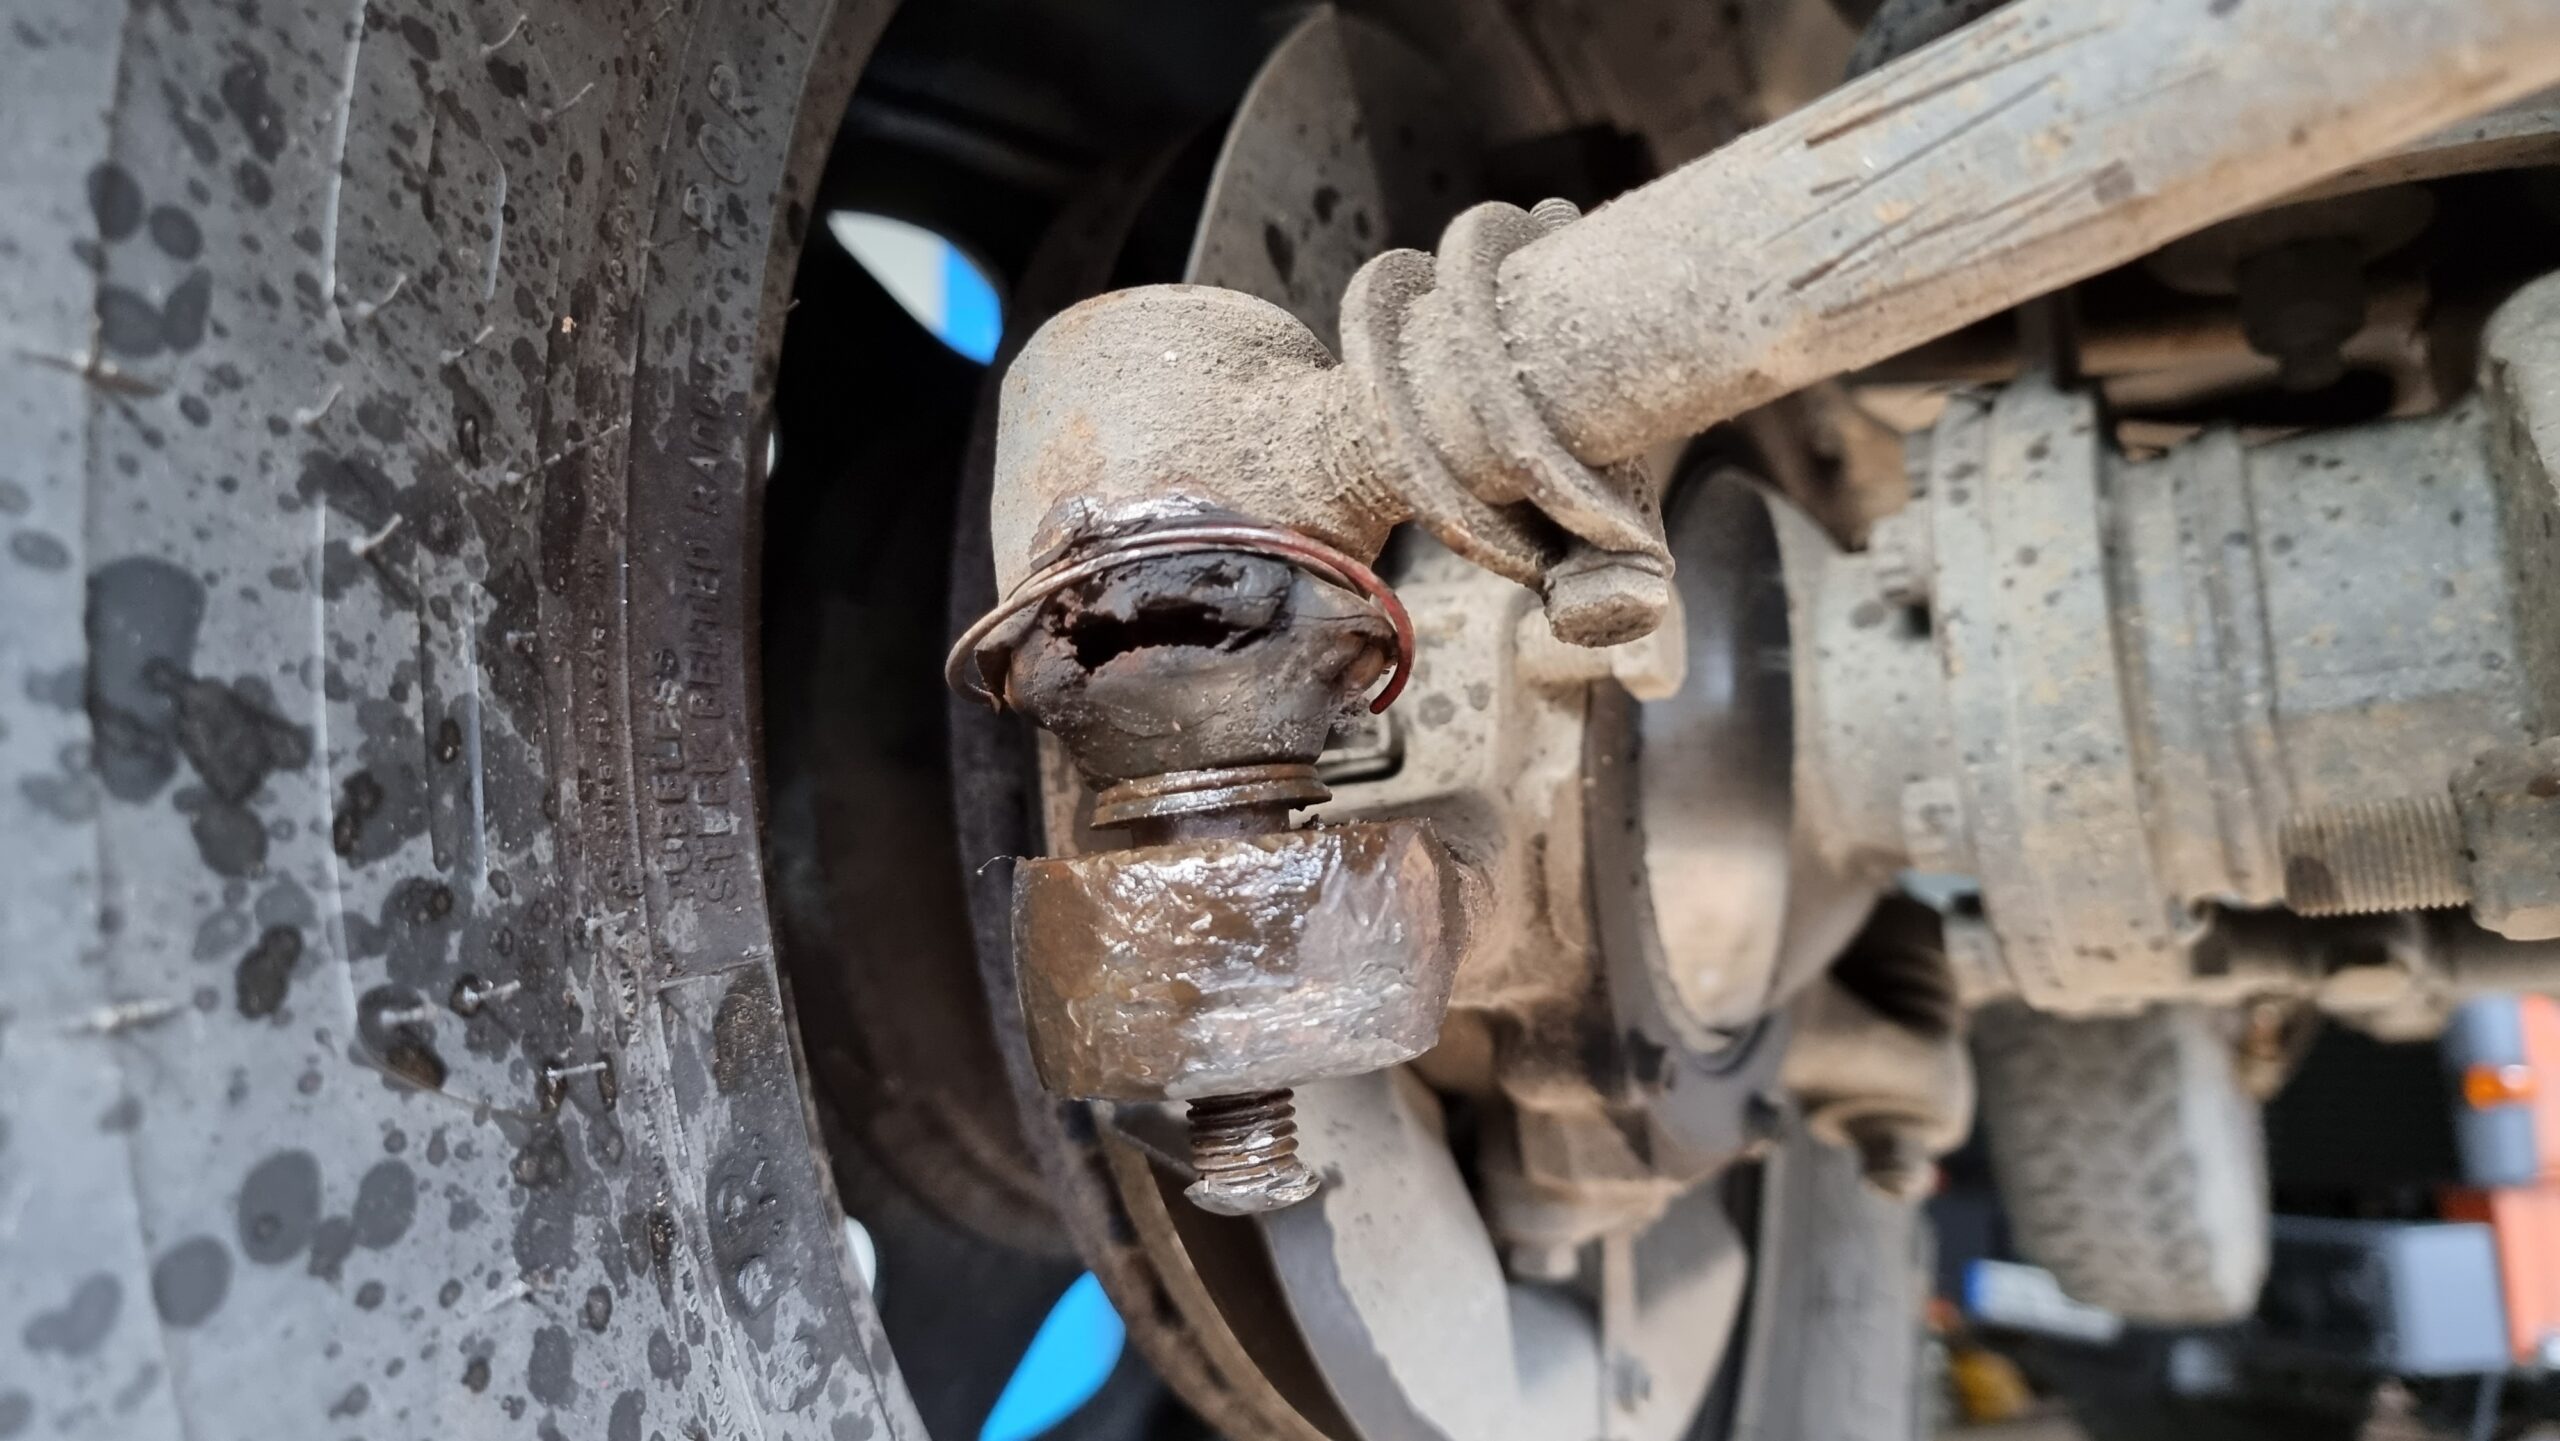
Check the universal joints for play. Grip the two yokes of a joint firmly and try to move them against each other in every direction. Up, down, sideways and so on. There must be no play you can feel or see. None at all. If you feel or see play, the joint has to be swapped. If not, give them fresh grease, where there are grease nipples. Some universal joints can’t be greased later. If the grease doesn’t come out of all four cups, turn the shaft so the joint moves to another position. Grease again. If necessary, the propshaft has to come out so it’s completely unloaded.
If you don’t look after your universal joints, after a while they look like the next photo. You notice it first through play in the drivetrain, a knock on the throttle on/off, and at an advanced stage of damage even squealing and grinding noises can be added. These are usually easy to hear when you drive past a wall that bounces the sound back.
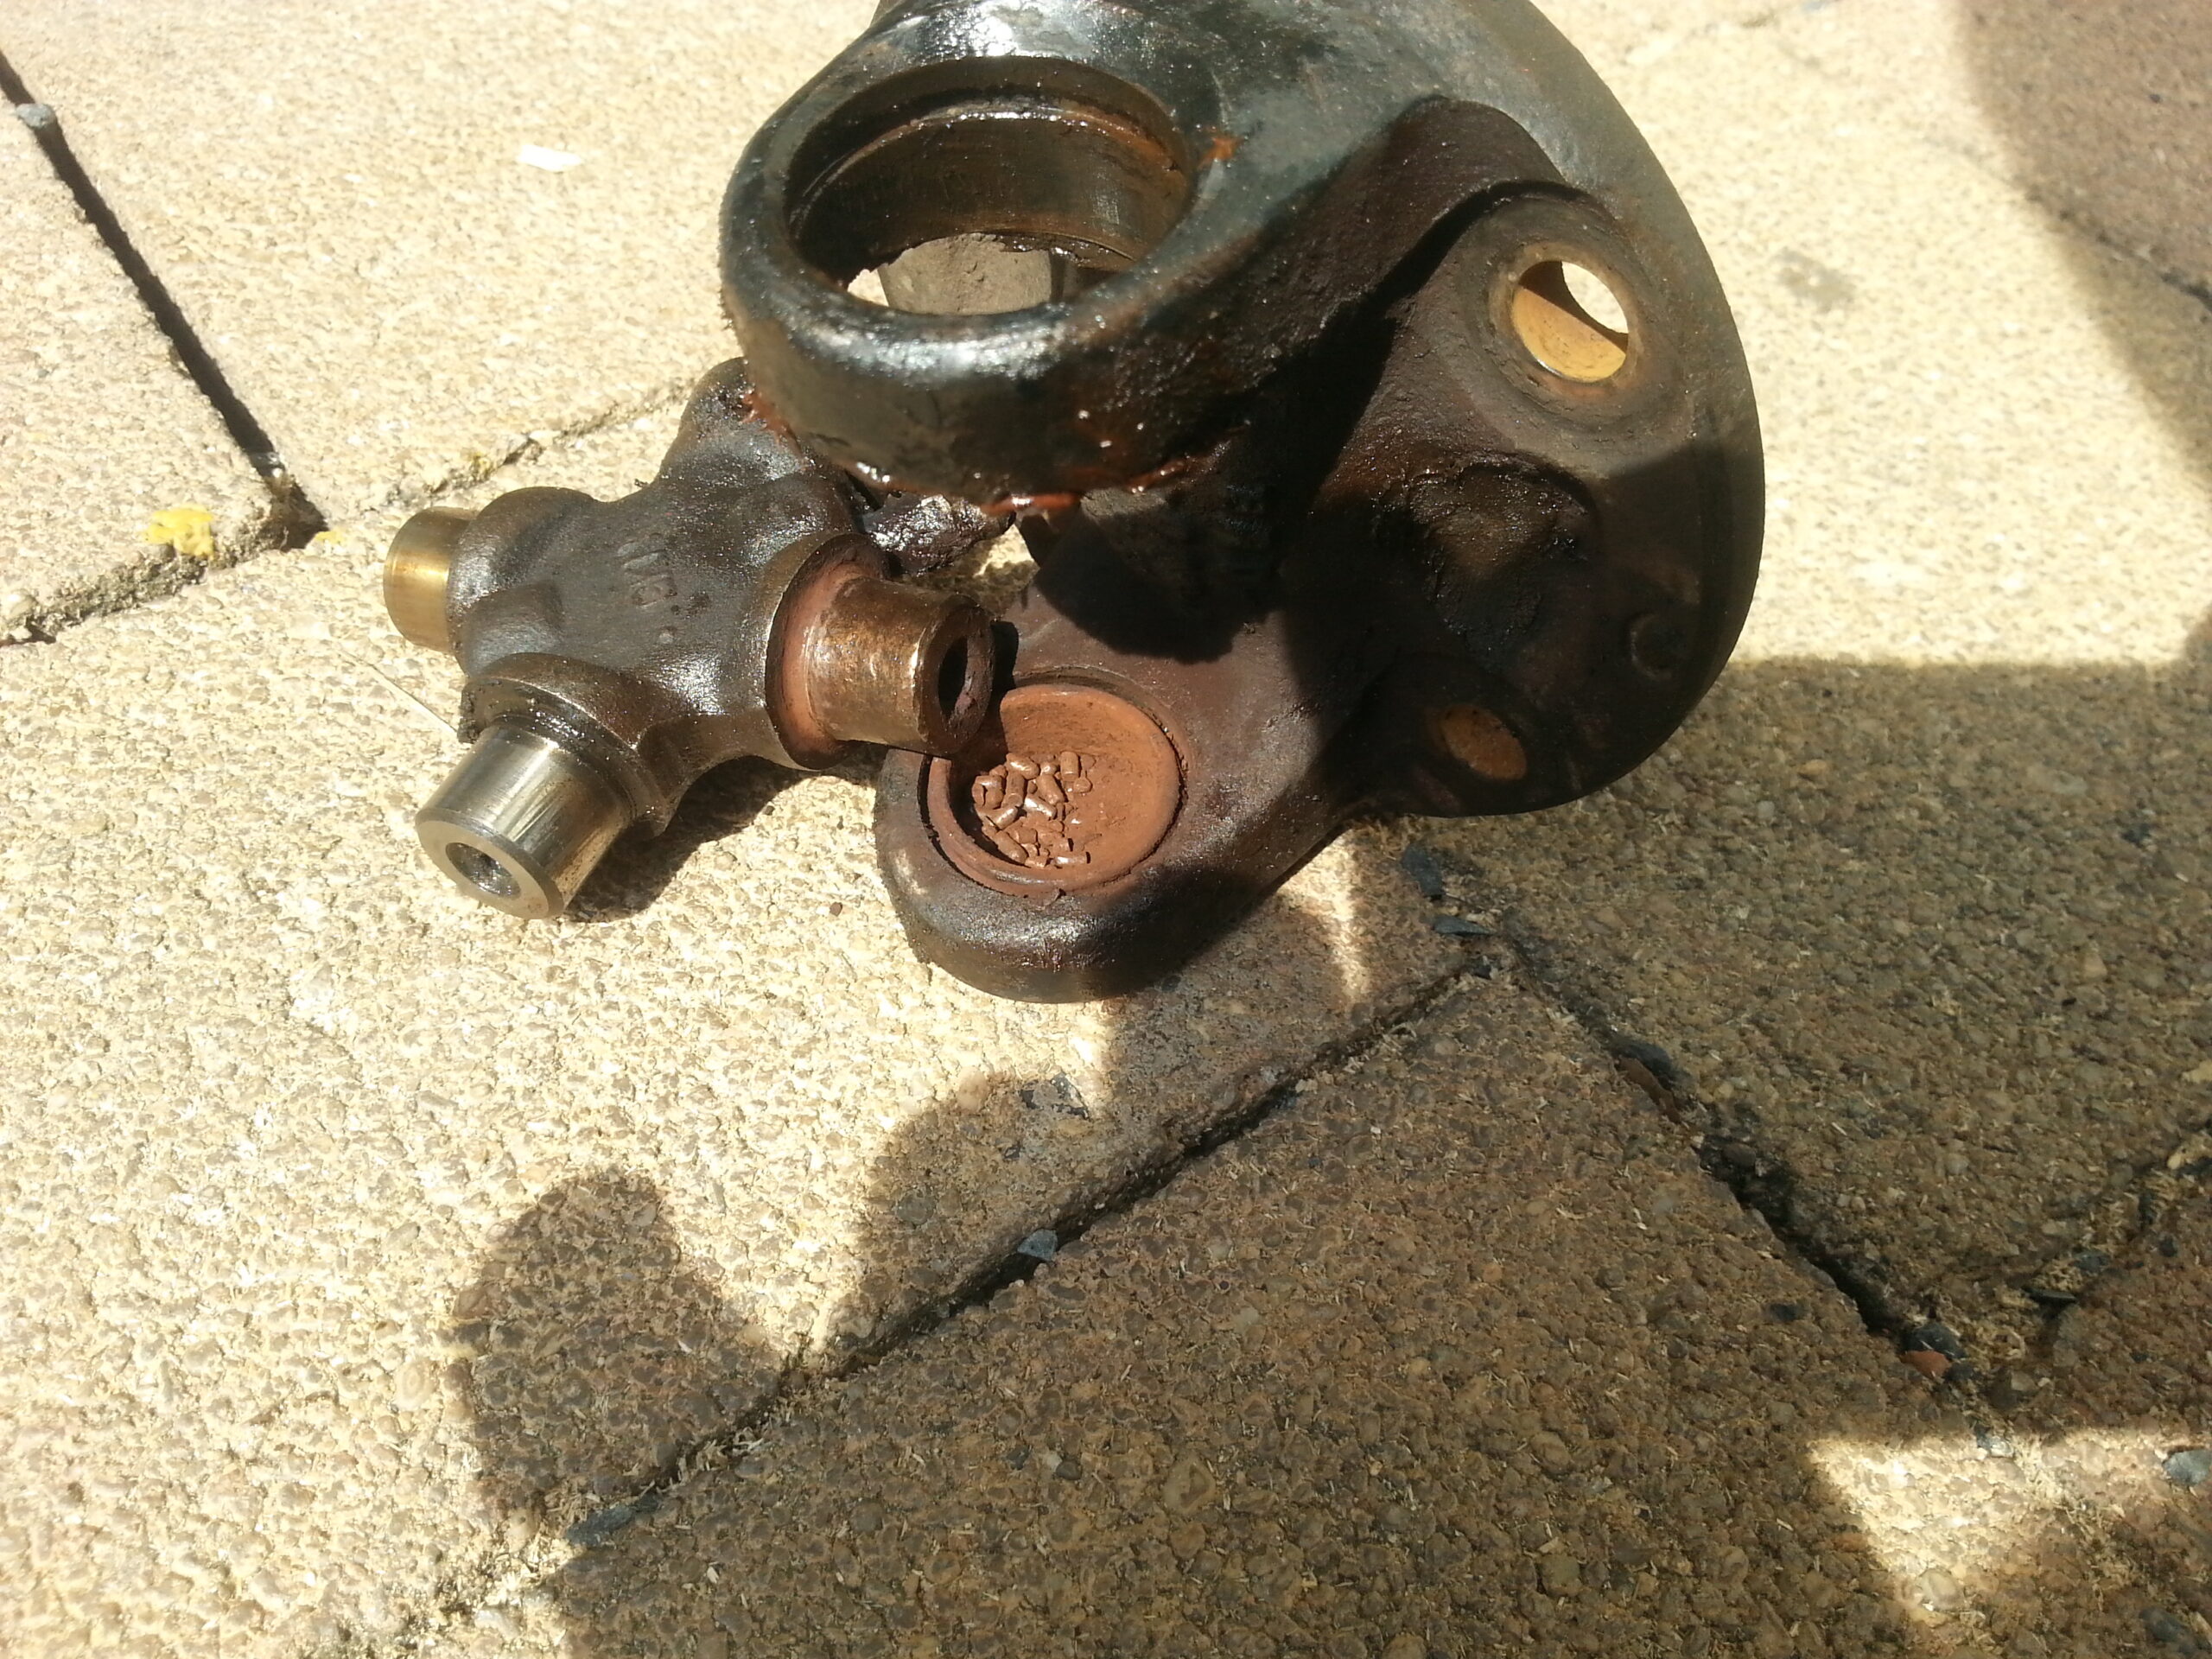
Don’t underestimate how important the universal joints are. Just look under a properly built pick-up. There you’ll find a catch loop on the front part of the rear propshaft. If the universal joint breaks and the front part then drops to the ground, that can have fatal consequences. This way the shaft only drops into the catch loop. And to save yourself exactly that, good servicing matters.
More on universal joints, servicing and replacement is here: Universal joints. At the end of the propshaft article there’s a detailed video on the subject.
Drive shafts and drive flanges
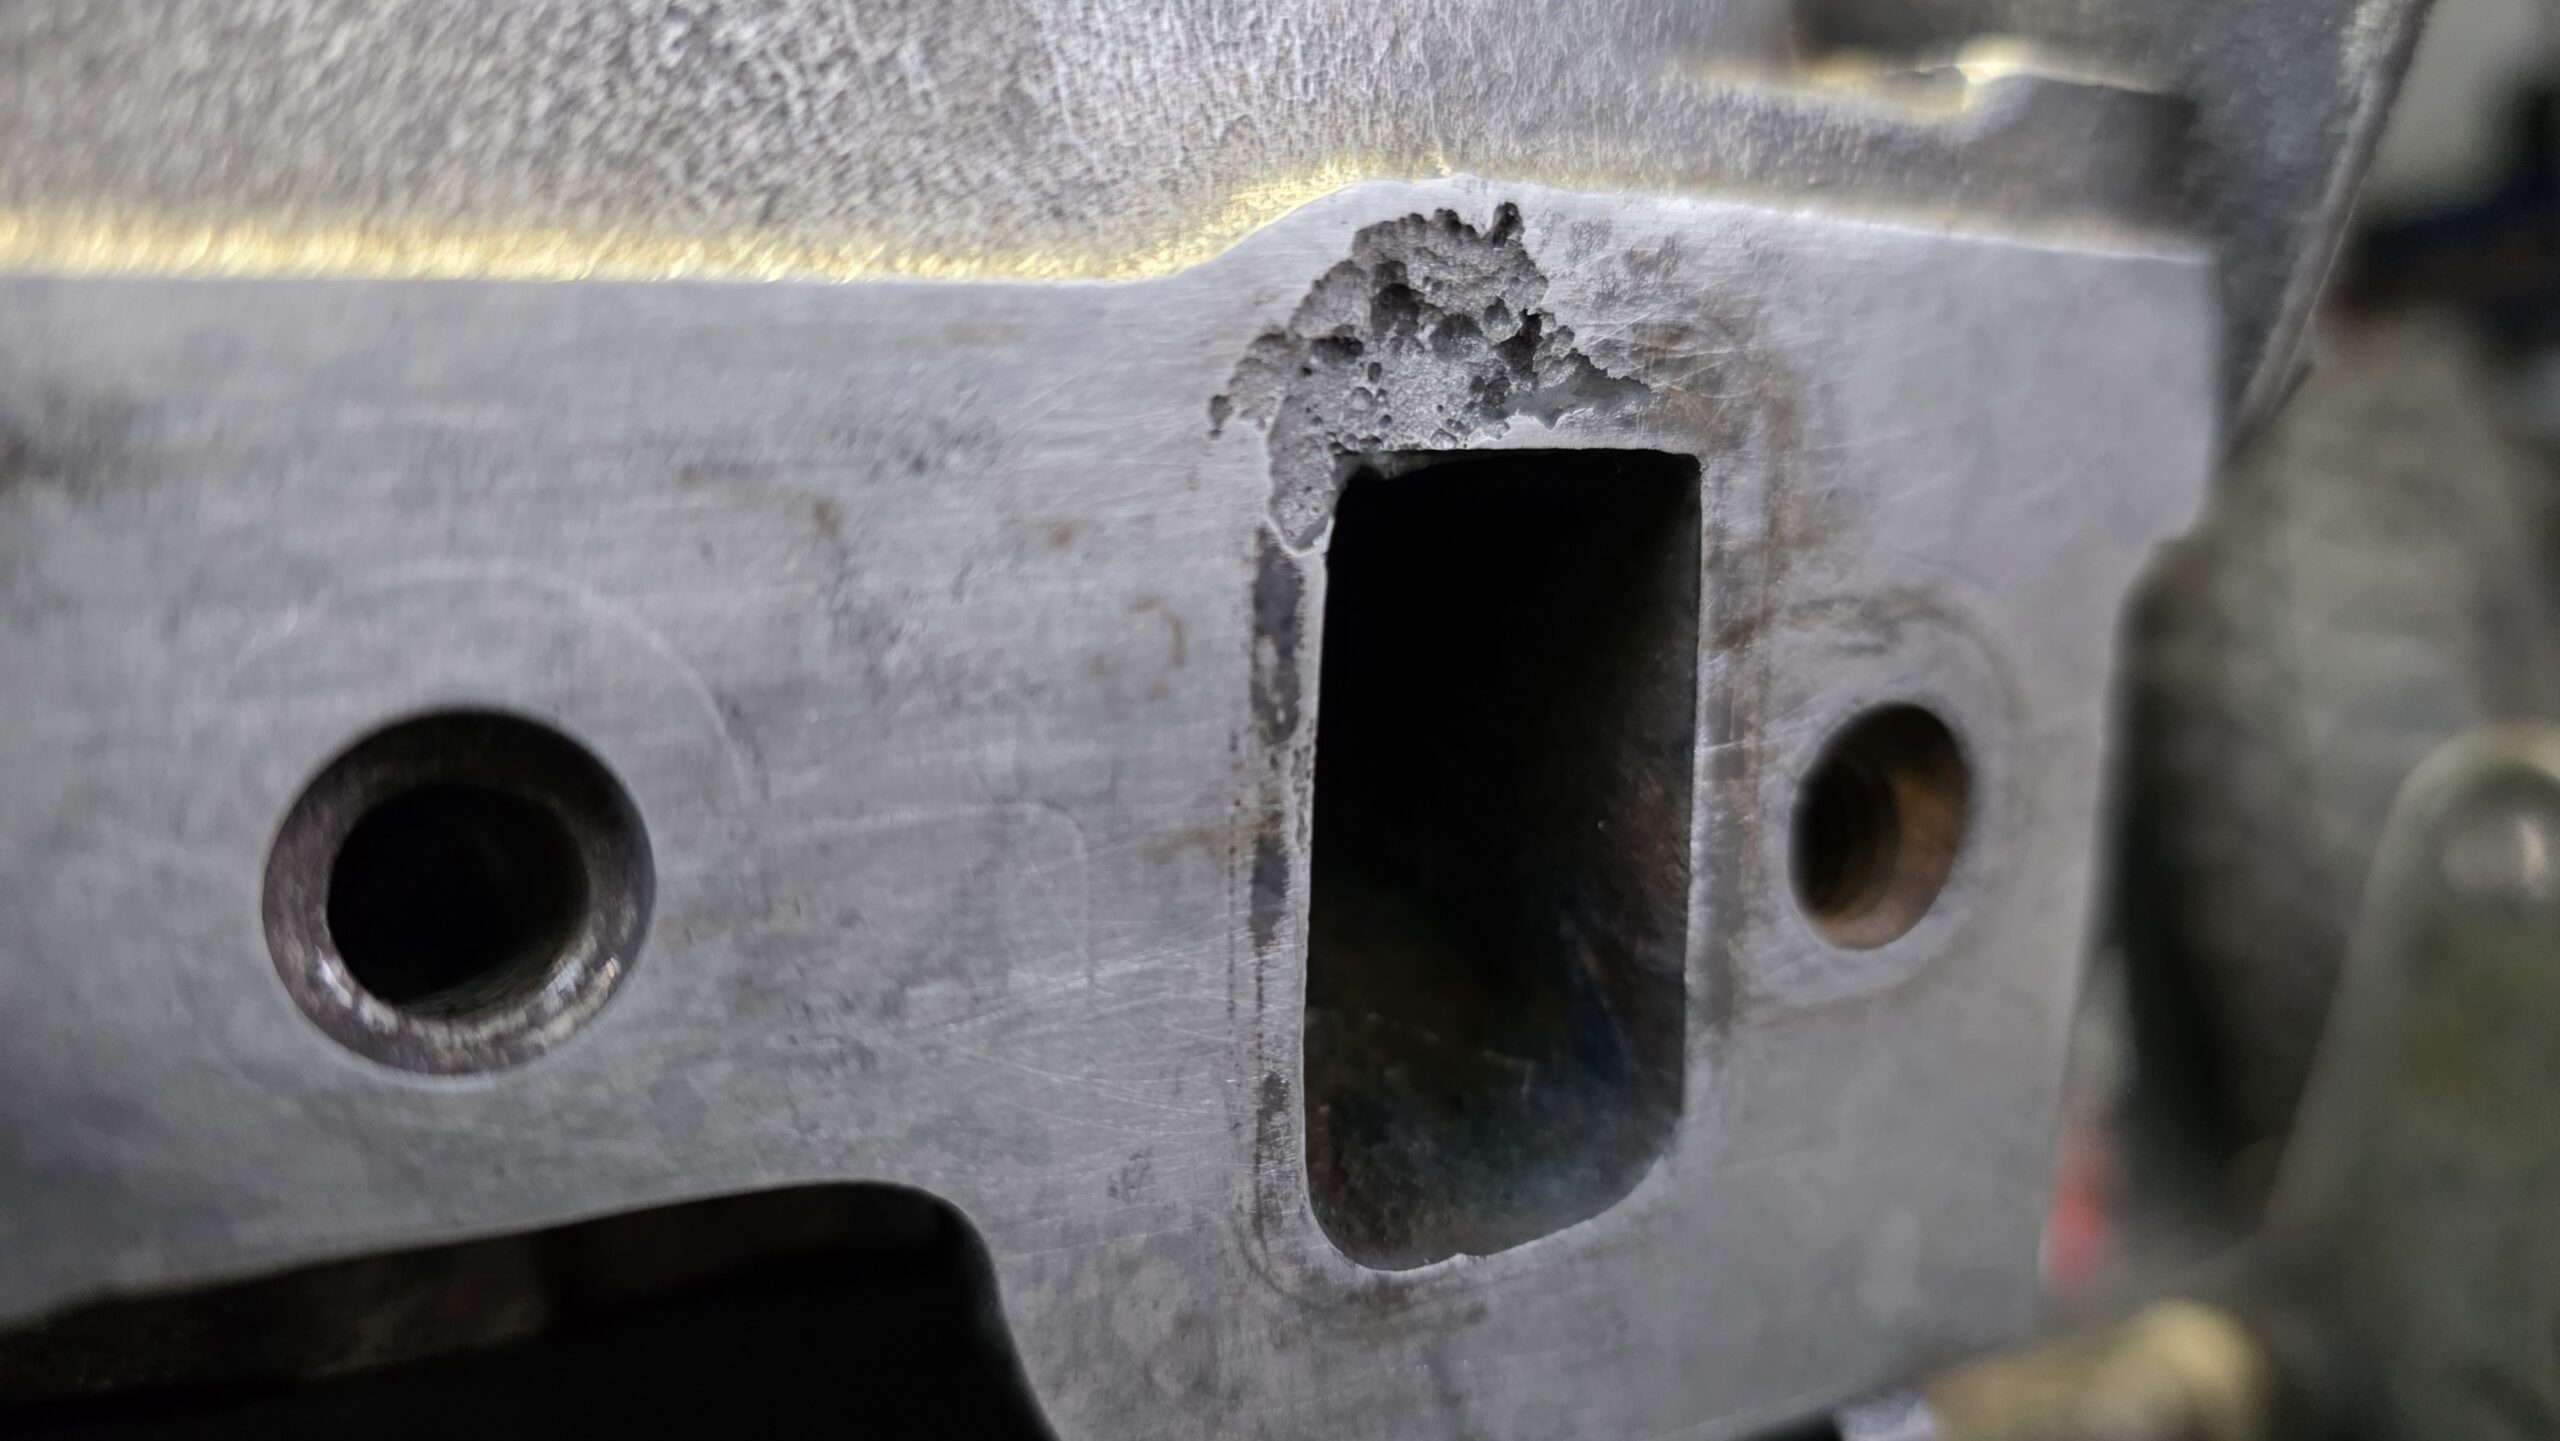
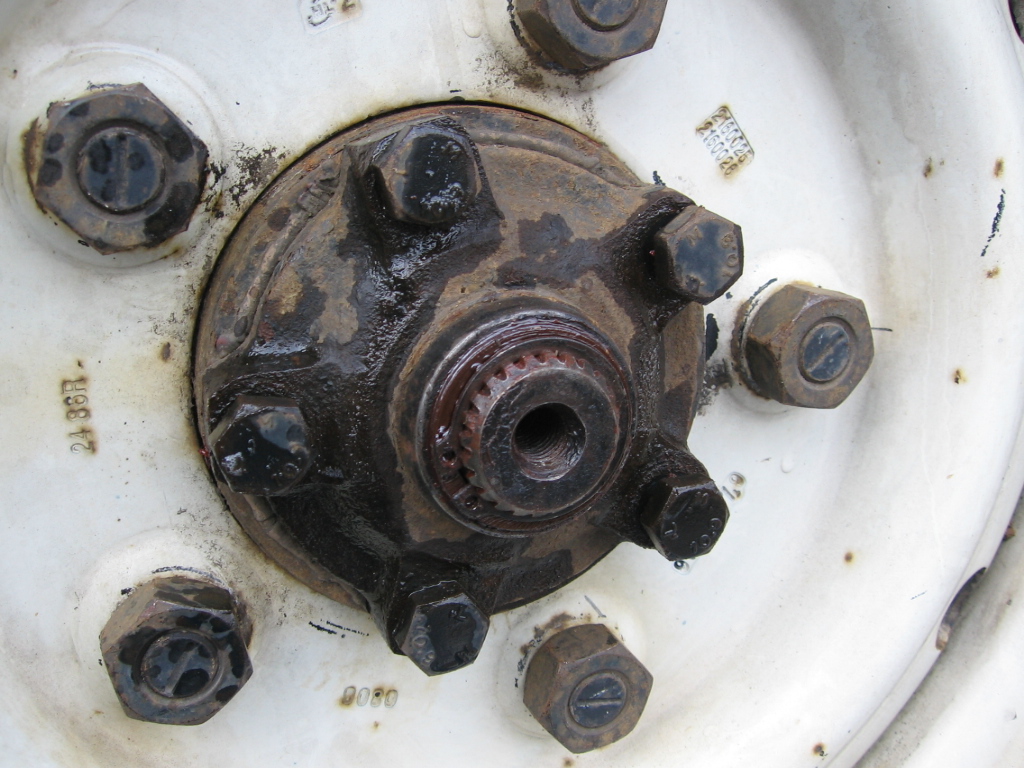
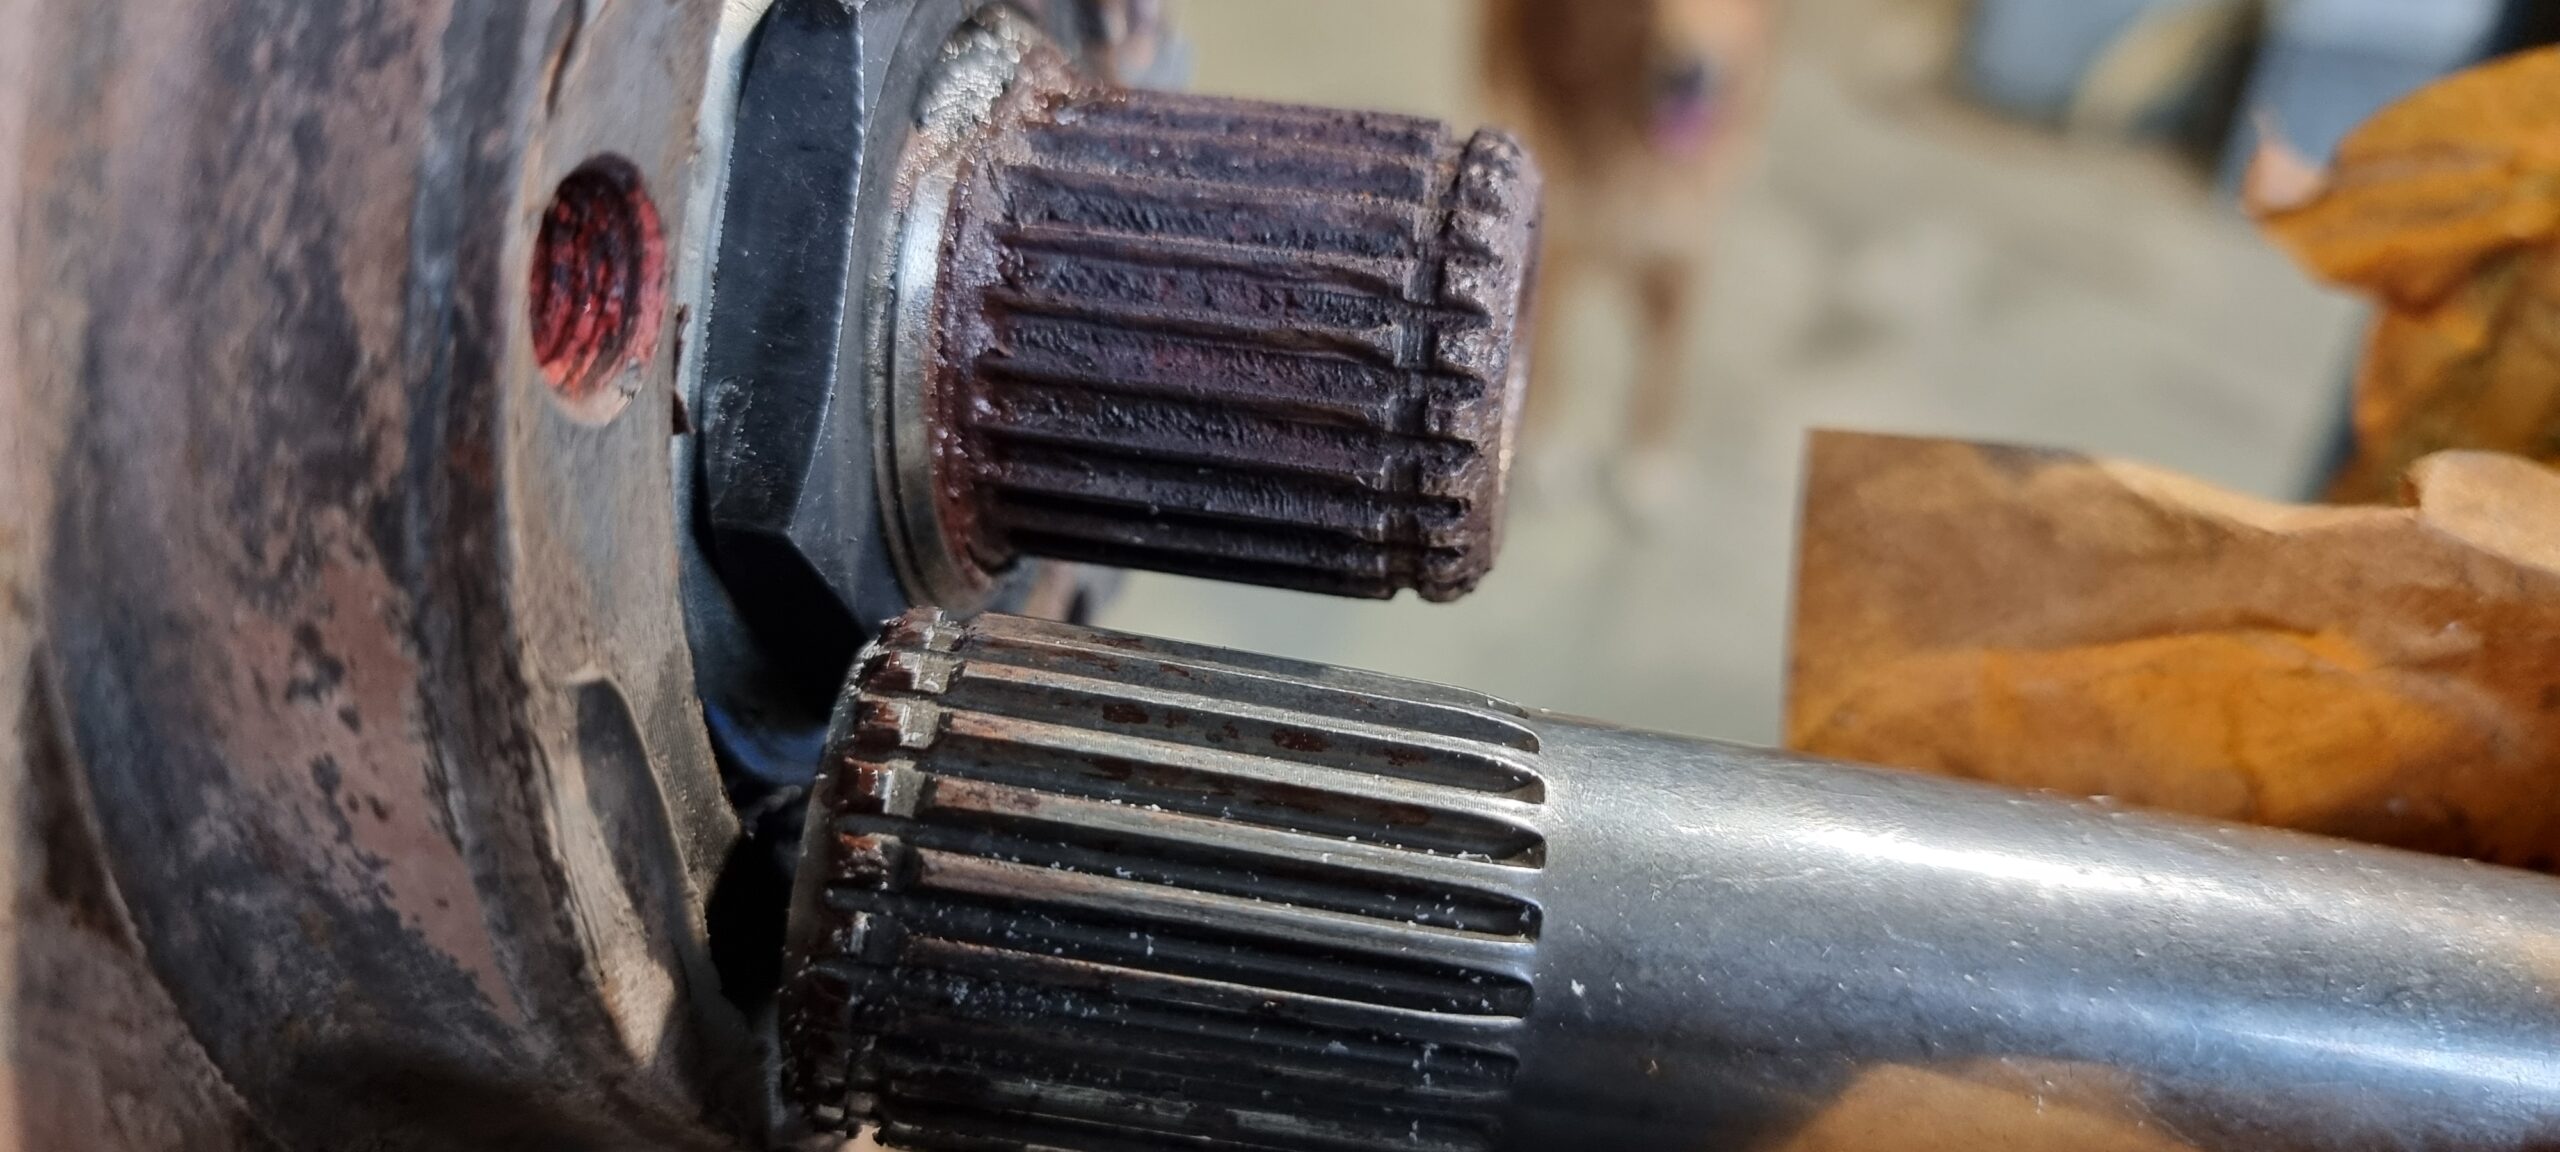
The drive flanges make the connection between the axle shafts and the wheel. They’re very often two-part, that is, the shaft engages the flange with a splined ring and that’s how the drive is made. These flanges are exposed to big loads and harsh conditions. They can wear fast, and then play develops that grows quicker and quicker until the splines give up. They’re also often designed weaker than the shaft’s connection in the differential, so that any damage from a shock load doesn’t happen in the differential, but where it’s easy to fix.
The video shows an example where a replacement is called for. In this case it concerns the shaft (photo) and the flange. The photo shows the old and the new shaft.
The flange splines should be checked for play and good greasing. For that, take off any cap and protective cover so you can see the splined ring of the shaft and the flange. Put it in gear and push the vehicle back and forth. You can also lift the wheel and move it. Between shaft and flange there should be only minimal play to see. Both have to be in good, rust-free condition.
To re-grease, take the flange off, grease both sets of splines and refit the flange. If grease can be filled into the protective cover, do that. It keeps water out and helps keep the whole thing greased. If there’s wear or rust, a swap is due.
Does your vehicle have swivel balls on the steered axle? Then they need a certain amount of care. Check here first, again, for obvious leaks and scoring in the swivel balls. Well, as long as no grease is escaping, there should be enough in the swivel ball. If there’s a check plug, though, it can’t hurt to look at the level during a service.
Other joints and rod ends
There can of course be further joints on the vehicle. On the drag link and the track rod you’ll find the relevant rod ends. These rods are, on one hand, highly stressed and safety-critical, and on the other exposed to all the dirt, water and salt. Check them for play and damaged boots. These like to go brittle and crack. If that’s already the case, problems develop in the joint, because now dust, dirt, water and salt get into it. At the German MOT this would likely be flagged too. Swap damaged ends or ones with play.

Also give a look to the threads of the ends that the track rod or drag link screws onto. Are the joints and threads heavily rusted? Then the affected parts should be swapped. Rust doesn’t make the joint any better and makes it harder and harder to undo.
Sometimes the track rod ends can be greased, then top them up regularly with the grease gun during servicing. If you have anti-roll bars on the vehicle, look closely at the drop links and swap them if worn.
You want to come to a safe stop too
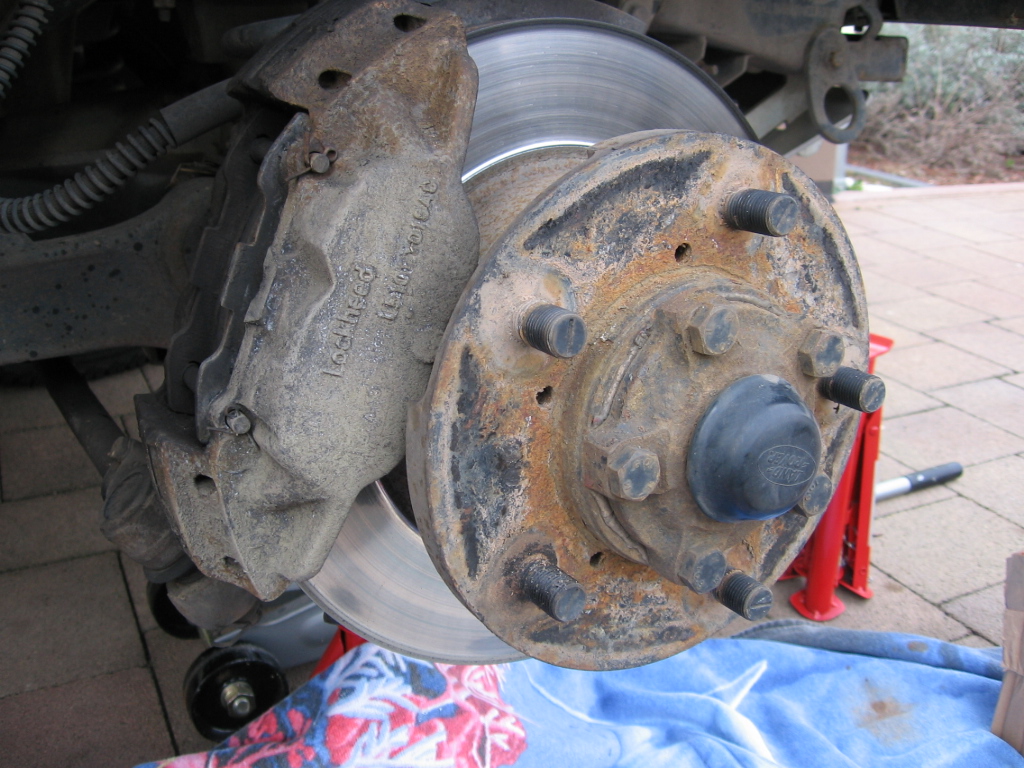
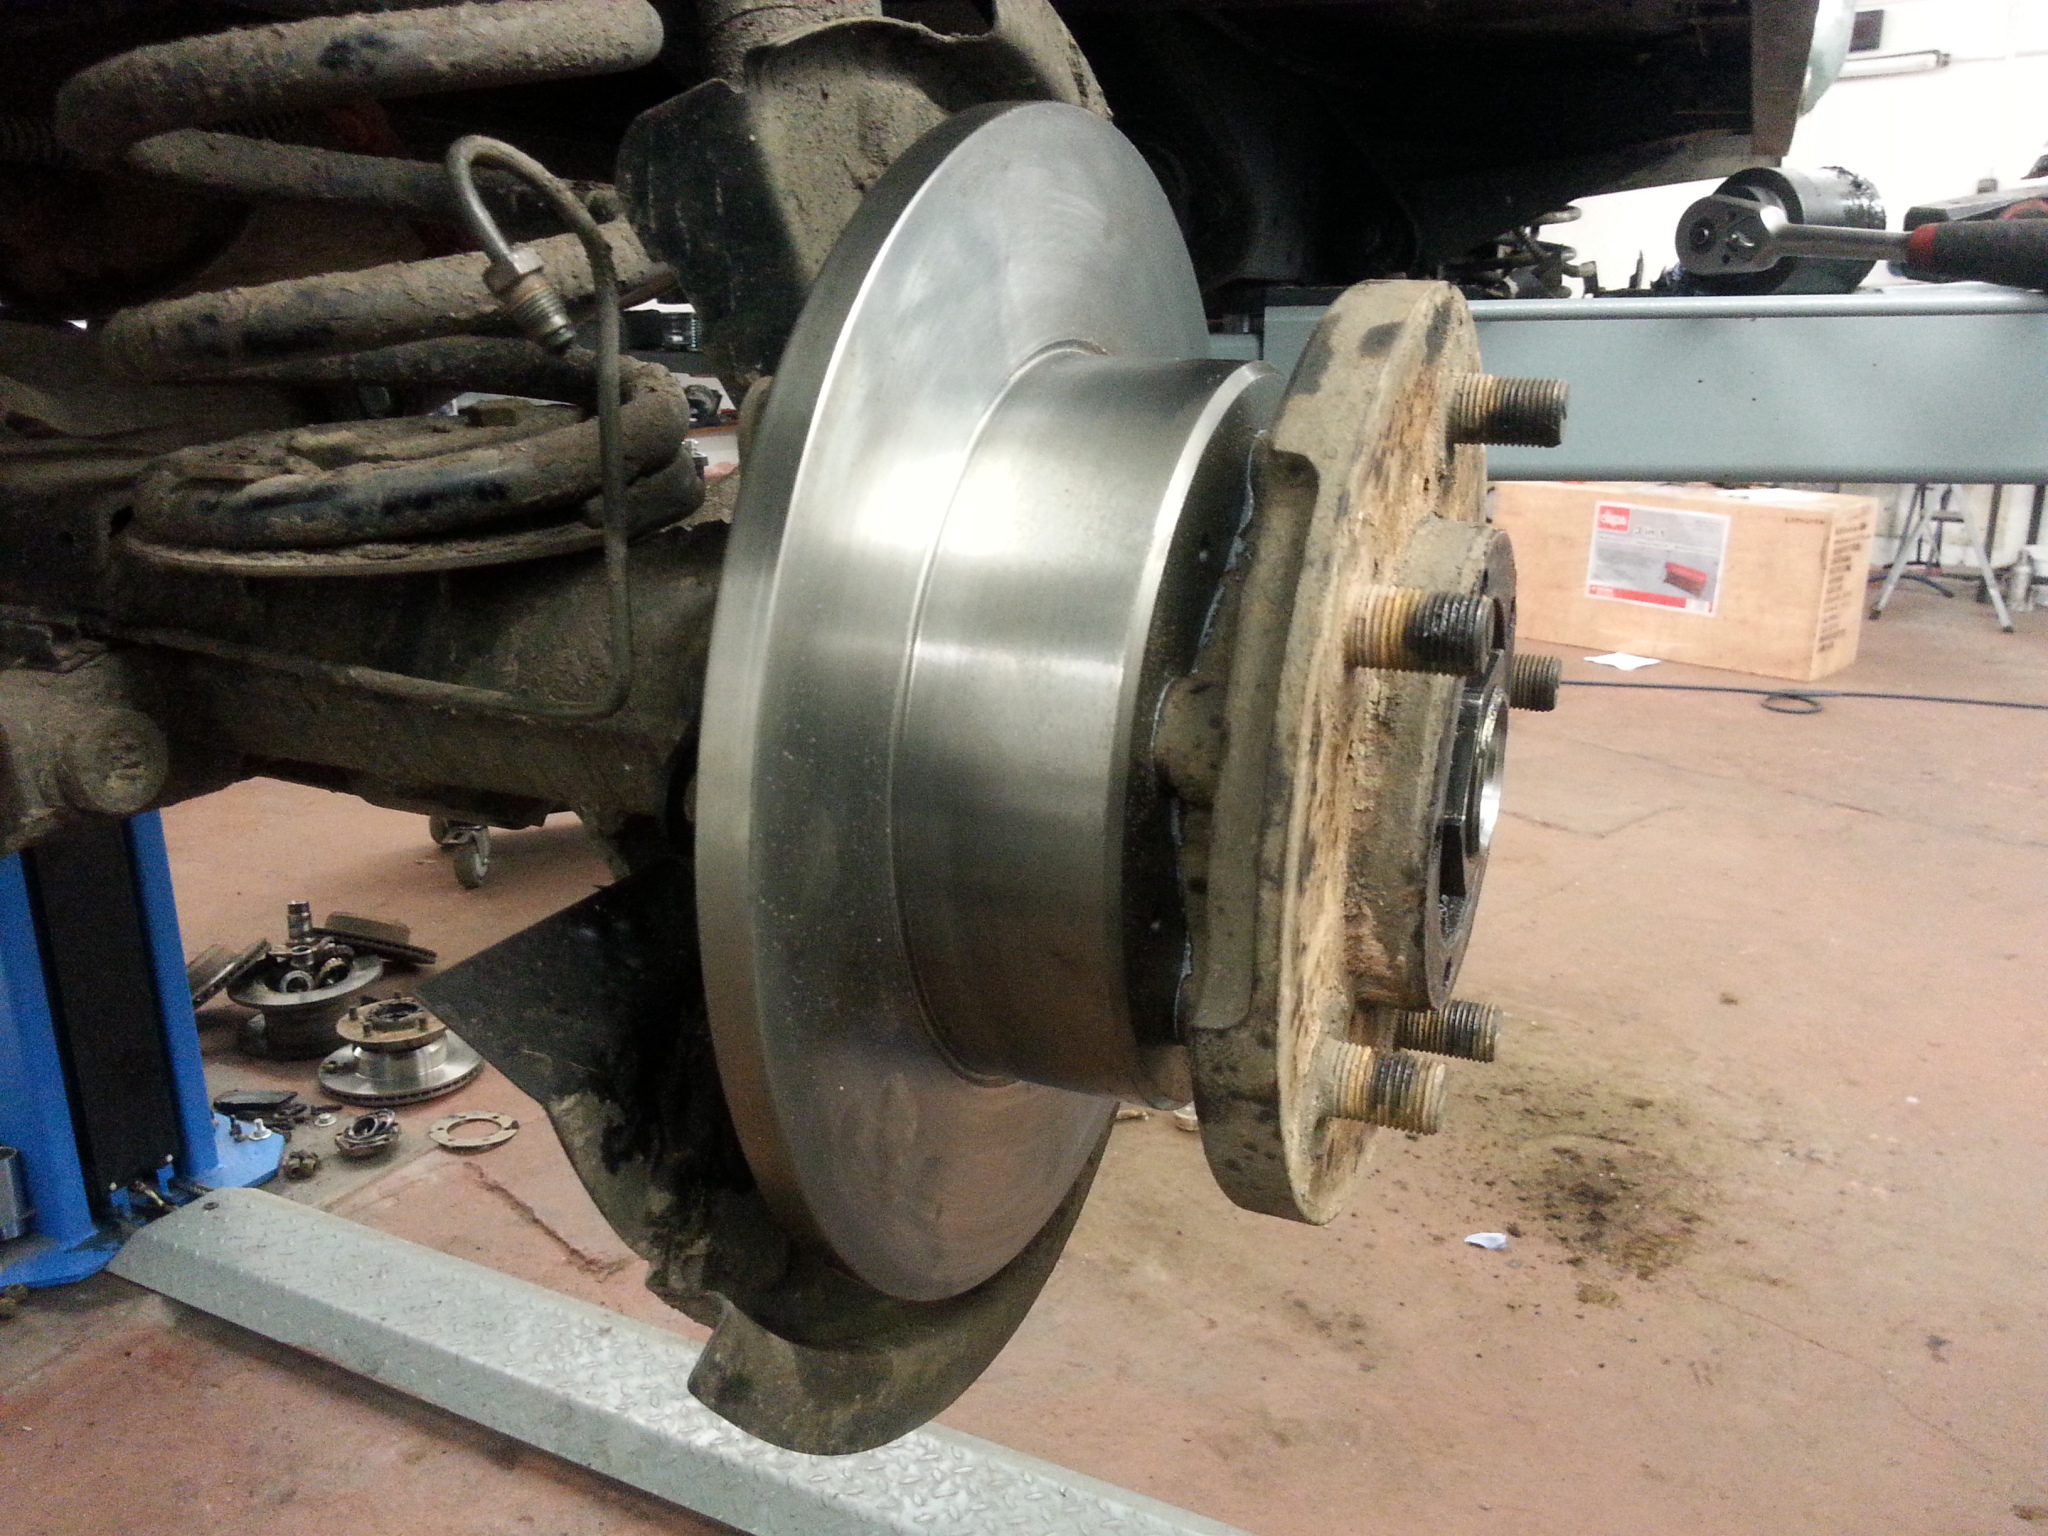
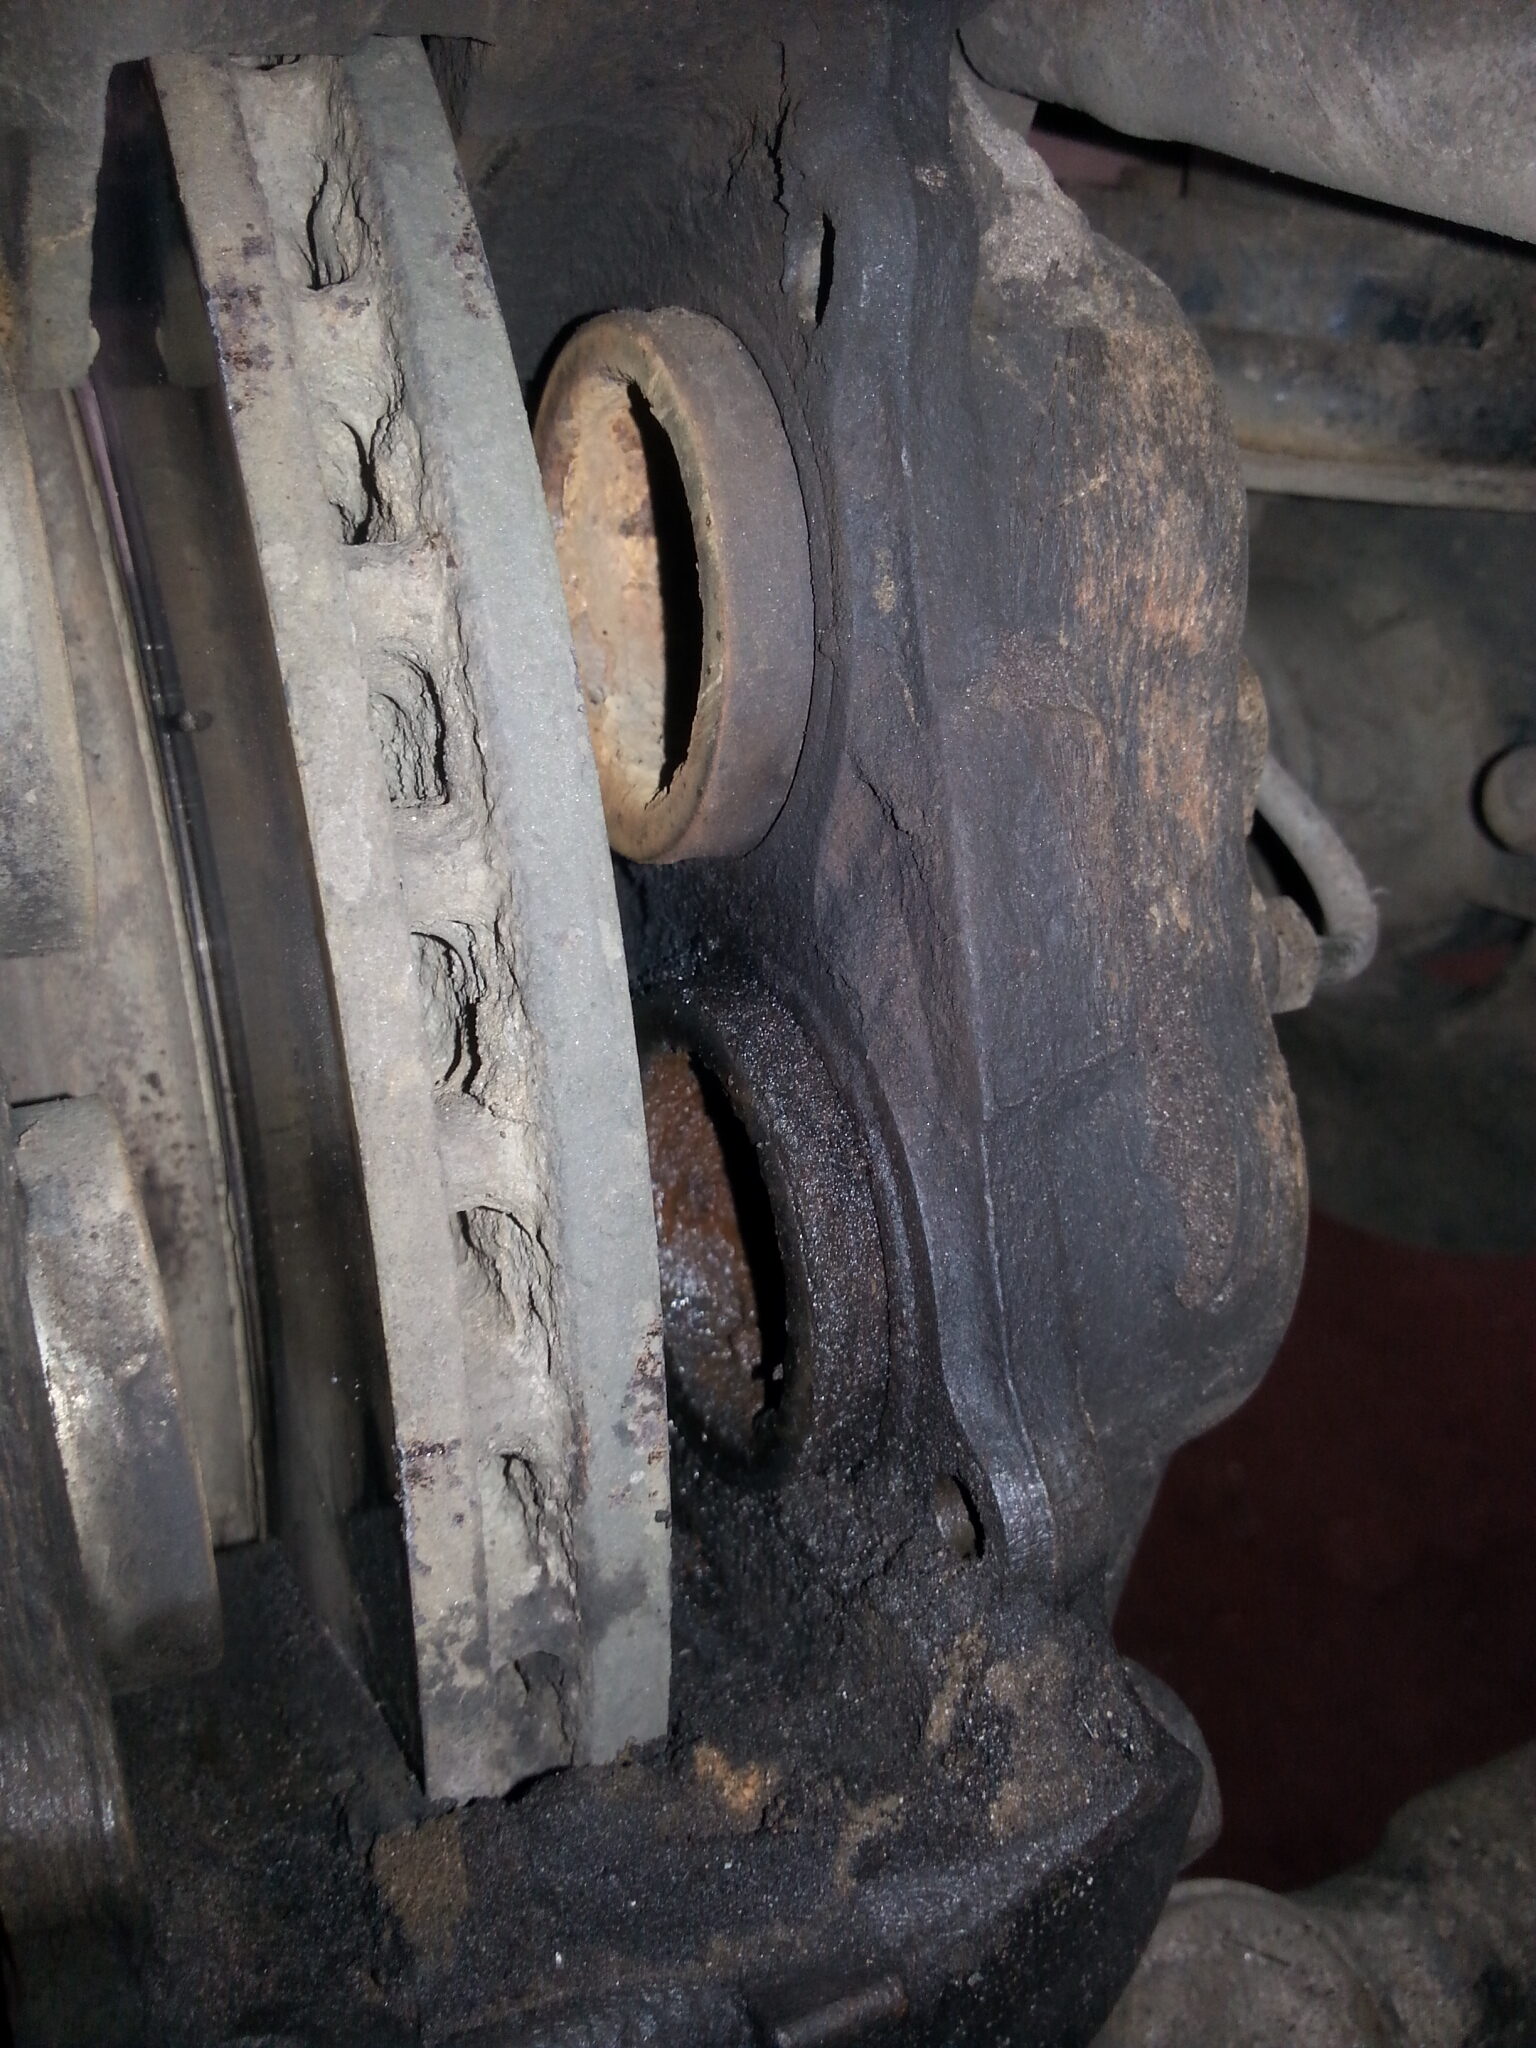
With the brakes we start again with a visual check. Best to take the wheels off for that, then the calipers are exposed. The calipers and lines first have to be freed of heavy dirt. Otherwise you can’t see anything. Are the pads already badly or even unevenly worn? Do the discs have deep scoring or a clear lip? Then it’s definitely time for a change. Watch for brake pressure, obvious leaks, perished hoses. The discs also have to meet a minimum thickness, which you can find in the vehicle data and check easily with a vernier caliper.
Look at the brake pistons. Are they dirty or even rusty? Over time, dirt and rust damage the seals and then brake fluid escapes past the piston, and the brake pressure and so the braking effect drop. If needed, take the pads out and clean the piston faces with a fine abrasive fleece. Move the fleece with the curve, not across the caliper! For care, you can rub a thin layer of brake cylinder paste on the pistons, for example the ATE brake cylinder paste*.
Take the brake disc between thumb and forefinger and run upwards. Is the standing lip at the edge of the disc a different depth on each side? Then the pistons press with different force. You should be able to see that on the pads too. The side with the smaller lip should have the thicker disc. That means the pistons press with different force. That points to a problem and reduces braking power.
Since you’re at the brake discs. Are they vented? If so, have a look into the venting. Is it blocked with dirt? Then you can clean it with compressed air or, if you must, a screwdriver.
How’s the brake fluid level? Any leaks visible? Then repair it at once! You can basically do the brake fluid reservoir level check during the engine-bay visual check. Also check the water content of the brake fluid. There are simple, cheap meters in the shops for that. Brake fluid is hygroscopic, which means it draws moisture. If the water content rises, the water boils off when braking and it will eventually lead to brake failure. So it’s generally recommended to change the brake fluid every two years, or of course whenever the water content is too high. The limit here is 3%.
Don’t forget to check that your handbrake works. Depending on the vehicle it’s adjustable and has a warning light in the cockpit. The latter naturally has to work properly too. This applies to electric handbrakes as well.
The suspension is there for a safe, comfortable ride
First check the whole suspension for obvious damage. Is oil leaking from the dampers? Do you see corrosion and rust anywhere, like on the spring seats? Do you see rub marks on moving parts? How do the springs look, any cracks, rust or even breaks? Do you notice unusual noises while driving? Are the suspension bushes cracked or perished?
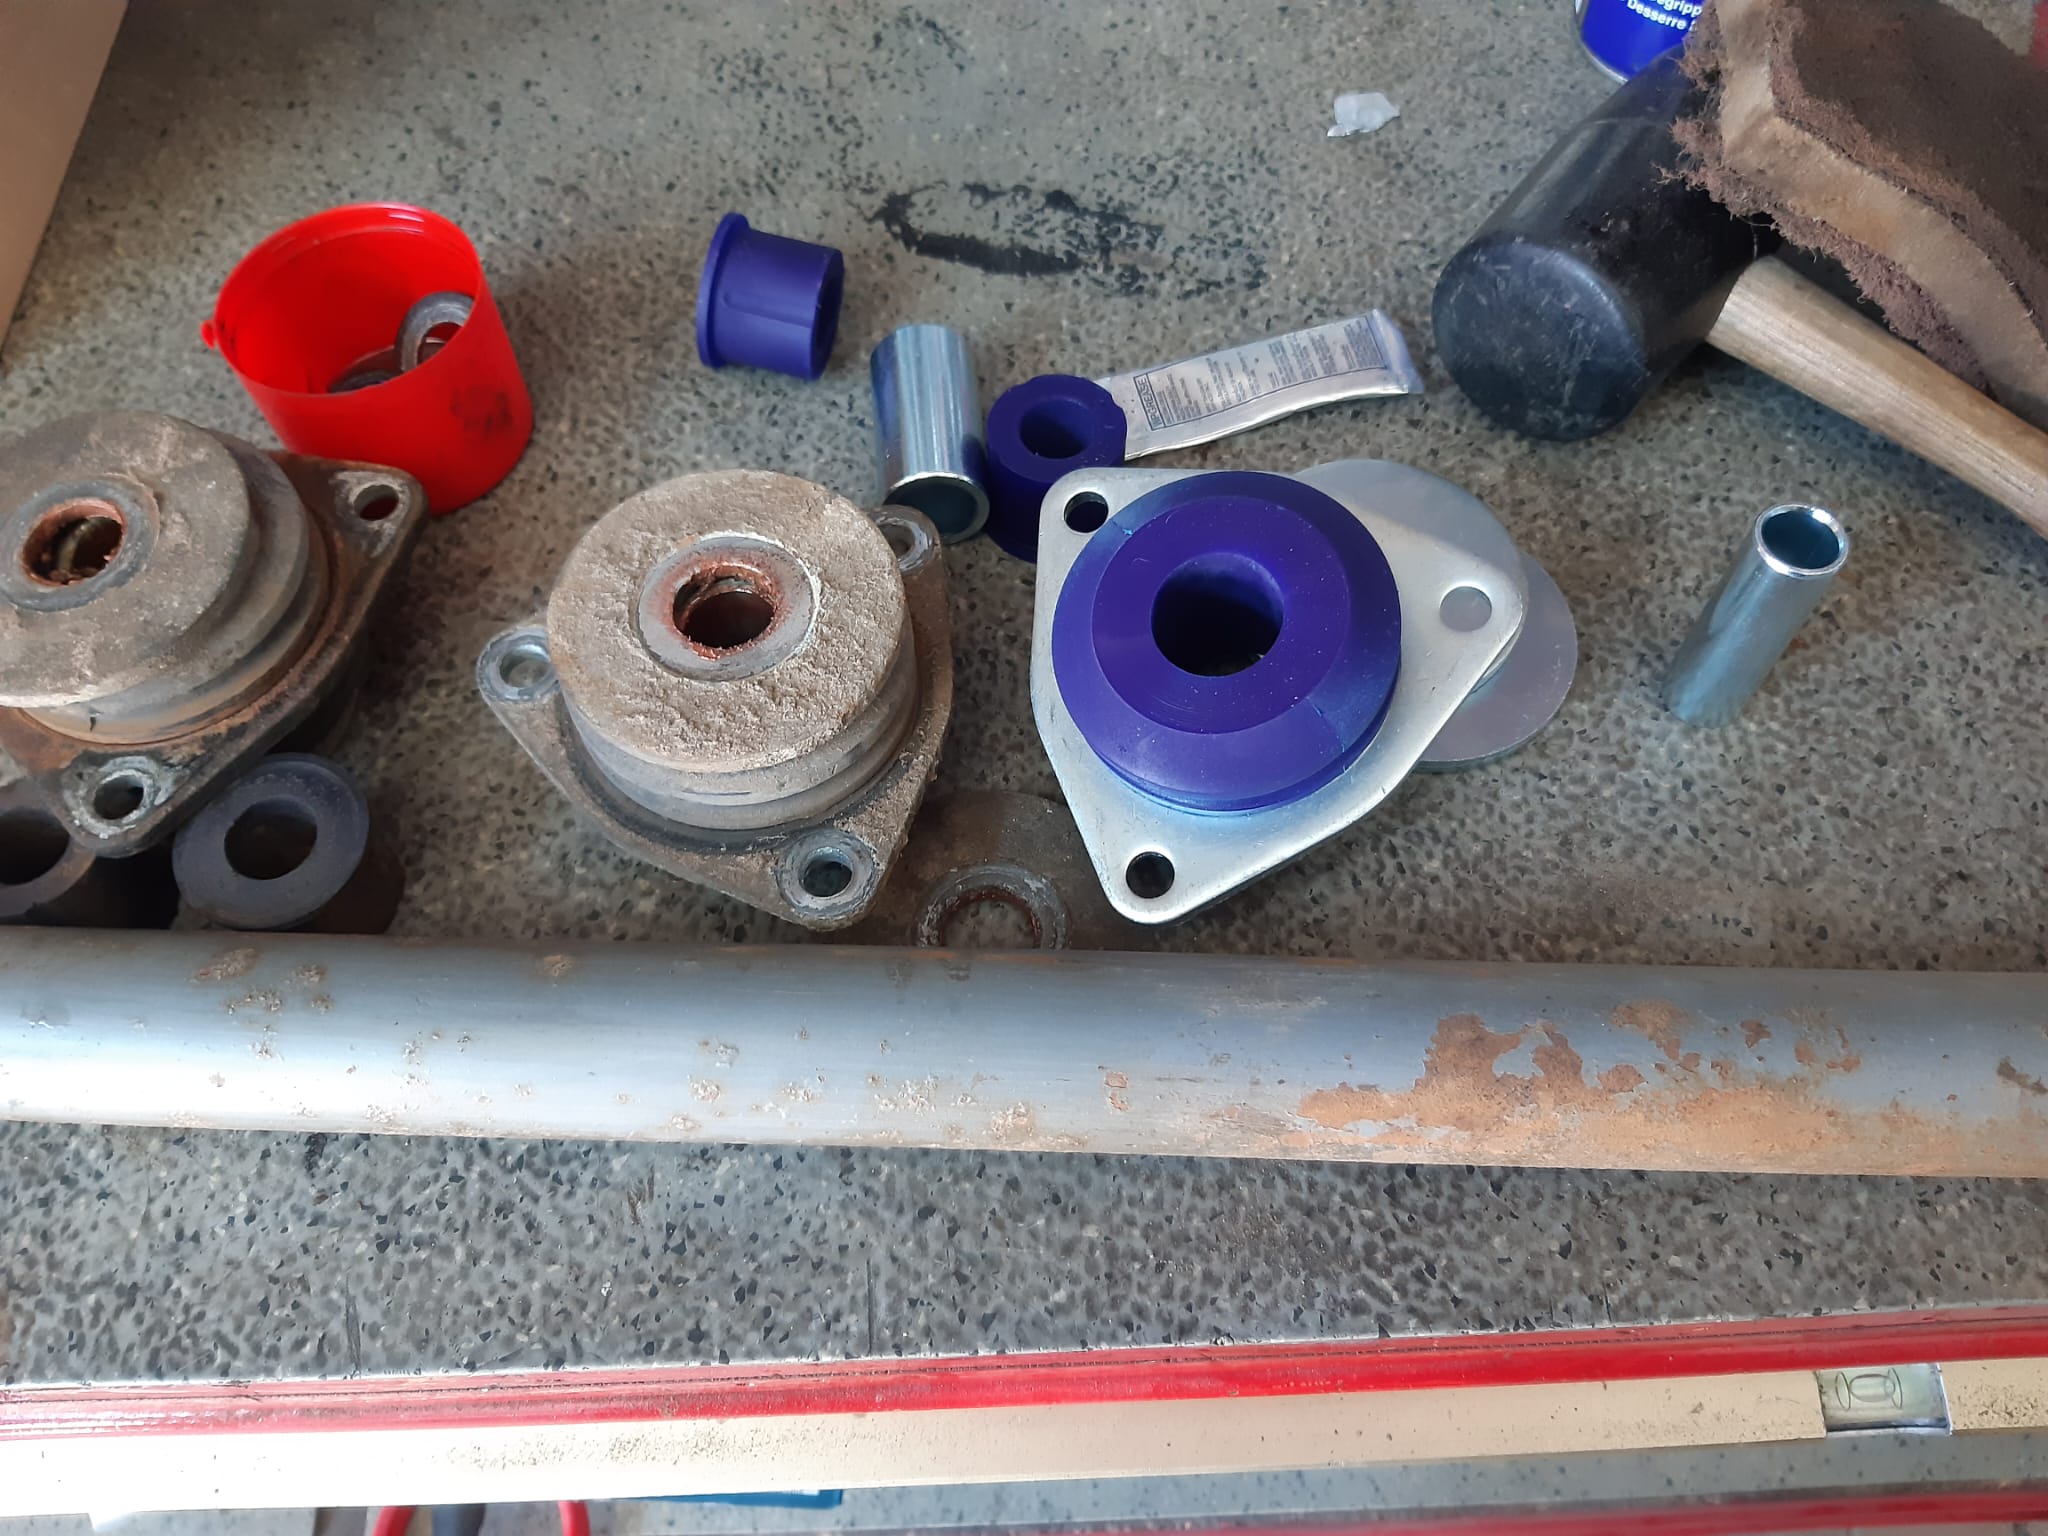
So check everything very closely first and repair these parts if needed. If your dampers are very high-end and so usually fully rebuildable, then build such a rebuild into your own service plan. Overhauling dampers usually needs special workshop gear and special know-how. Best to have it done at a suspension specialist.
Wheels and tyres are your contact with the ground
Wheels and tyres
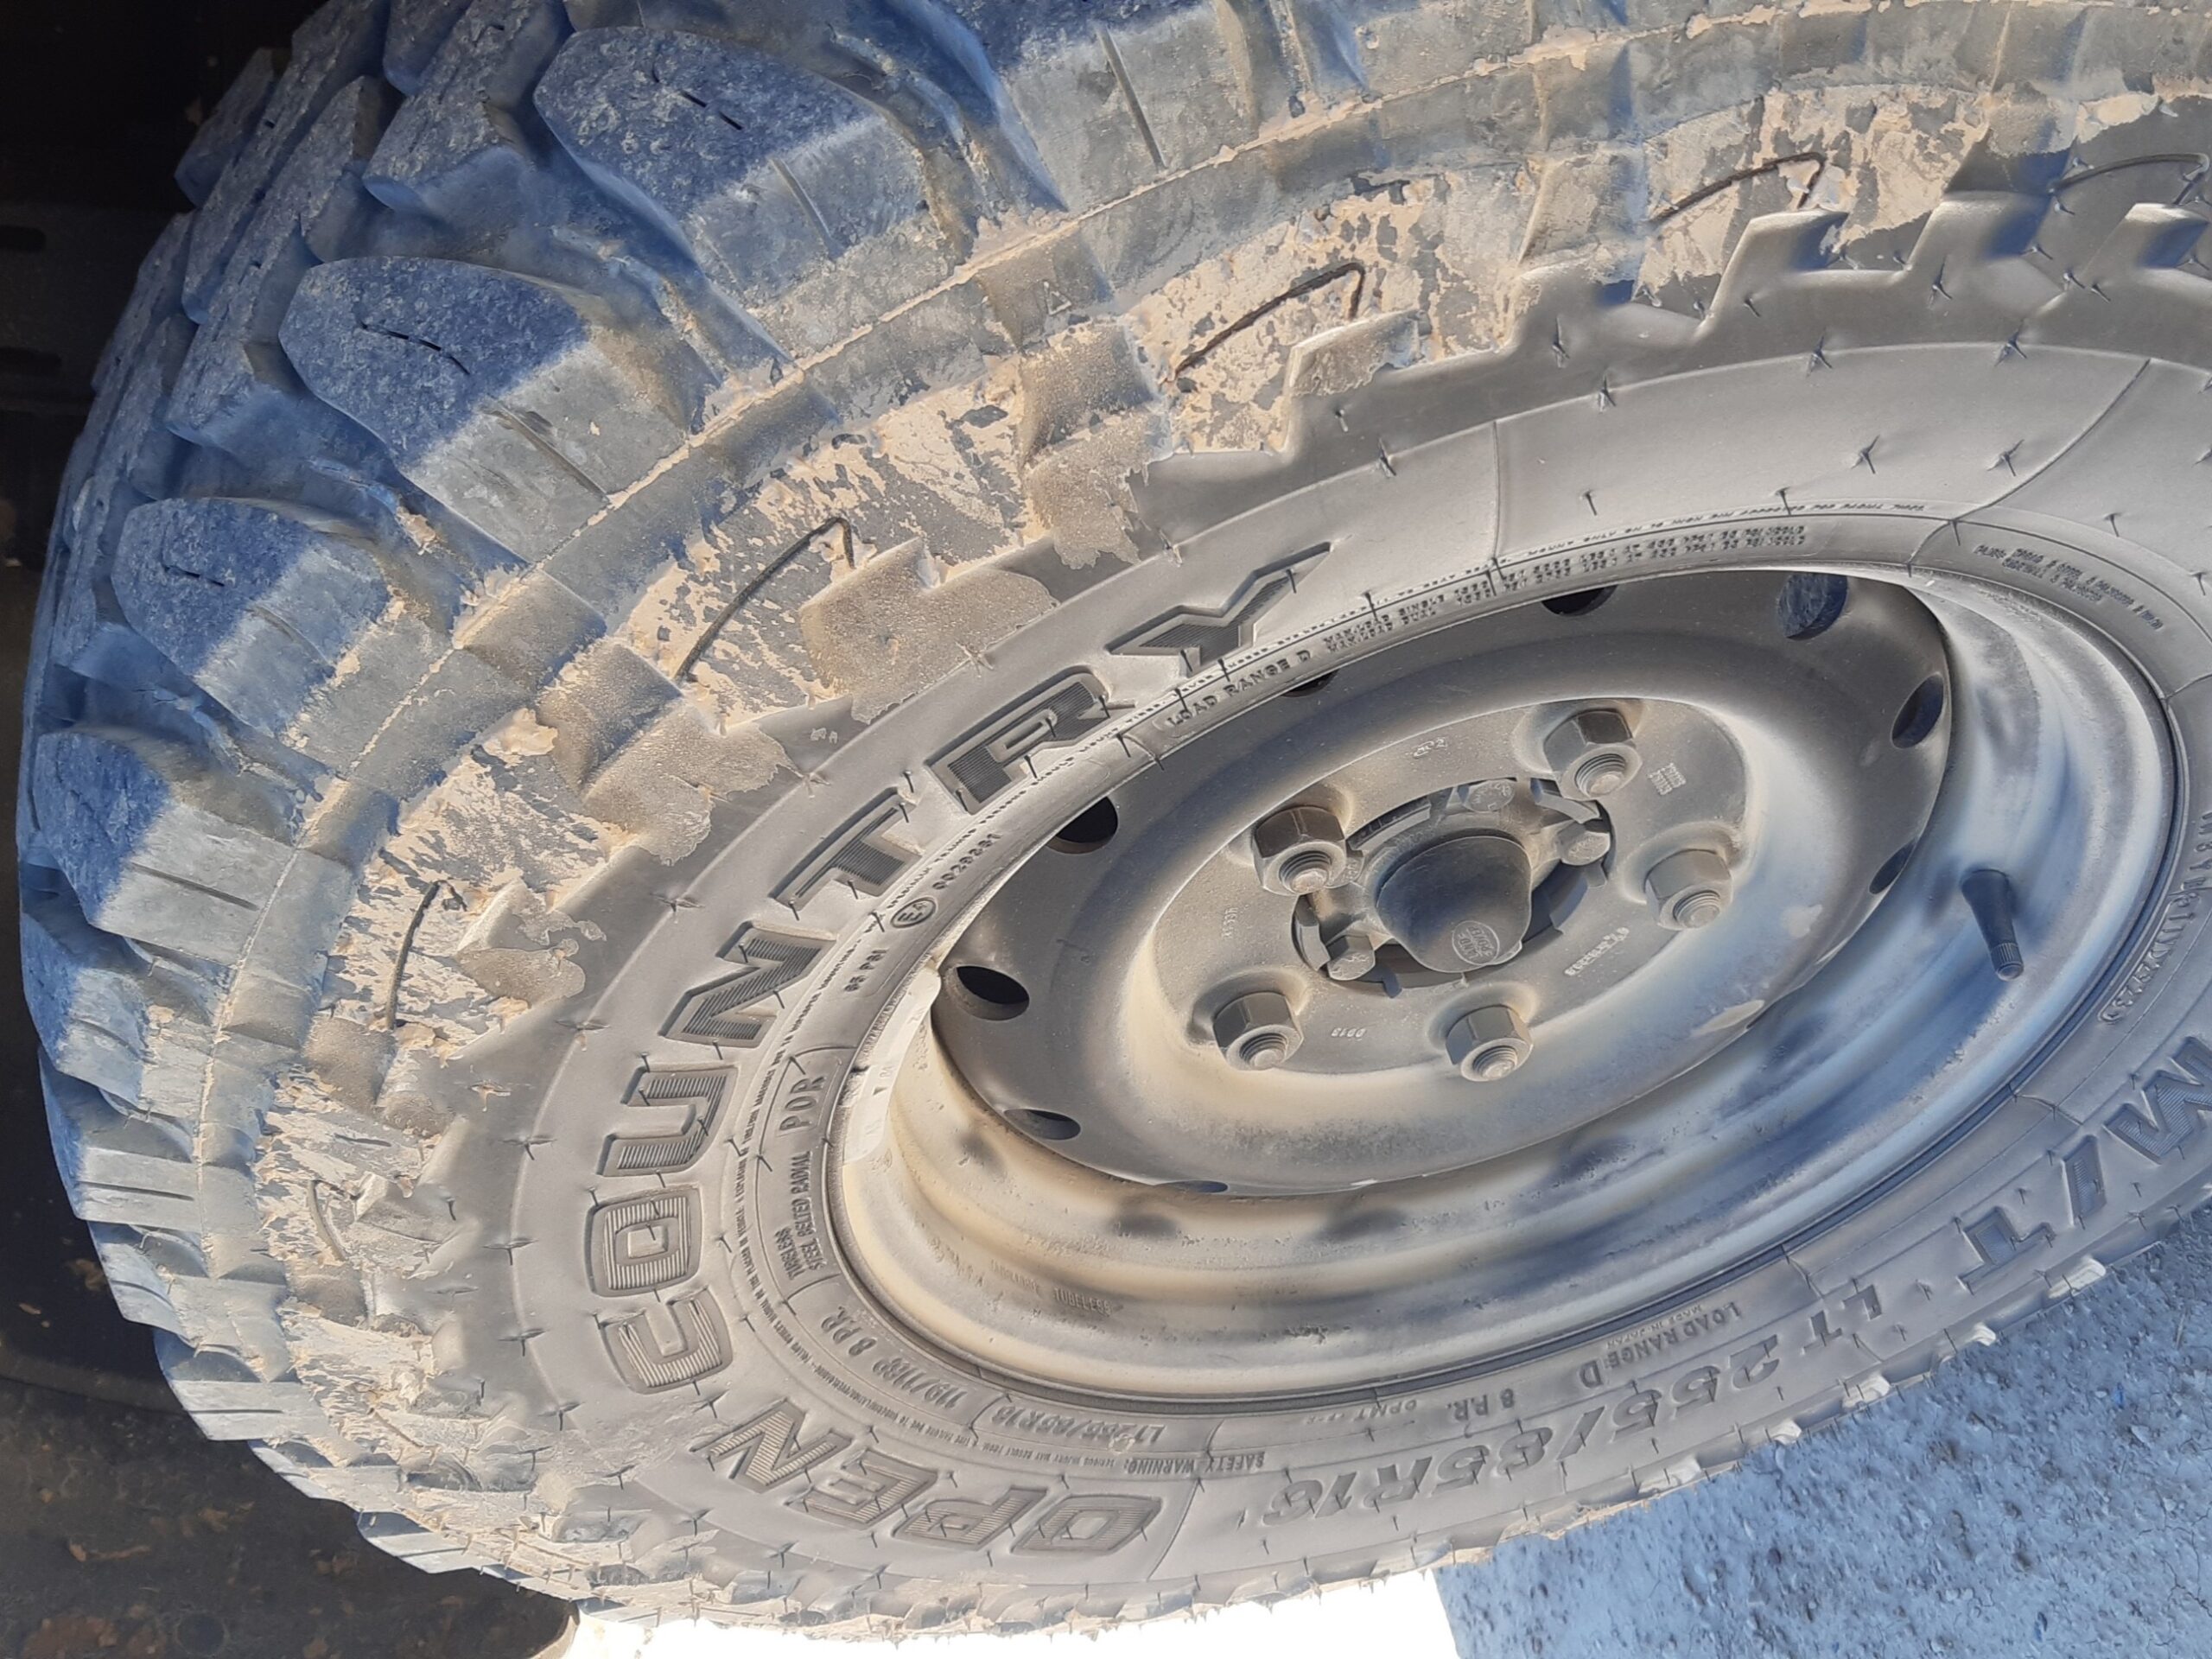
Look at the tyres for outer damage like cracks, broken lugs or cuts, and the rims for damage. Check the tread depth regularly and whether the tread has worn evenly. Unevenly worn tread can point to other issues, like a wrong toe and camber setting, or even bigger damage like a bent axle casing. You check and correct the pressure more often anyway. The legal minimum tread depth of 1.6 mm in Germany is more of a theoretical figure on a 4×4, because for good traction you should of course swap the tyre, especially aggressive off-road tyres, much earlier.
The spare wheel gets forgotten easily here
It often leads a lonely, dull existence under or on the rear of the vehicle. Here it’s exposed to the elements and not seldom seizes up. Especially if your vehicle has a mechanism to lower and raise the spare wheel, you should check and care for it regularly during the service or trip prep so it works. So that when you’re stuck somewhere, maybe in the dark, the cold or a hailstorm, you can actually use the spare wheel.
Many people rotate their wheels between front and rear axle on a fixed plan, or even bring the spare wheel into it. This can make sense depending on the vehicle. There are vehicles, for example because they have part-time four-wheel drive or are much heavier on one axle than the other, where the tread wear is very different. On other vehicles you barely see this.
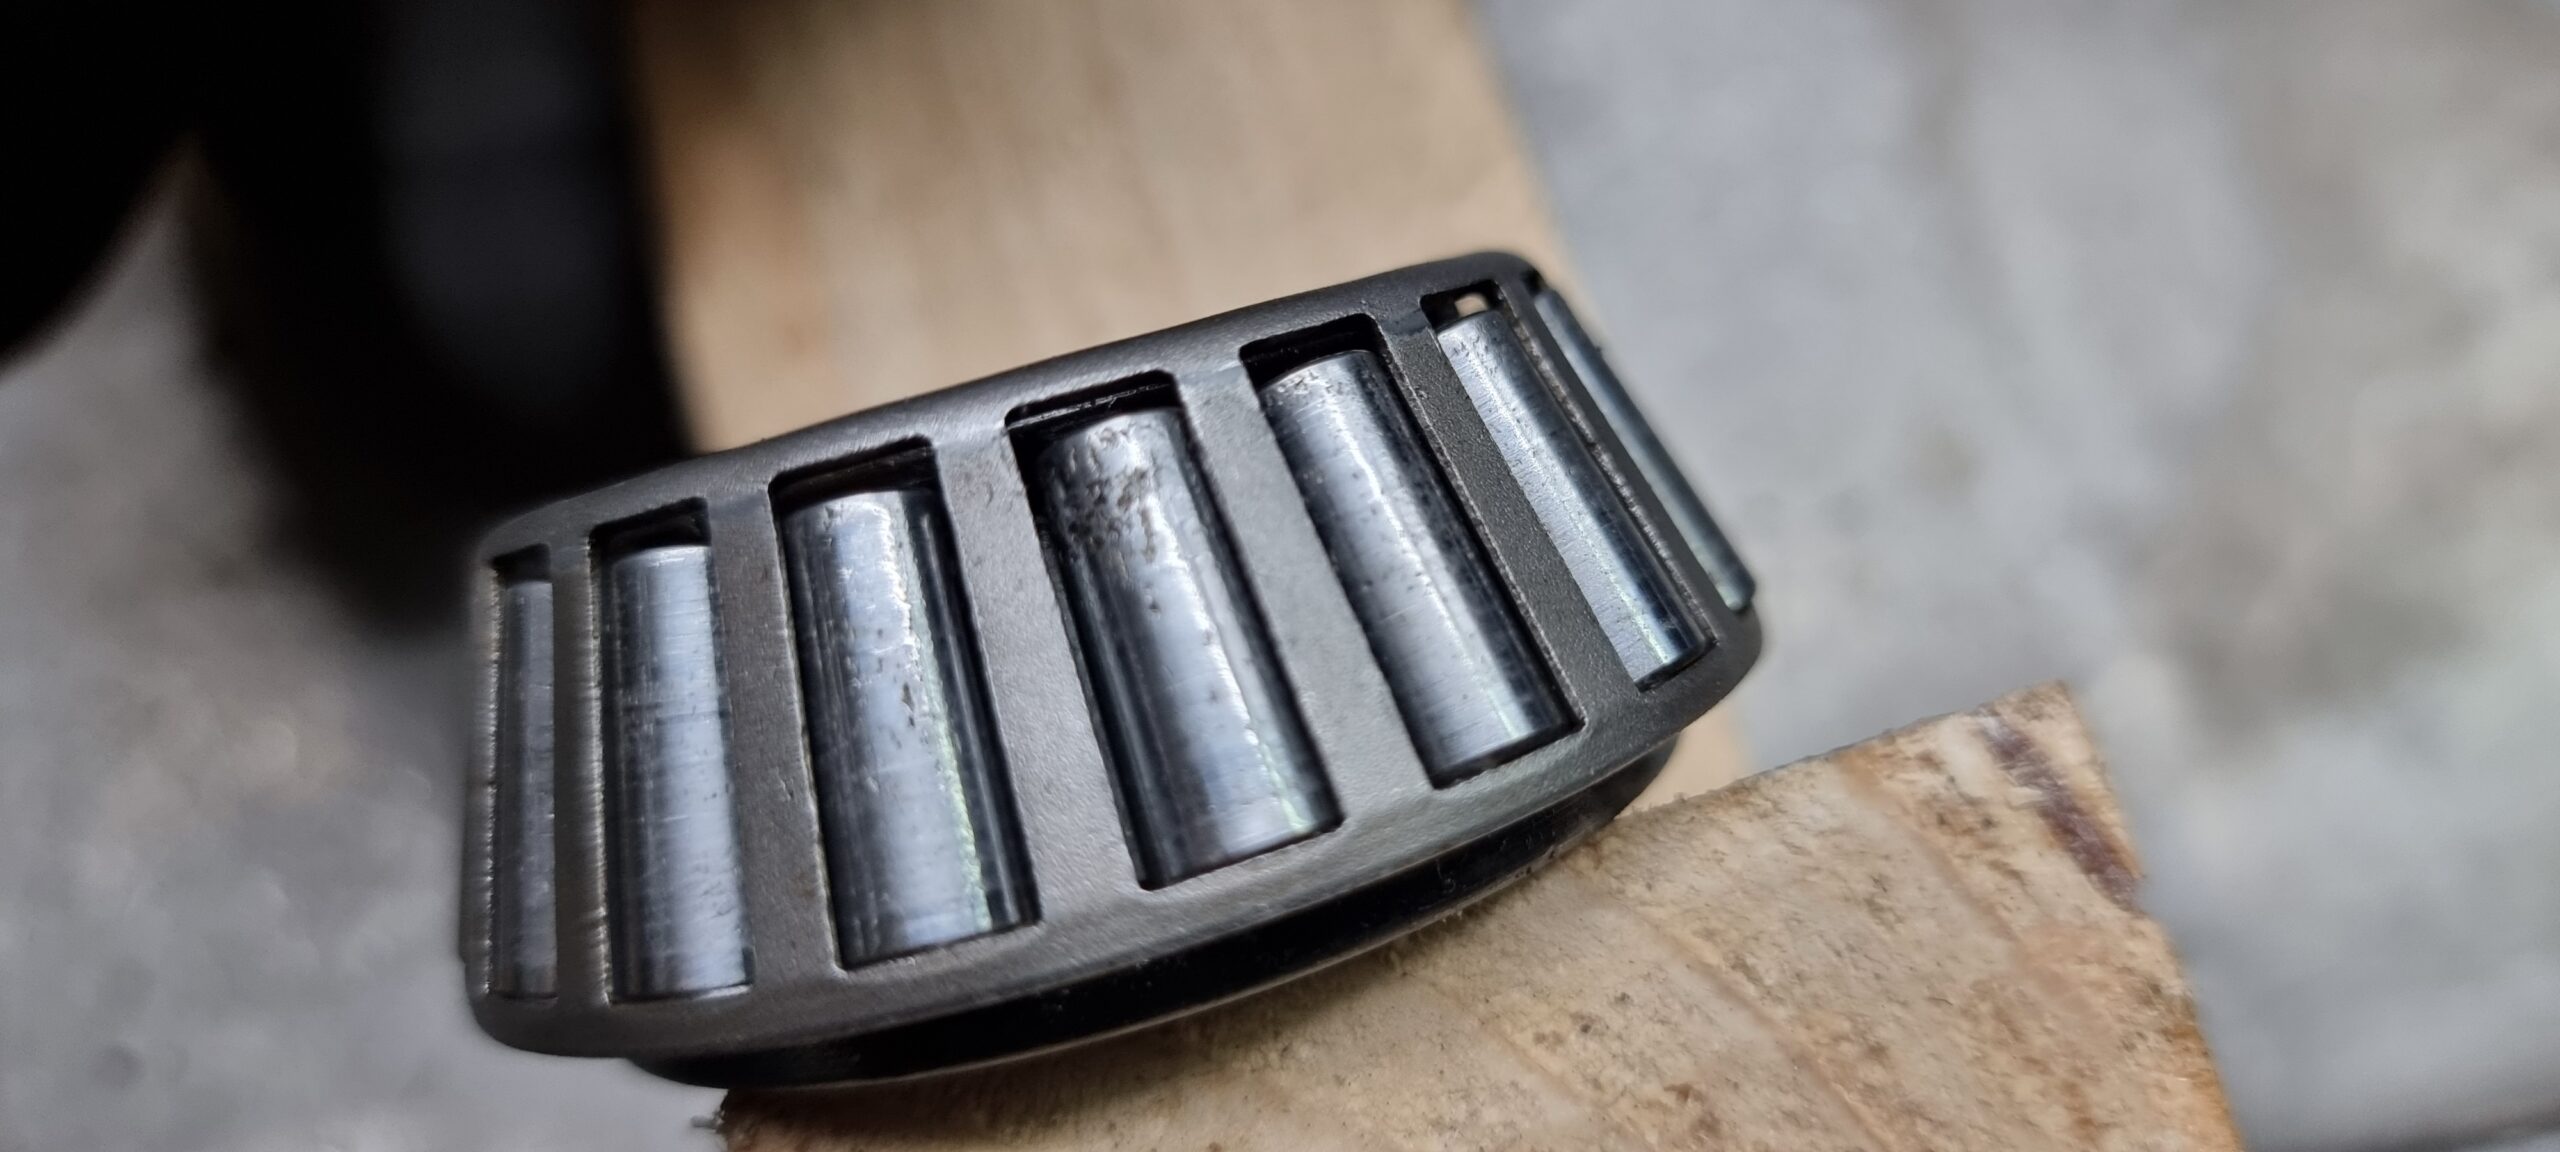
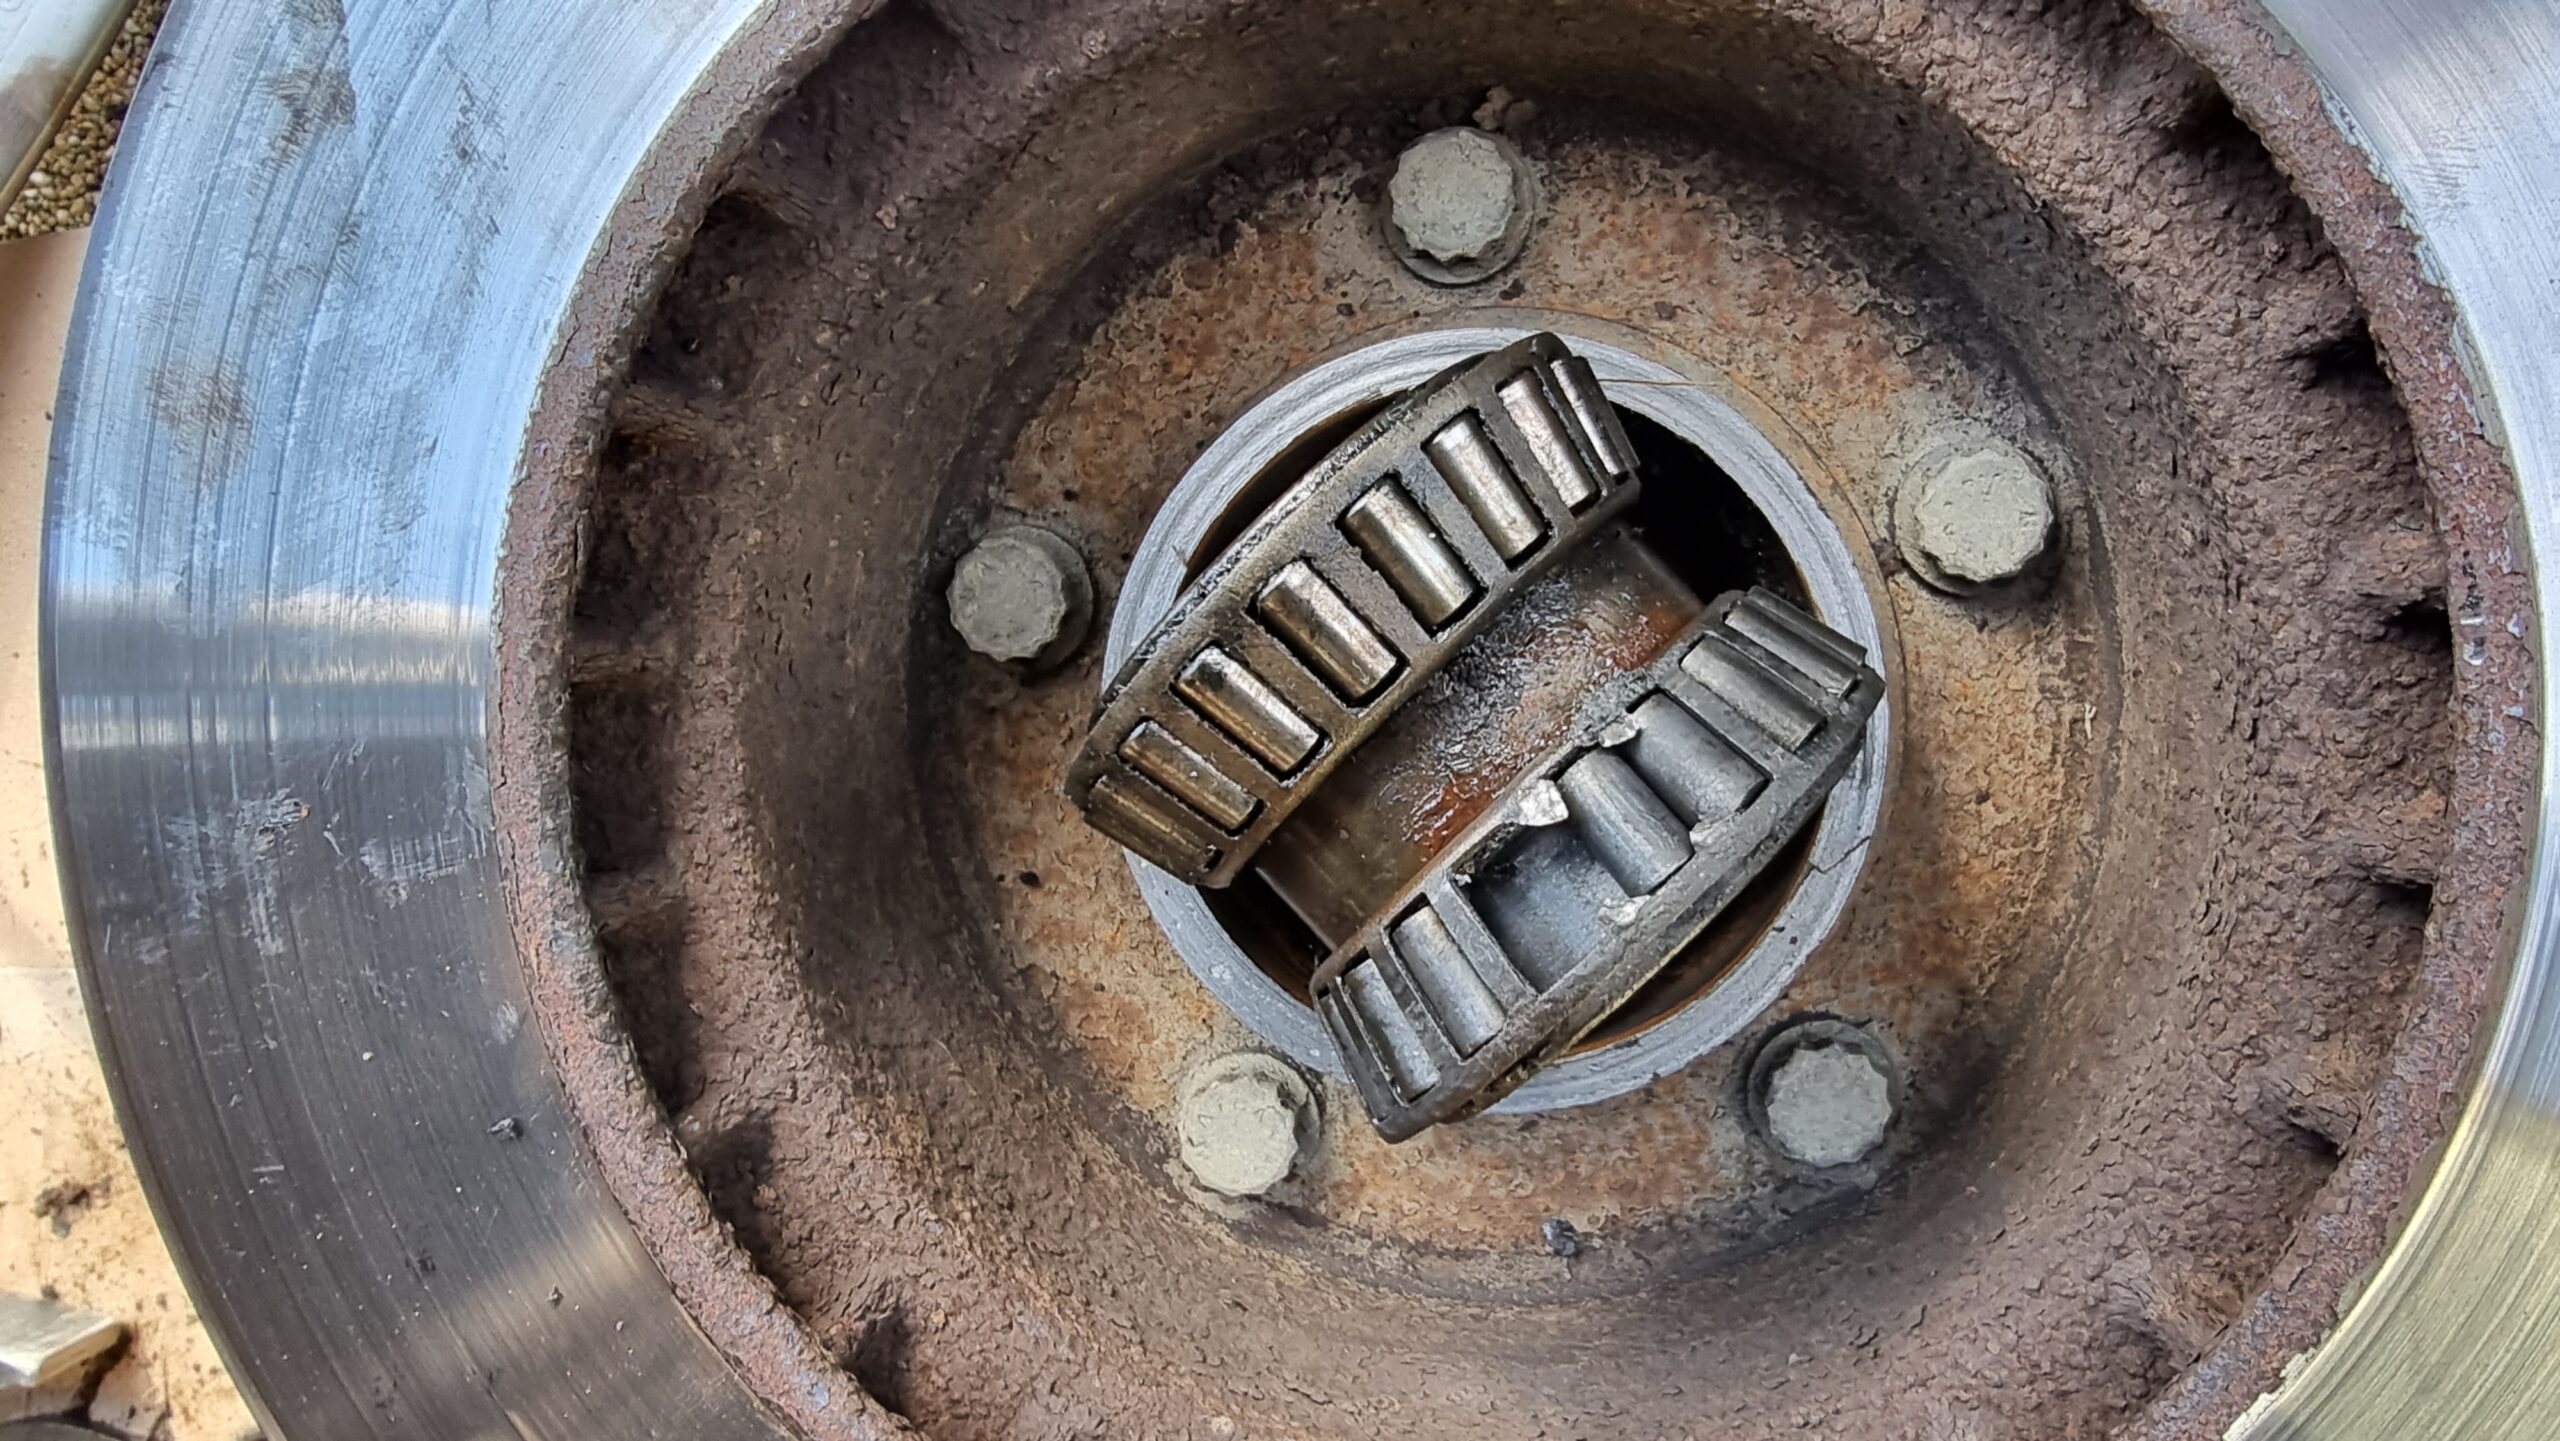
Wheel bearings
At this point at the latest, you should also give the wheel bearings your attention. You might notice damage while driving. Through humming or howling noises, for example, that may even change when you go round a bend, or through vibration in the steering. All this can of course only be a pointer, and the symptoms can come from elsewhere too. So you should check the wheel bearings regularly, adjust the play where possible and needed, and grease them.
The stationary check has an important role here. For that you have to lift the wheel in question (easiest of course on a ramp where all the wheels hang free) so it can spin freely. Now grip the wheel top and bottom and try to move it. If that feels loose, or you even notice a rattle, it can be a worn wheel bearing. Now turn the wheel and listen closely for any suspicious grinding, rolling noises, or whether the bearing does its job nice and quietly.
The steering points you the right way
There are many different steering systems. What you should always do is check for play in moving parts like the end of a track rod, play in the steering box and so on. You do that best with the car standing on all its wheels. Also check the power steering fluid level if you have hydraulic power assistance. Look at the steering box, is it losing fluid, is it damp? Then you should act. Steering boxes can often be overhauled with seal kits. If gears or shafts are too worn, these are available as spares. If the steering box has to be swapped, that’s often an expensive affair. Check whether there are good reconditioned steering boxes.
Electrics and lighting want checking too
Checking the lights
You should check the lights regularly, not just once a year at the service. Because they mean safety. A regular check of the lights is no big effort. It can be done at a short rest stop with a walk around the car. Faults at the rear lights you notice less often yourself as the driver. But you can check these fairly easily on your own too. Park your vehicle close to a light wall, rear-on, so you can see the rear lights, brake lights, rear fog light and reversing light work in the mirror. Don’t forget your work lights and the interior light. Checking the lights includes cleaning them, if that hasn’t happened before the service anyway. Only that way is safe, good illumination possible. We’ve put more on lighting together in this article.
The electrics often include a remote key
The makers usually have a battery change in the service schedule mentioned at the start. Please don’t forget this, or one day, and usually just when you can least use it, you’ll be stuck with a flat battery. Before the change, please check the manual whether there’s a special procedure to follow. Some of you will surely have a remote for the winch. If it has a battery, it’s a good idea to bring its change into your own service plan too. Either way you should pack spare batteries for the remotes.
Other parts
Look at other electrical parts for corrosion and care for them. This applies especially to the contacts on plug connections, relays, fuses, battery terminals and switches. These often suffer particularly during off-road driving or heavy winter use. If you spot some corrosion on the contacts, you can clean them back to bare metal with a fine fleece or sandpaper. That sometimes works wonders! You can spray a bit of contact spray into the socket or terminal. That cleans the contact. It should dry off quickly, because the contact spray itself insulates.

A vehicle has a number of external contacts. The earth cables are very important here. The frame and body form the earth for many electrical parts. That’s why several thick cables run between frame, body, engine and gearbox, all making sure of the earth connection to the battery. A good manual or workshop manual lists all the positions of these cables.
Check the connections. They’re usually bolted with thicker bolts. Bad, corroded connections lead to all sorts of problems. Undo the connection, grind the contacts back to bare metal and put them back together. Then you can protect the connection with battery terminal grease, for example, or better still a protective spray. For example with ECS 71*, an insulating spray that forms a flexible, waterproof protective skin.
Battery care
The battery often leads a lonely existence in the vehicle. It’s also often fitted in hard-to-reach spots. Even so, you have to give the battery your attention. With auxiliary batteries it’s usually just a comfort issue if they fail, but if it’s the starter battery, your vehicle stops dead first of all.
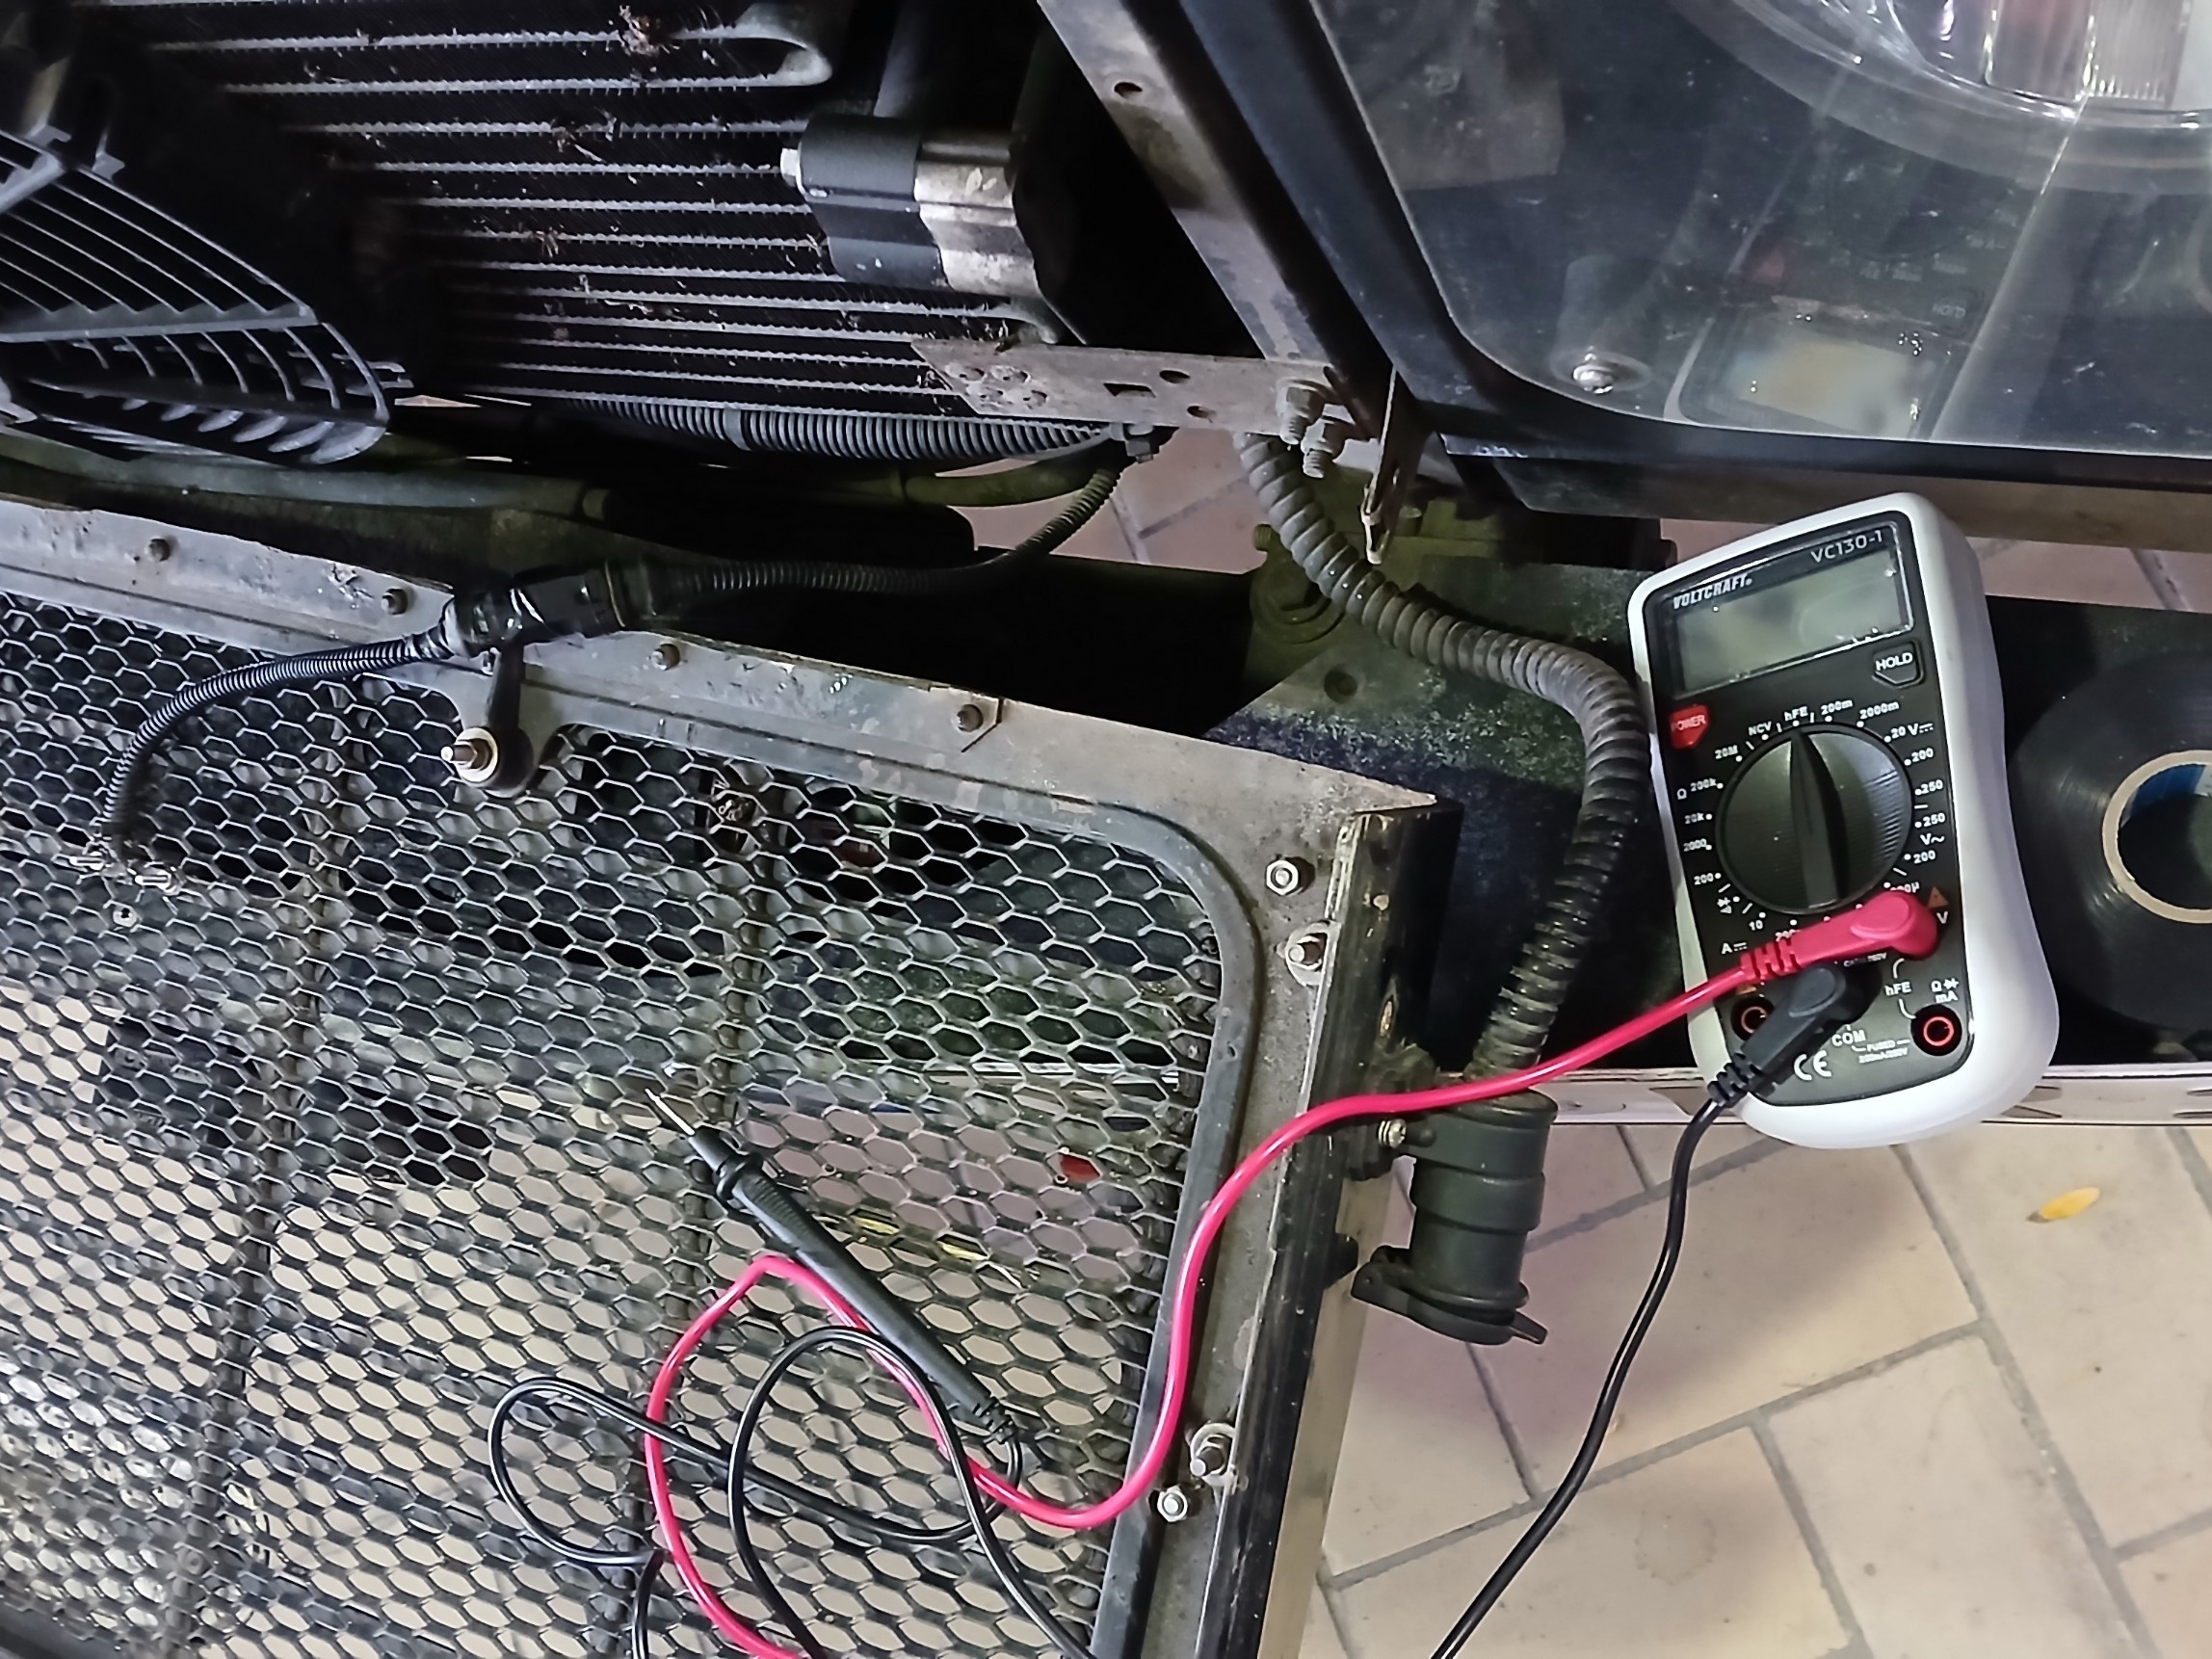
Keep the battery and its terminals in particular clean. That effectively prevents corrosion and problems for a start. A bit of terminal grease for protection can’t hurt here either. Check the connections for a firm, tight fit. It often turns out that the battery isn’t securely mounted. Watch for this, for your own safety alone. Many batteries today are maintenance-free, that is, not refillable. If you have a refillable wet starter battery in your vehicle, which you can tell by the caps that open over the cells, you naturally have to check the fluid level during the service and top up if needed. Now measure the resting voltage with a multimeter to find the health of the starter battery. Figures of about 12.5 to 12.8 volts on a charged battery are well within normal. Below that, you should think about a replacement. Batteries with less than 12V are no longer up to the job.
Do you use your vehicle only for travel, or lay it up in winter? Then we have plenty worth knowing here on battery servicing and care: Laying up and battery servicing on little-used vehicles.
Kit
A night heater should be run regularly when not in use. This is to check it works and to drive out condensation. It’s a good idea to run the night heater once a month for about ten minutes. If that doesn’t happen, it’s not rare for the fuel to run back out of the feed line, and then after a long time you first have to bleed the line when starting.
You should also use your winch regularly. The winch often won’t work just when it’s needed. Why is that? Simple, on travel vehicles especially it’s used less often and seizes up. So it’s important to check it from time to time, not only for obvious outer damage, in the rope for example, but to spool it out and back in now and then and move the freewheel lever. If you find damage to the rope or other recovery gear, swap it at once, because in case of doubt your vehicle or someone else’s hangs off it, and maybe someone is even sitting in it. There’s more to service on the winch, so we’ve given it its own article: Get your winch fit! Why servicing is a must, MATSCH&PISTE guide
Check the function of your accessories at regular intervals, especially after longer periods of non-use. Does the radio work? Because it’d be annoying if you head out on a tour with your off-road buddies and the comms don’t work. How about the camping fit-out? Does the water supply work? Clean your drinking-water system regularly. These are all just examples, and you should set up your own service plan, by simply writing these things in the calendar, for instance.

Extra equipment
Your vehicle might of course have further extra equipment. Alongside the night heater already mentioned, this could be air conditioning, for example. Air conditioning sadly often gets neglected, but it needs regular servicing. In a so-called air-con service, the parts aren’t just given a visual check, the system is checked for leaks, fresh refrigerant and compressor oil are topped up, and any cabin filter is swapped. For the leak check and topping up, special service gear is needed, so this is usually only possible at a workshop. The prices for an air-con service are generally reasonable and money well spent, so the air conditioning stays working for a long time and doesn’t fail on a desert tour in searing heat. Ideally the air-con service should be done on a two-year cycle.
When you head off on a trip
When you go on a (longer) trip, it’s well worth deviating from the service schedule and bringing intervals forward. Otherwise you might have to turn a nice travel day into a service day on the road, and with everything you do before the tour, there’s a chance to effectively head off breakdowns that are brewing. Something can always happen out on the road when the vehicle is worked hard, and tech can simply break, that’s completely clear. But experience just shows that quite a few faults on travel vehicles that we’ve been able to observe on the road sadly come down to poor servicing. If you have technical faults on the road, they’re of course usually only patched up with the means on hand so you can carry on. But please think about a proper, professional repair when you get back.
Preventive servicing is a much-discussed topic, but it can help head off breakdowns on the road. Is your alternator maybe already twenty years old, or the starter motor? Then it could make sense to swap them before a tour.
Once you’re on the road, you should do regular checks for this. Depending on the tour profile and how hard the vehicle is worked, these checks happen daily, like checking the engine oil level, or as the occasion demands, for example checking the air filter after a very deep water crossing, or checking the suspension bolts after a long run on corrugated tracks.
To prepare your tour, have a look at our Big vehicle check. There, among other things, we’ve put together a checklist that you can download here and pack into your car.
A good service record is worth keeping too
If you have the servicing done at a workshop, they document the inspections or the replacement of bigger components in a (digital) service book. If you do the servicing yourself, you should document it too, for yourself as a memory aid, as proof when selling the vehicle, or maybe towards the insurer. For that you can buy blank service books, or you make your own service plan with a checklist tailored to your needs. For the same reasons it’s also a good idea to keep the invoices for spare parts, lubricants and so on.
Better safe than sorry!
You can see from the length of this article alone how thorough and involved good servicing is. Experience shows, though, that this effort pays off and good servicing stands out. It looks like a lot of work at first, but many things are done quickly. Still, this is about 4x4s that get worked hard, do many travel miles or get moved through the mud. A certain amount of care is just necessary there. Over time you get to know your vehicle better and better, which saves time later. You then know which noises or leaks slowly announce a problem. You then know where the car needs lots of care and inspection and where you can be more relaxed.
If you do the servicing conscientiously and in this depth, then that’s the best servicing and care you can get. You probably won’t get it in this depth at hardly any workshop. Especially if there aren’t keen enthusiasts working there who really know the vehicle.
As mentioned at the start, even the best servicing doesn’t protect you from every problem, that’s completely clear, but you can cut the chance of a breakdown a lot with it. And the chances are good that, while servicing your vehicle, you spot problems in good time and can fix them early and in an orderly way, so you can enjoy your tours.
Text/ photos: Andreas Woithon and Björn Eldracher
*Affiliate links: If you like the products and order them through the affiliate link, we get a small commission. It doesn’t cost you a cent more, but we’re very glad of your contribution to our free magazine.